Showing posts with label cake. Show all posts

Sunday, December 4, 2016

Pumpkin Cheesecake!


I wanted to try something new this Thanksgiving. I usually make exactly two pies: pumpkin and pecan. Facebook also cheerfully reminded that five years ago for Thanksgiving I made two pumpkin pies, two pecan pies, cranberry sauce, and a sweet pumpkin dip. This year brought about a stressful week right before Thanksgiving, and I asked my mom if I could be free of pie duty this year. She was happy to take on our pumpkin and pecan pies so that tradition could continue and to help me out.

But I can't stay away from baking for long. I soon found myself wondering if maybe I should try that Pumpkin Cheesecake recipe I'd been saving for weeks from FoodNetwork.com. I'd purchased all the ingredients (twice) and still had yet to make it. I thought maybe Thanksgiving would be the perfect time.  Maybe baking would be the ultimate stress reliever as it had been for me in years past. And so I threw it together, following the Pumpkin Brulee Cheesecake recipe fairly closely but with my own style, and enjoying the whole process.

Ingredients:

8 sheets of graham crackers (honey, not cinnamon)
1 Tablespoon unsalted butter, melted
12 ounces low fat cream cheese
1/2 cup brown sugar (light)
1/3 cup plus 1 Tablespoon white sugar
1/2 teaspoon salt
2/3 cup low fat Greek yogurt
2 eggs
2 egg whites
15 ounces (one can) pumpkin puree
2 Tablespoons flour (I used whole wheat pastry flour again)
1 Tablespoon pumpkin pie spice
1 Tablespoon vanilla extract

Directions:

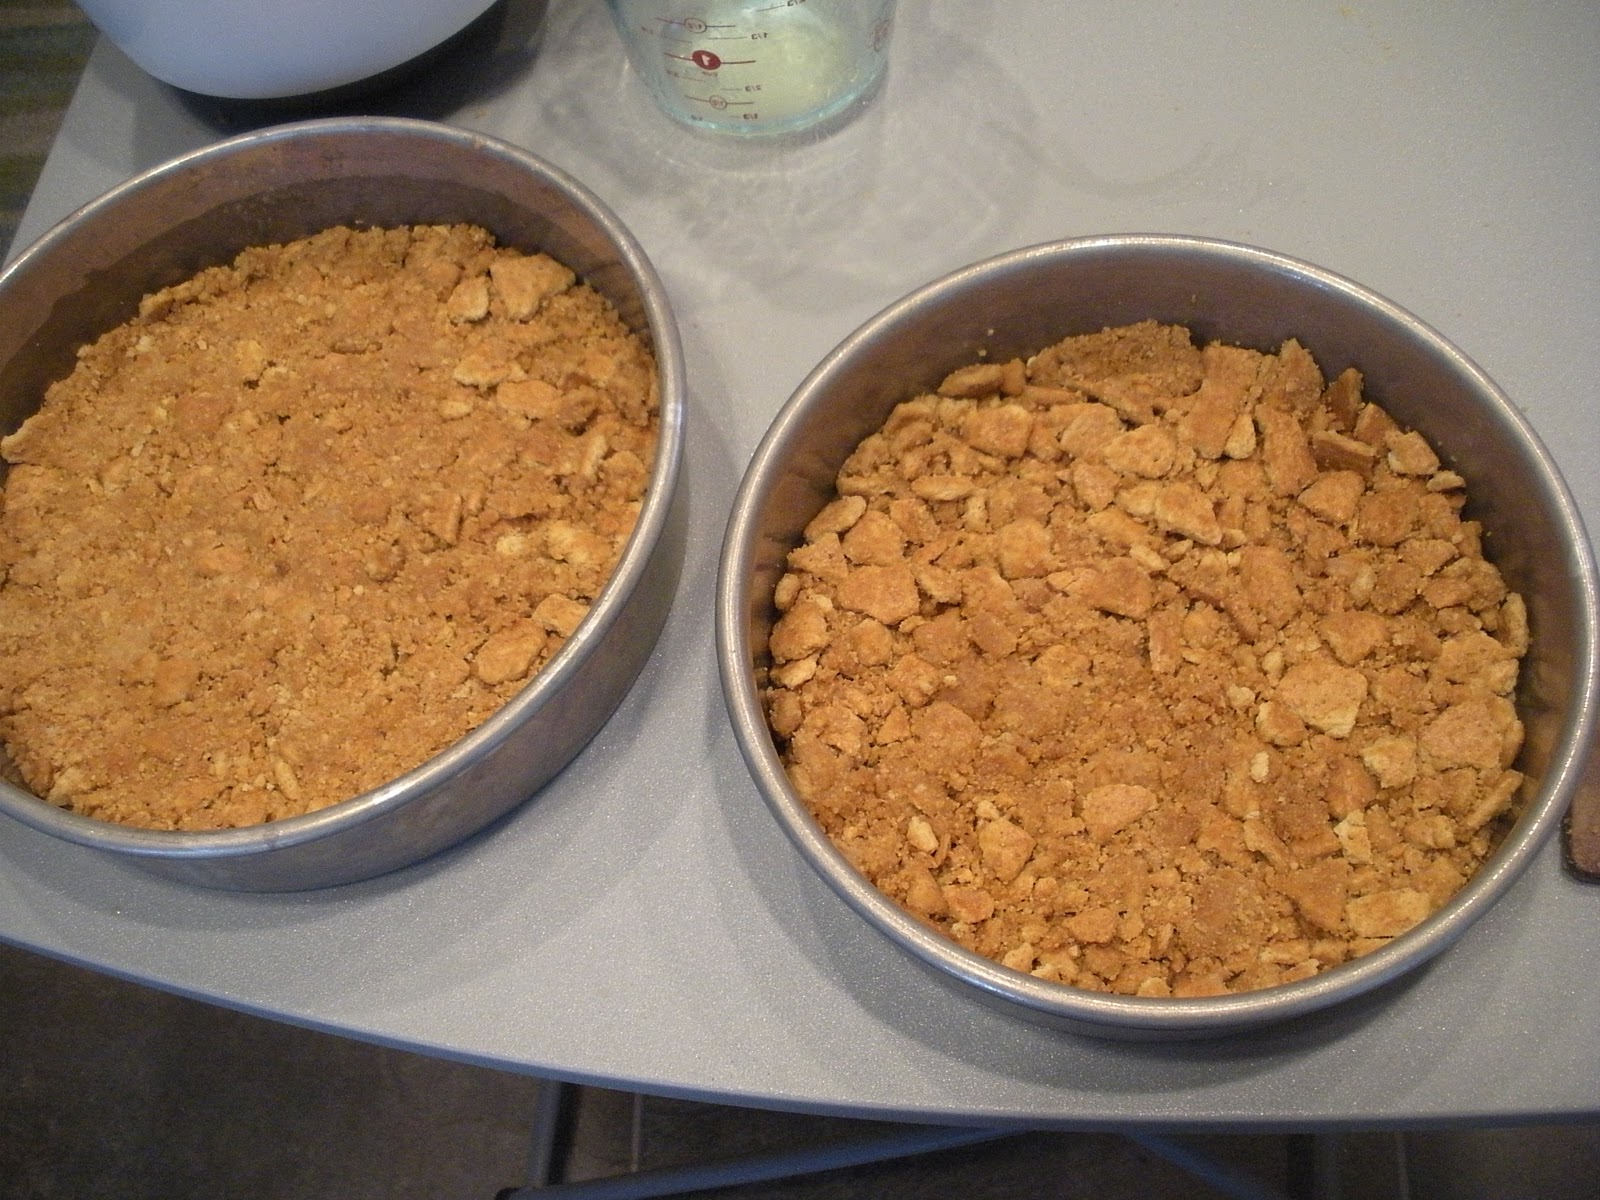
1.) Preheat the oven to 325 degrees. Mash your graham crackers into tiny pieces and crumbs (I placed the graham crackers in a plastic baggie and then mashed them with a meat mallet, carefully so as not to hurt the counter). Pour graham cracker crumbs into a bowl and mix in 1 Tablespoon of white sugar, 1 Tablespoon melted butter, and 2 Tablespoons water. Mix until the graham crackers are moistened and can be pressed into the bottom of a pie tin. I like to press mine in with a plastic baggie over my hand lightly sprayed with nonstick cooking spray.

2.) Bake the pie crusts 10 minutes and set aside to cool completely. Then in a large bowl, combine the cream cheese, brown sugar, 1/3 cup white sugar, and salt. Beat in the yogurt, egg, and egg whites. This can all be about medium speed. Lower the speed and add pumpkin, flour, vanilla, and pumpkin pie spice. Keep the speed low, then stir with a spatula to fully combine.

3.) Pour the batter over the cooled crusts and bake in the center rack for about an hour (check about five minutes before to make sure it's not burning too much). Place on a trivet to cool to room temperature. Refrigerate overnight.

4.) Top with whipped cream or other toppings of your choice. I skipped the actual "brulee" part of the original recipe (lacking a torch) and went for a whipped cream border instead!

Thanksgiving was a great success with the immense help of my mom, the help of my brother, and my small pie contribution. It held together, didn't taste overdone (despite the browning on top) and was a delicious dessert to enjoy with family!


Sunday, July 24, 2016

Biko Rice Cakes!


Another one I made back in February but only just had time to post:

You may have seen some of my previous posts on various Filipino desserts (kutsinta, halo-halo, and bibingka)--they're so delicious. But I'd never attempted to make one of my other favorites that I've had at many a party before: Biko Kalamay

Basically a sweet rice cake, biko is a delightful mixture of coconut, rice, and syrup flavors, held together in a rectangular package.

All the recipes I've found online sounded a little intimidating, but this one for Biko with Latik syrup from Russian Filipino Kitchen was exactly what I needed.

Ingredients:
1 and 1/2 cups uncooked rice
1 and 1/4 cups water (for cooking the rice halfway)
1 and 1/2 cups brown sugar (1/2 cup for the latik syrup, the rest for the biko cake)
4 cups coconut milk (1 cup for the latik syrup, the rest for the biko cake)

Directions:

1.) After rinsing your uncooked rice in a pot (until the water turns clear), drain the sink water, place the pot on the stove, add the 1 and 1/4 cups cooking water, and bring the pot to a boil.

2.) Once the water has boiled, lower the heat to medium low and cook until the water mostly evaporates. Remove from heat and set aside. The rice should only be cooked halfway at this point.


3.) Make the latik syrup by mixing 1 cup coconut milk and 1/2 cup brown sugar in a separate pan. Bring the pan to a boil and then adjust the heat to medium low as well. Cook for 10 minutes, constantly stirring until the syrup thickens (mine didn't get super thick, but it still worked in the end and tasted great!). Remove from heat and set aside.

4.) Finish the biko cake by mixing 3 cups of coconut milk and 1 cup of brown sugar in a separate pot and bringing to a boil. Add the rice to the milk/sugar, and then mix again. Cook on medium heat for about 30 minutes, stirring constantly until thick.

5.) Remove from heat and transfer to a rectangular or square baking dish (glass or aluminum works well). Flatten the mixture and drizzle with the syrup as a topping. Cool to room temperature (the longer the better) before you cut the cake into squares and serve. Top with toasted coconut.


My first attempt at toasting coconut flakes was not the best (see below), so I'll leave you to find your own recipe for that one!


You'll fall in love with this unique treat--though my version is still not nearly as good as authentic biko made by Filipino chefs!

Thursday, March 17, 2016

Green Sour Cream Pound Cake for St. Pat's!


Happy St. Patrick's Day! It's the one day out of the year where my baking can match my clothes. Green, after all, has always been my favorite color. This year St. Patrick's Day also fell within the week of Spring Break at the college where I work. It's fairly quiet on campus, which makes it the perfect time to bring in treats to colleagues who have been working so hard to make it to mid-semester.

So I knew I would be baking something green well before the day arrived. I just wasn't sure what. I wanted to make something from scratch and use the ingredients I had. I'm not sure how the idea of "pound cake" came into my head--it must have popped up in my Internet search for recipes using self-rising flour (I had a leftover container my mom gave me for pancakes). But most of the those self-rising baked goods also called for buttermilk--which I did not have. In my fridge, however, was a small tub of sour cream. I knew this could be a good substitution for some baked goods. In fact, a few donut recipes appeared when I modified my search for self-rising flour and sour cream. But I was most drawn to a post for Sour Cream Pound Cake from farmflavor.com. It might take a while to bake, but sounded super easy to put together. And the instructions on my green food coloring bottle said I only needed to add 1/2 teaspoon into any cake batter to get that green tint. Perfect! My St. Pat's Green Sour Cream Pound Cake was born.

Ingredients:

2 sticks of butter (16 Tablespoons), softened but not melted
3 cups sugar
5 eggs
1 teaspoon vanilla
3 cups self-rising flour (sifted)
8 oz. sour cream (I use Daisy Lite)
1/2 teaspoon liquid green food coloring (I used McCormick)
Optional strawberries, green, grapes, whipped cream, and green frosting to decorate

Directions:

1.) Preheat the oven to 325 degrees. In a very large bowl, cream the butter and sugar together with an electric or stand mixer. Add the eggs one at a time, mixing after each, then add the vanilla and mix again.

2.) Alternate adding flour and sour cream until all ingredients are combined. Add the green food coloring last, mixing until thoroughly combined.

3.) Pour the batter into your pan of choice (that's been heavily greased with butter/flour or nonstick cooking spray). The original recipe calls for an hour and a half bake time for a tube/bunt pan. For my shallow book-shaped pan (slightly larger than 9x13 inches) I had to cut that baking time down significantly, checking after 30 minutes (still too wobbly), and ultimately baking only about 40-45 minutes total, until the top and edges were slightly brown and a toothpick inserted into the center came out clean.

4.) Remove the cake from the oven and let cool to room temperature before refrigerating overnight. Serve the next morning with strawberries, GREEN grapes for St. Paddy's, and any whipped cream or icing you choose.

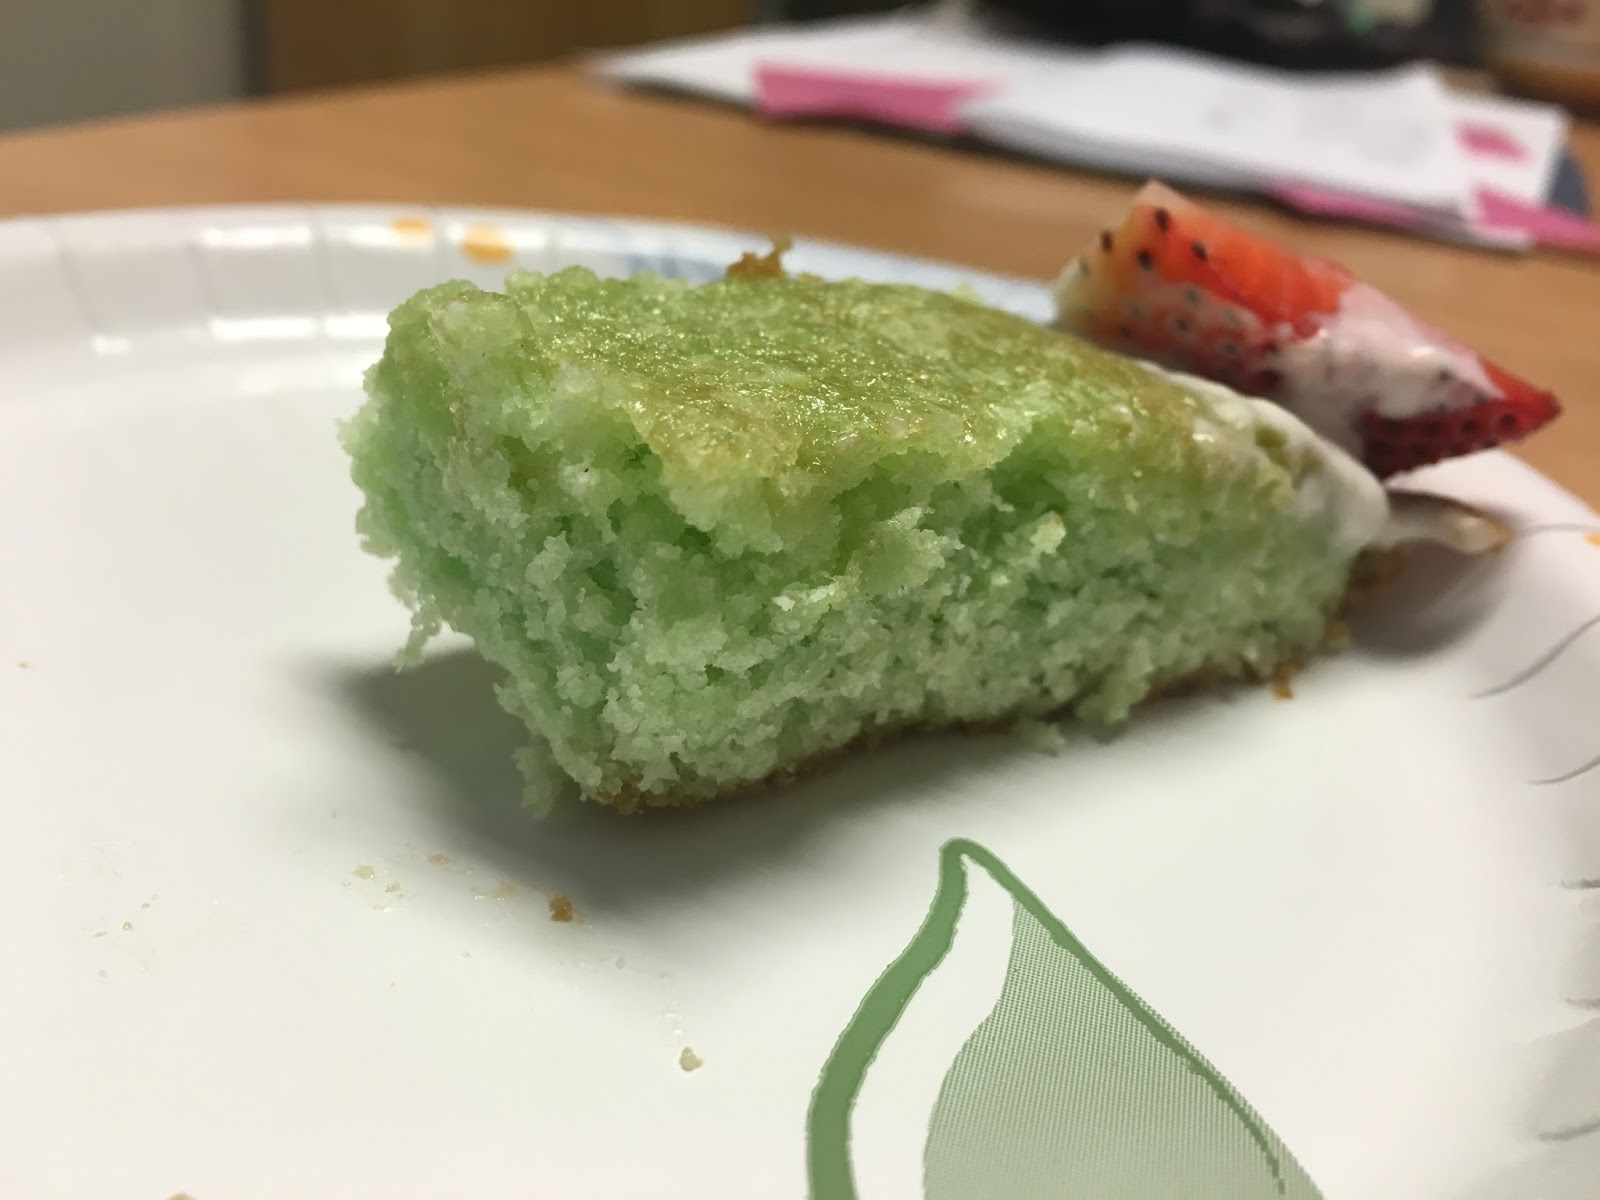
I was a little nervous bringing the finished product to work the next morning after baking. Would a green cake be appetizing? Would the center be too solid or not solid enough? Despite a clean toothpick test, I hadn't cut into the cake or baked any side cakes to try first since the batter was just barely enough to fill my pan. And I didn't want to ruin the look of the finished cake before my coworkers saw it.

Turns out I didn't need to worry! The cake received rave reviews by my supervisor, our administrative assistant, and all the librarians and staff that had a piece. Nearly half the cake was gone by lunch time! The center was moist, the flavor was sweet, and I now have a go-to pound cake recipe for any time of year!


Wednesday, May 7, 2014

Kutsinta


Not all experiments succeed. In fact, some fail into melty, odd-shaped blobs. However, since this is a baking blog and I had my first experiment baking with steam and making a new multicultural recipe, I felt it was important to document the occasion.

Since this week is my last Tagalog class of the semester, we decided to all bring in Filipino food (not unlike our previous classes throughout the semester where we decided to all bring in Filipino food...). For something a little different (besides Halo-Halo and bibingka that I made in the past) I decided to attempt Kutsinta, a sweet brown rice cake with a chewy texture, the look of gelatin, and made using a steaming cooking technique. It's also one of my (many) favorite Filipino desserts. To make it from scratch you need lye water, which I do not have. But I did have a box of "Sarap Pinoy" (roughly translated as "delicious Filipino") Kutsinta ready mix! (sold at the local Filipino market around the corner from my house).


All I really had to do was follow the directions on the box. Heat some tap water in the bottom of a double boiler. Empty the kutsinta mix in a bowl with 1 cup of bottled water and stir. Pour the resulting mix into kutsinta molds and steam in the top part of the boiler for 35-45 minutes or until the concoction turns "clear" (or rather, Jell-O-like).

Here were the problems:

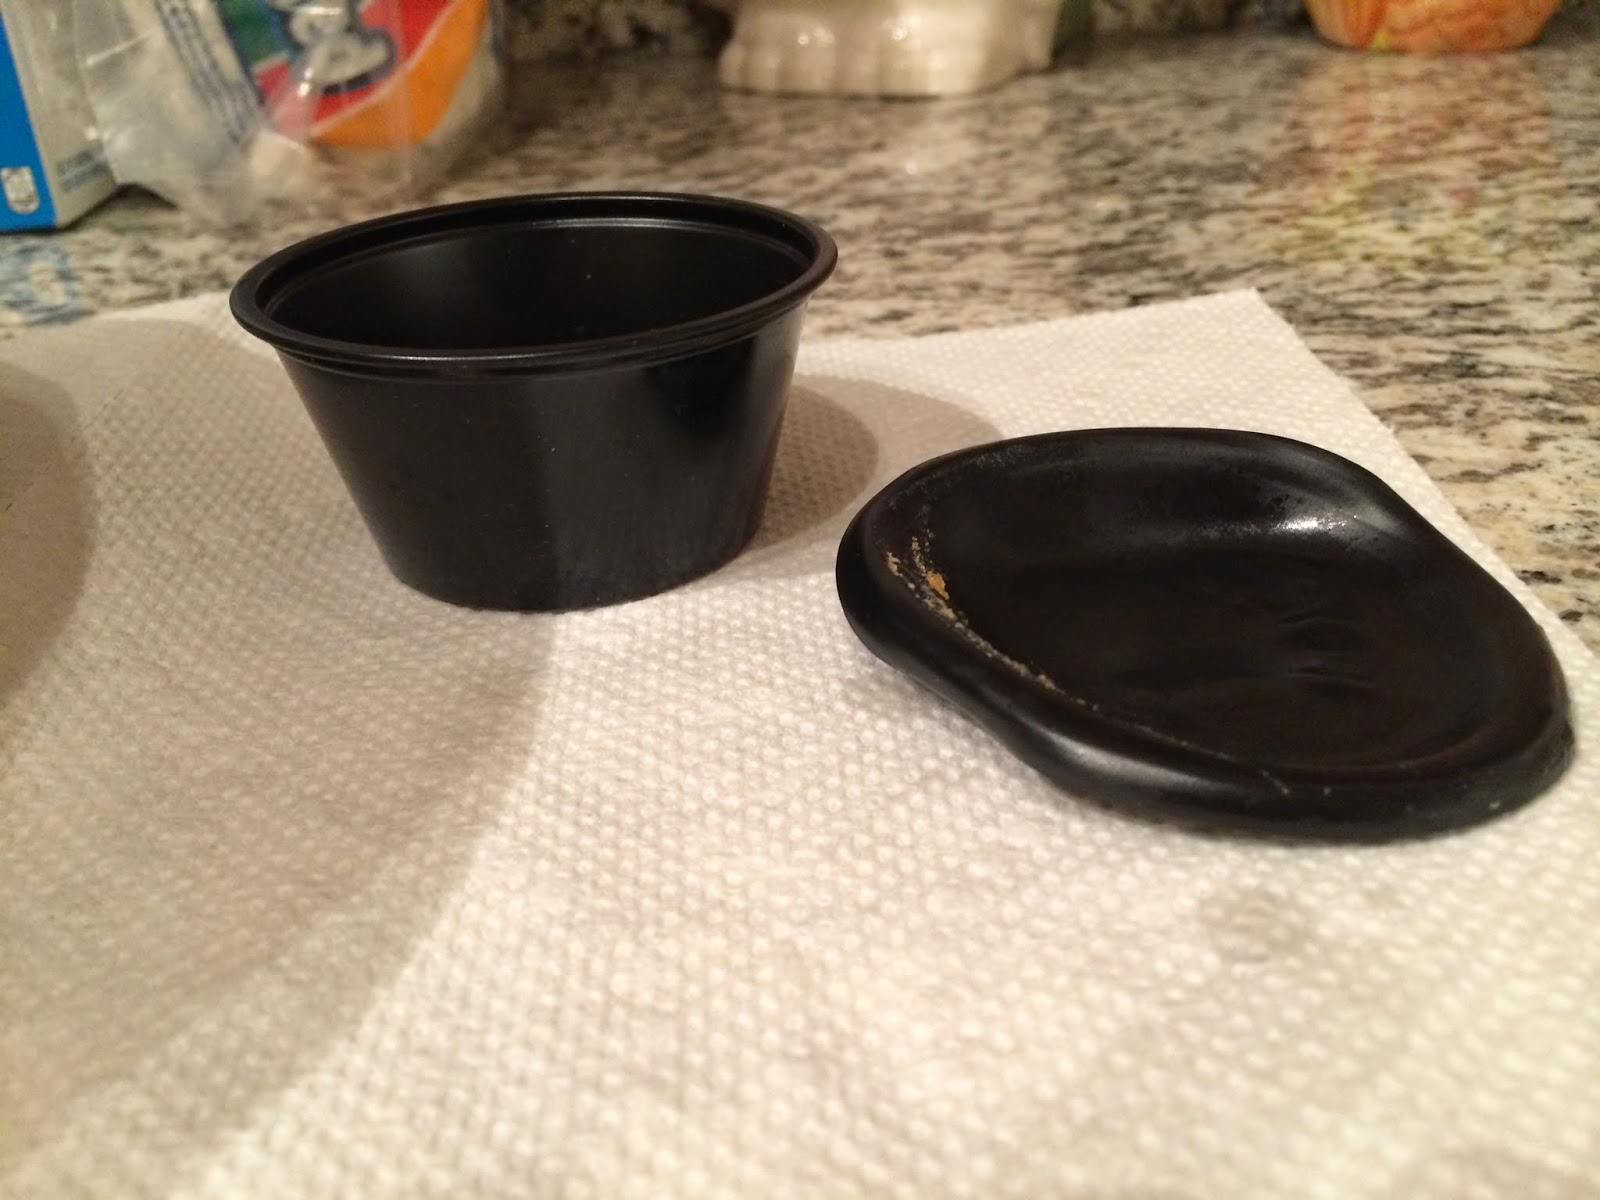
1.) I had no kutsinta molds. They were sold out at the market. So I used the only small cups I had--plastic condiment containers. Word to the wise: plastic melts.


2.) I had no idea how high to keep the heat on, and basically ended up boiling off all my water in the second batch. It evaporated while the heat was still on and ended up burning the bottom of my pot while I was waiting for the second batch to finish cooking (sorry, no picture--I was too devastated).

3.) My kutsinta didn't seem to be turning "clear."  Not after 35 minutes. Not after 45 minutes.


I finally took them off the stove to cool, and only then did they seem to get close to the right color. I flipped them over and...


Huzzah! They may be a bit melty, odd-shaped and stamped with what appears to be some kind of product serial number from the condiment containers, but they do resemble kutsinta (as you can see here).

The plastic did not melt into the dessert since I coated the containers with nonstick cooking spray to make sure they slid out easily. So I think the kutsinta is still fit for consumption. Probably. If not, too late--I already ate one for breakfast....

Just top with coconut and enjoy!

Thursday, August 29, 2013

Blueberry Coffee Cake Muffins!


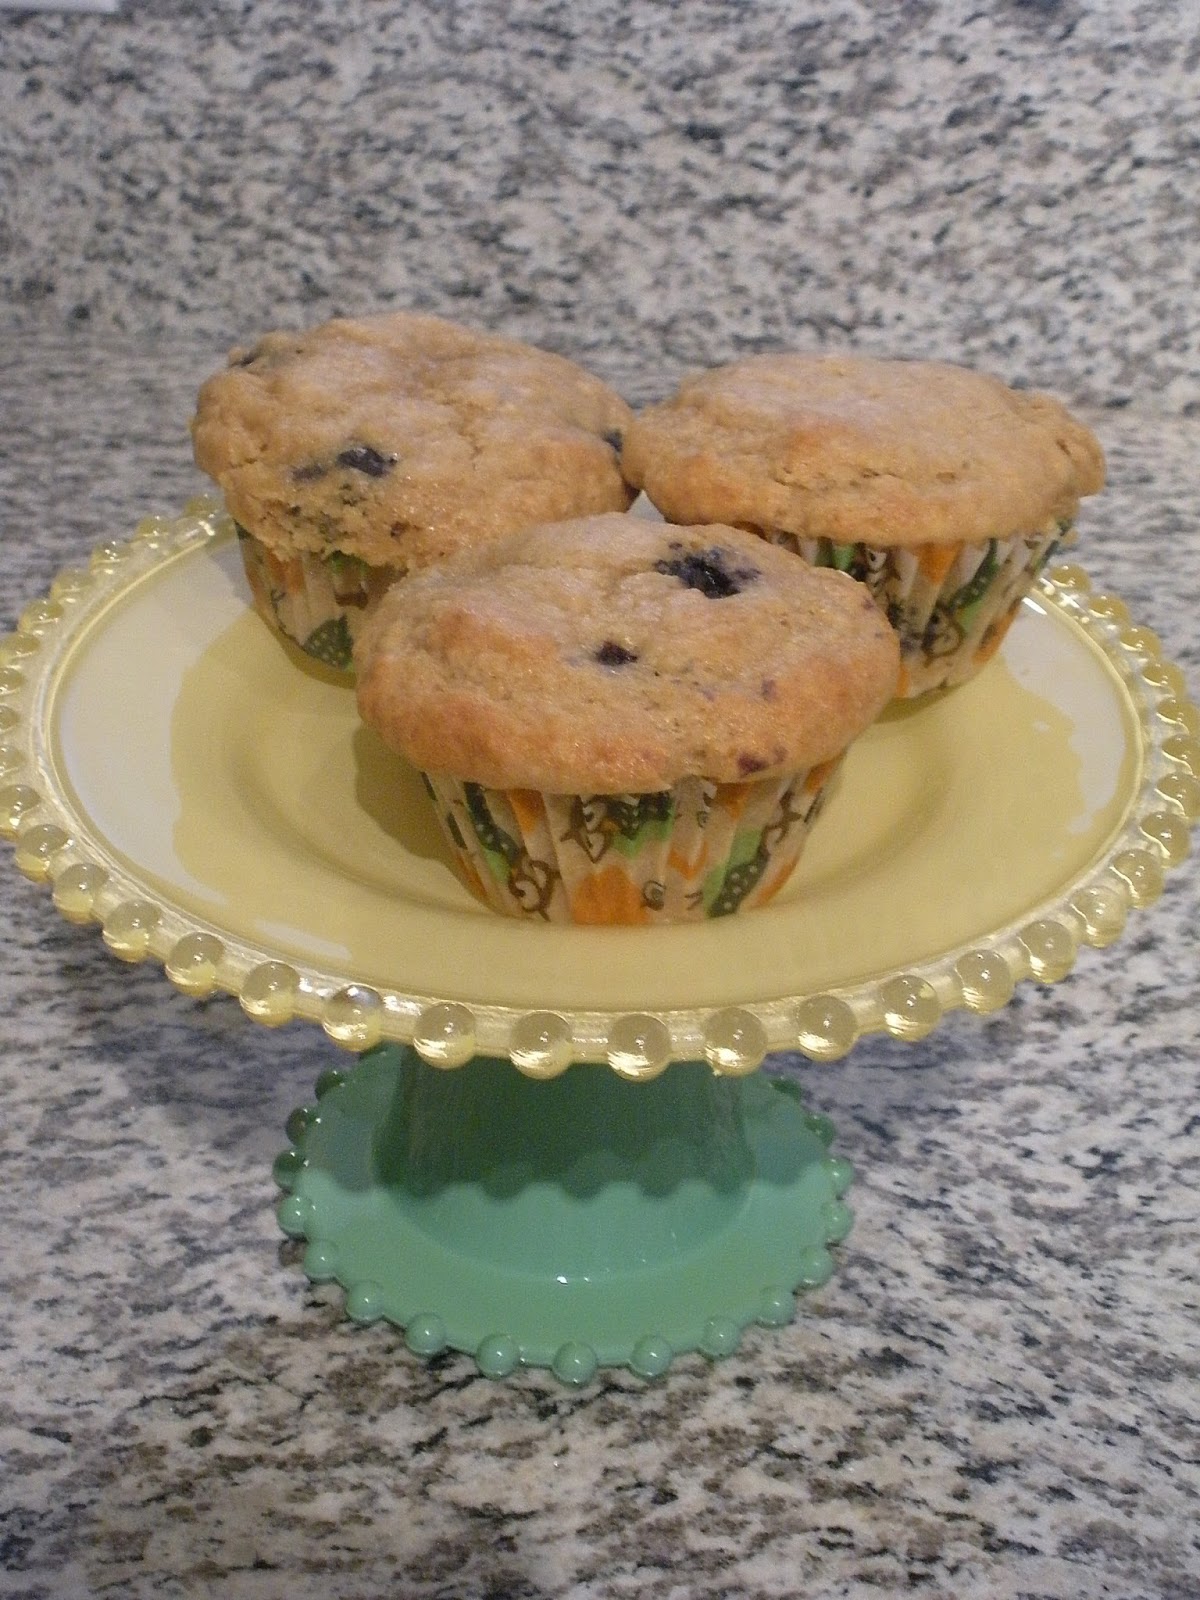
Time for another baking project! I'm going for a new baked good just about every week now. While not all of them are blog worthy (a repeat recipe cinnamon roll batch and a last-minute pizza--see below), I did enjoy experimenting with a recipe my mom gave me for blueberry coffee cake. Since I didn't have the 9x13-inch pan or the yogurt she used in her original recipe, I opted to make muffins with half the batter, and a loaf cake with the other half. I think it turned out quite nicely for such an adaptation. Let's call them Blueberry Coffee Cake Muffins:

Ingredients:

2 and 1/2 cups whole wheat pastry flour plus extra for dusting
2 teaspoons baking powder
1/2 teaspoon baking soda
Dash of salt
1 and 1/3 cups brown sugar
1 egg
1/3 cup of oil
12 ounces buttermilk (instead of yogurt that my mom used)
1/3 cup unsweetened applesauce
2 teaspoons vanilla extract
2 cups frozen blueberries (Mom's original recipe called for fresh blueberries but this was all I had)

Directions:

1.) Preheat the oven to 375 degrees. In a large bowl, sift the flour, baking powder, baking soda, and salt together.

2.) In a separate bowl combine the brown sugar, egg, oil, buttermilk, and applesauce. Slowly and carefully add the wet ingredients to the dry ingredients, stirring until just combined, then pour the batter in 12 muffin cups lined with paper and a loaf pan sprayed with nonstick cooking spray.

3.) Rinse the blueberries and dust them in a little bit of flour so they won't sink in the muffins. Drop about 4-6 blueberries into each muffin, pushing them deeper into the batter with a spoon. Layer just a little bit of extra batter on top of the blueberries in the muffins so they can barely be seen. Fold the rest of the blueberries into the loaf pan batter.

4.) Bake the muffins and the loaf separately for approximately 22 minutes each (may be a little light on the muffins, but I like them that way. The loaf came out perfect with the toothpick test).

5.) Allow both to cool slightly before eating! You can spread butter on the loaf or eat the muffins with sugar dusted on top.

These turned out nice and fluffy with just the right amount of sweetness without being too sweet. I like how the muffins rose and spread to a nice size as well. And then there's the health factor--less guilt with whole wheat flour, applesauce, and blueberries to make this treat a little more wholesome. It really hit the spot when I taste tested the loaf for breakfast and the muffins for lunch!


Cinnamon rolls and pizza from this week:


It's good to be baking again.


Thursday, July 11, 2013

Berry Cheesecake


It's time for a potluck! To welcome our new boss, my coworkers arranged a fun vegetarian potluck lunch and I couldn't wait to sign up! For a non-meat dish, I decided on bringing in the family's traditional Artichoke Dip that my mom makes for Christmas almost every year (and sometimes Thanksgiving, and sometimes random parties in between). And of course, I couldn't show up without a baked dessert! Since our potluck was right before the Fourth of July, I decided to make something red, white, and blue. The idea of Berry Cheesecake came to me before I had a recipe, but I'm always up for experimentation. This one's based off of the Sour Cream Cheesecake I made with my friend last April, with a few slight changes to make the cake berry fun!

Ingredients:

For crust:
1 and 1/2 cups graham cracker crumbs
1/3 cup melted butter
1/4 cup sugar

For filling:
2 eggs
2/3 cup sugar
1 teaspoon vanilla extract
8 ounces light cream cheese (softened)
1/4 teaspoon salt

For topping:
2 cups light sour cream
1/4 cup sugar
1 teaspoon vanilla
3 Tablespoons strawberry jam
5-6 large strawberries
1/2 cup blueberries

Directions:

1.) Preheat the oven to 325 degrees. Crush a box of graham crackers to create crumbs (I crushed mine in a ziploc baggie, or you can buy graham cracker crumbs already crushed).  Mix the crumbs, butter and sugar together, then press the mixture into a round cake pan. Bake about 8 minutes, then remove from the oven to cool.

2.) In a bowl, beat the eggs, then add the sugar, vanilla, cream cheese and salt. Combine all with an electric mixer until the mixture is smooth.  Pour on top of the crust and bake another 15 minutes.

3.) Let the cheesecake cool while you make the topping. Mix together the sour cream, sugar and vanilla extract. Stir in the strawberry jelly, then pour on top of the filling and bake another 10 minutes.

4.) Cool the cheesecake completely before refrigerating overnight. In the morning, slice your strawberries very thin, and use the slices to decorate the top of the cheesecake in a pattern with blueberries around the edges. Sprinkle the fruit with just a dusting of sugar and serve cold to keep the cheesecake as solid as possible.

And, though I didn't make it myself, here's my mom's famous Artichoke Dip!

Ingredients:

3 cans whole artichoke hearts
1 cup mayonnaise
2 cups powdered Parmesan cheese
1 teaspoon garlic powder (not garlic salt)
Paprika for sprinkling

Directions:

1.) Preheat the oven to 325 degrees. Open the cans of artichokes, drain, and cut into small pieces with kitchen scissors. Place pieces in an empty ceramic crock pot.

2.) Add in the mayonnaise, Parmesan cheese, and garlic powder, stirring so that all ingredients evenly combine. If the mixture looks too moist, add a little more cheese. If it’s too dry, add more mayonnaise. When you’re done mixing, smooth the top flat with the back of a spoon.

3.) Sprinkle paprika over the top of the dip until it forms a nice and even red layer that’s not too thick but still covers the artichokes. Bake at 325 degrees for about 25-30 minutes, watching the dip for the last few minutes to make sure it doesn't brown too much on the top.

4.) Remove from the oven and serve warm or refrigerate overnight. The next day, place the ceramic pot into the electric crock and turn on to heat a few hours before the dip will be served. Tastes best warm.

Tuesday, February 5, 2013

Red Velvet Cuppy Cakes


Another coworker birthday meant another baking opportunity at the end of January! When I asked what kind of treat my coworker would like to celebrate her special day, she was less specific than her predecessor's request for savory scones. Instead, she simply wanted something chocolate. While the thought of brownies did cross my mind, I was hoping to try something a little more adventurous again, and I remembered her ordering a Red Velvet dessert at Claim Jumper for her birthday last year. Though deeply red, Red Velvet cakes are actually made with cocoa powder, and so I hoped a cupcake version would fulfill her craving.

After searching both cookbooks and websites for a tasty (and easy) Red Velvet cupcake recipe, I discovered that the ones calling for cake flour (which I didn't have) usually called for buttermilk (which I did) and the recipes that called for flour that I did have were lacking in buttermilk, and most of them seemed like they just didn't have quite enough cocoa powder to taste like chocolate anyway. Not to mention the fact that vinegar still sounded like an odd ingredient in a baked good to me.

Still, I was determined to produced Red Velvet Cuppy Cakes that morning to take to work that day. It was time to start adapting.

While I tend to stay away from a lot of Food Network recipes simply because they can be fairly complex, I had stumbled upon the famous Paula Deen's Red Velvet cupcake recipe that didn't require cake flour and didn't sound too complicated. Though my cooking tends to be a lot lighter than Paula Deen's (much less butter), I had a feeling I could adapt the recipe to my needs easily enough too. The public comments on the recipe recommended using more cocoa powder (what I had in mind) and less oil (huzzah!) so I didn't dive in completely unprepared. I also halved the recipe--more manageable to make and take in one morning before work. The results:

Ingredients:

For the cupcakes:

1 and 1/4 cups whole wheat pastry flour (my staple)
1/2 + 1/4 cup sugar
1/2 teaspoon baking soda
1/2 teaspoon salt
1/4 cup cocoa powder
1/2 + 1/4 cup vegetable oil
1/2 cup buttermilk
1 egg
1 Tablespoon red food coloring
1/2 teaspoon white distilled vinegar
1/2 teaspoon vanilla extract

For the frosting:

8 ounces Neufchatel (it's what i had in the fridge--cream cheese will work)
1 stick of butter
2 cups sugar (the original recipe called for powdered sugar but I only had granulated baking sugar)
1/2 teaspoon vanilla extract

Directions:

1.) Preheat the oven to 350 degrees. In a bowl, sift together the flour, sugar, baking soda, salt, and cocoa powder. In a separate bowl, beat together the oil, buttermilk, eggs, food coloring, vinegar and vanilla (be careful that the very red food coloring and resulting mixture doesn't get on your clothes).

2.) Combine the dry ingredients and the wet ingredients slowly. Stir until well mixed, and then pour into a cupcake tin lined with paper wrappers until each is about 2/3 full.

3.) Bake the cupcakes for about 20 minutes, using a toothpick to test for doneness (watch the time closely so they don't overbake and come out dry).

4.) Remove from oven and let cool completely before frosting. To create the frosting, beat the cheese and butter with an electric mixer until smooth, add the sugar and beat again on a low speed. Finish on a high speed until the mixture becomes light and fluffy.

That's all there is to it! If I were to make it again, I might try cake flour, a little less baking time, and with powdered sugar in the frosting. But all in all, I think this birthday treat turned out quite beautiful, and disappeared from my office break room quite rapidly. With the chocolate flavoring and rich red color, it's also something to keep in mind for Valentine's Day. Which is coming up. In nine days. Just saying. Be prepared....

Friday, November 23, 2012

Bibingka


As much as I claim to be a baking "experimenter," I don't always necessarily bake outside my comfort zone. You can tell from my previous blog posts that I love to make pies, muffins, cookies...pies, muffins and cookies...and, okay, the occasional something new--donuts, truffles and baklava were all new to me, for example. And out of all three of those, my baklava was probably the most successful. A good sign--that means I can (sometimes) bake international food. The treat that originated with the Assyrians and is now served at many a Greek restaurant, is one of my favorite dessert indulgences. I've learned that it's truly worth it to try something new.

But this post isn't about baklava.

Rather, one of my friends from the Philippines invited me over for lunch and confessed that while she loved to cook, she hated to bake. "Perfect," I thought. "I can do something about this." While I knew I wasn't the best cook, I could most definitely bake something for her in thanks for the delicious meal.

And so, after some searching, I stumbled across a recipe for a dessert called "bibingka" using one of my library's new databases called A to Z the World (I can't link to the exact page since it's a paid for subscription only accessible to employees and students of the college). The article said Bibingka is traditionally baked in a clay oven (which I don't have) and is a kind of pudding or cake (which sounded delicious). The recipe called for coconut milk (non dairy!) and rice flour (which my mom just happened to recently buy for a different recipe). It sounded easy enough, and I could only hope it was authentic--I wanted the dessert to be a surprise, so I wasn't about to ask.

"Okay," I thought. "Let's do it."

Ingredients:

1 cup sugar
4 Tablespoons melted butter
3 eggs
1 cup reduced fat coconut milk (I found it canned)
1 teaspoon vanilla extract
1 and 1/2 cups brown rice flour (this is what my mom bought, available at whole food stores--the original recipe just called for regular rice flour)
1 Tablespoon baking powder
Grated coconut for topping

Directions:


1.) Preheat the oven to 350 degrees. In a bowl, combine the sugar and melted butter. Add the eggs and stir. Add the milk and vanilla and stir again.

2.) Fold in the flour and baking powder. Mix just to combine.

3.) Pour the batter into a 9x9-inch brownie pan greased with nonstick cooking spray (the original recipe was doubled and called for a 9x13-inch buttered pan, but I didn't have that handy). Bake about 30 minutes (for the full version) until the cake is set (I baked it for about 22-25 minutes until the cake was just slightly browned on the top and set around the edges. A toothpick inserted in the center came out clean).

4.) Allow the cake to cool before removing it from the pan. Top with grated coconut and serve warm.

The results even got my mom addicted, and she can be a little hesitant to eat food outside her own comfort zone. So regardless whether or not the treat was perfectly authentic, I can attest to the fact that it was perfectly tasty! When I brought it over to my friend she was so pleased! And her own mom snagged the first bite before she even had time to try it. I call that high praise indeed.

Happy Halloween! (A little late)


Witch Hat Cookies (Oreos and Hershey's Kisses)
Pumpkin Cakes (Whoopie Pie recipe)
Mummy Wrapped Hotdogs
Cheese Wreath
It was my turn to host Game Night with my group of "bookish" library friends, and All Hallow's Eve was approaching fast. Why not make it a Halloween party? Snacks would need to be provided regardless, and I'm not ashamed to say I loved the idea of becoming a hostess in a princess gown. Everything on the menu had to be seasonal, of course. Which meant primarily "fall," "pumpkin" and just a little "creepy cute." With Fright Bites Halloween tortilla chips, Witch Hat Cookies (made just by "pasting" a Hershey's Kiss to the bottom half of an Oreo cookie with a dab of orange frosting) and Mummy Hotdogs (wrap turkey or beef hotdogs with strips of cut Pillsbury Crescent roll dough and bake about 12 minutes at 375 degrees) my "creepy cute" theme was complete. I displayed a wreath of cheese slices cut with leaf-shaped cookie cutters for the "fall" part of the theme as well. And as for pumpkin (my favorite, favorite, favorite), check out the recipes below:

Pumpkin Cakes (I found the recipe for this one on the back of a Whoopie Pie pan given to me for my birthday by one of my awesome coworkers--the perfect gift!  I adjusted the recipe just slightly because I didn't end up making the filling)

Ingredients:

1 and 1/2 cups flour
1 teaspoon cinnamon
1 teaspoon baking soda
1/2 teaspoon baking powder
1/2 teaspoon salt
1/4 teaspoon nutmeg
1/8 teaspoon ground cloves
4 Tablespoons softened butter
1 cup sugar
2 eggs
1/2 cup canned pumpkin
1/2 cup buttermilk

Directions:

1.) Preheat the oven to 350 degrees and spray your pan with nonstick cooking spray. Then in a bowl, combine the flour, cinnamon, baking soda, baking powder, salt, nutmeg and cloves.

2.) In a separate bowl, beat together the butter and sugar with an electric mixer until it's fluffy. Add in the eggs one at a time, beating after each addition.

3.) Fill the pan about 1/2 full, spreading the batter so it fills each cavity. Bake about 7-9 minutes or until a toothpick inserted in the center comes out clean. Let them cool in the pan about five minutes before removing.


Pumpkin Dip (a new recipe compared to the Pumpkin Cream Cheese Dip of last year. I found this one on the Taste of Home website, but adapted it and used store-bought Stacy's Pita Chips: Simple Gingerbread instead of their "black cat dippers." Incidentally, gingerbread pita chips are AWESOME).

Ingredients:

16 ounces cream cheese (I used two 8 ounce packages of a reduced fat cream cheese)
1 can pumpkin (15 ounces)
1 cup sugar
1 Tablespoon pumpkin pie spice
1 Tablespoon maple syrup

Directions:

1.) In a bowl, beat the cream cheese until it's fluffy. Then add in the pumpkin, sugar, spice, and maple syrup.

2). Continue to beat until the mixture is smooth. Refrigerate until ready to serve.

For this dip I ended up doubling the amount of cream cheese and replacing the original Taste of Home recipe's honey with maple syrup to keep in the flavors of fall. I think it worked quite nicely whether you dipped pita chips, apple slices, or simply ate it with a spoon. Which I wouldn't dare do...while anyone was looking....

All in all, I'd have to say Halloween was a success! Though I didn't have time to make my favorite Caramel Apples for the party, I was able to make them the actual night before Halloween for some of my coworkers--thus even those not at Game Night (my parents only allow so many people over to our house at a time) could share in the deliciousness of October treats.

And with October over at last, it was time to start thinking about the hostess duties that come with entertaining for my family at Thanksgiving....


Saturday, May 12, 2012

Easter Treats--2012!


For me, holidays are all about tradition. Family, of course, and tradition, and often times religious backgrounds. I know the true reason Easter exists, but I'm here today to talk about the foods it has inspired me to make from such secular traditions as honoring the iconic animals that have come to symbolize a holiday right smack in the beginning of spring. How could I not dye eggs and bake something for bunnies? Thus I present to you first my recipe for Colored Easter Eggs (my traditional go-to every year) and then a new attempt using a box mix (gasp--yes, I was in a hurry) to create Carrot Cake Muffins.

Colored Easter Eggs

Ingredients:

1 teaspoon white vinegar
Hot tap water
Food coloring

Directions:
1.) Fill paper cups about 2/3 of the way full with hot tap water. Add the vinegar and stir.

2.) Place 10-20 drops of food coloring into each cup, stir again, and carefully submerge your egg into the colored water. To get the exact shade of a color you'd like, follow the number of drops recommended on the back of the box. My favorite brand is McCormick, and their food coloring drop tips can be found here.

3.) Leave in 5-10 minutes depending on how dark you want your colors to be. Carefully remove each egg with a plastic spoon and store in the egg carton. Refrigerate overnight and enjoy on Easter morning!

Carrot Cake Muffins

Ingredients:

1 cup hot tap water
1 pouch of carrots and raisins (it comes in the box)
2 eggs
1 stick softened butter
1 cup oats

Directions:

1.) Follow the directions on the box for "Carrot Cake Cookies" but place in a muffin tin lined with paper cupcake liners instead (my cookie attempt did NOT end up tasting as delicious as when I put these into muffin form). First preheat the oven to 350 degrees and rehydrate the carrots and raisins by soaking them in the hot tap water for about 5 minutes. Drain and pat dry with paper towels. 

2.) In a large bowl, combine the cake mix, butter and eggs, stir in the oats, then stir in the carrots and raisins.

3.) Fill the muffin cups about 3/4 of the way full and bake approximately 12-15 minutes before removing from oven to cool.

Despite the "cookie" recipe, these really did taste best in muffin form. No frosting necessary--they were already quite sweet on their own. And, of course, presentation is everything. I used the Wilton brand Pink Petal baking cups as paper liners to make my muffins look like garden flowers. In the end, both my families (the one at home and the one at the library) were able to enjoy my favorite holiday tradition of all--sharing and eating delicious food together.

The back of the box--recipe at the bottom!


My cookie attempt--in the shape of carrots...kind of....

A beautiful garden!

Sunday, April 15, 2012

Sour Cream Cheesecake


Yes, I am lactose intolerant. So, yes, as a general rule, I cannot eat such delicious foods as cheesecake--or pretty much anything with the words "cheese" or "cream" somehow buried in them. This is not to say I don't occasionally tempt fate, in very small portions, especially for the sake of dear friends, and with the help of a Lactaid pill. But you don't want to know about my dietary deficiencies. You want to know how to make that delectable-looking slice of heaven that even this non-dairy eater here is raving about from the minimal sliver she used for taste testing.

I owe this one to my dear friend Janice (that's her in the picture under step 2) who wanted to try out a recipe that another friend gave her. We've often created baking experiments together, and it's always fun to teach and learn and just spend time together--especially when it results in delicious food. So dairy product or no, I was gung-ho to try out her friend's recipe labeled "Cream Cheese Pie."  Accidentally glossing over the word "pie" on the paper she handed me, I baked both our Sour Cream Cheesecakes in cake pans (we doubled the recipe to make one for each of our families). This essentially created an easy cheesecake recipe (because cheesecakes are actually rather complicated to make under normal circumstances--they require hot steam baths to prevent cracking and everything!). But whatever you call it, and however you vary the recipe, it's still going to taste great and be a fun project to put together with friends!

Ingredients:

For crust:
1 and 1/2 cups graham cracker crumbs
1/3 cup melted butter
1/4 cup sugar

For filling:
2/3 cup sugar
1 teaspoon vanilla
8 ounces light cream cheese (softened)
1/4 teaspoon salt
2 eggs

For topping:
2 cups light sour cream
1/4 cup sugar
1 teaspoon vanilla

Directions:

1.) Preheat the oven to 325 degrees. Crush a box of graham crackers to create crumbs (we crushed ours by hand in plastic baggies). Mix crumbs, butter and sugar together, saving a few crumbs for the topping. Press the mixture into the cake pan, bake 8 minutes, then remove from oven to cool.


2.) In a bowl, beat the eggs, then add the sugar, vanilla, cream cheese and salt. Combine everything with an electric mixer until the mixture is smooth. Pour the mixture on top of the crust and bake 20 minutes.


3.) Let the cheesecake cool while making the topping: mix together the sour cream, sugar and vanilla, along with remaining crumbs. Pour on top and bake another 10 minutes. (I also accidentally glossed over the fact that the crumbs in the original recipe are supposed to go on the very top of the cake, not inside the topping mixture. But, oh well, this does not affect flavor--only presentation. See below).

4.) Cool the cheesecake completely before refrigerating at least 30 minutes, though overnight is best.

Using the light cream cheese and sour cream makes this one just a touch healthier than most cheesecakes, and I believe made it slightly easier for my tummy to digest. Don't let the three different mixtures (crust, filling, topping) scare you away from a relatively easy recipe that's still under five steps to make! Thank you Janice, and thank you Janice's friend!

Next up, my Easter escapades!

Monday, March 26, 2012

Donuts, Part Deux


While I preferred the taste of my first attempt at donuts--Bacon Cake Donuts that didn't quite taste like bacon but were still so delicious--I did prefer the look (i.e., the toppings) of my second donut attempt shown here. In this second attempt at baked (not fried!) dough, I pretty much just followed Wilton's Baked Cake Donut recipe on the back of my pan, except I doubled the amount of batter so I could have enough treats for my family and my coworkers. They were tasty, but I think the addition of a little bacon grease and brown sugar instead of white sugar really made a difference in the overall flavor (and color--this week's caked donuts turned out rather pale underneath the toppings). However, my second donut attempt still received many compliments and make a nice treat for anyone--especially with chocolate and sprinkles on top!

So if you'd like to recreate the recipe, I'll still share what I did below. The recipe for an awesome chocolate topping--also from the Wilton's donut pan but with a little more chocolate--follows!

Chocolate Cake Donuts

Ingredients:
4 cups cake flour, sifted
1 and 1/2 cups granulated sugar
4 teaspoons baking powder
1/2 teaspoon ground nutmeg
2 teaspoon salt
1 and 1/2 cups buttermilk
4 eggs, lightly beaten
4 tablespoons butter, melted

Directions:

1.) Preheat the oven to 425 degrees. Spray your donut pan with nonstick cooking spray or line a cupcake pan with paper cupcake liners (I got lazy and decided that instead of trying to fill my six-donut pan over and over again, I would make a batch of donut-flavored cupcakes to finish off the batter).

2.) In a very large mixing bowl, sift the cake flour, sugar, baking powder, nutmeg and salt. Add in the buttermilk and eggs. Make sure your melted butter has cooled slightly before adding it last. Beat carefully until all ingredients are just combined--no more flour should be visible, but the batter shouldn't be overmixed.

3.) Fill your donut pan or cupcake liners approximately 2/3 to 3/4 full and bake for about 9-10 minutes (mine still came out pale at 10 minutes even though the original recipe calls for 7-9 minutes. And I did three separate batches in the oven rather than try to fit all my filled tins in there at once, so who knows why they still came out so light?).

4.) Let the donuts cool about 2-5 minutes before prying them gently from the pan with a couple of toothpicks. Place on a wire rack to cool completely before dipping them in a bowl of chocolate glaze and then a bowl of sprinkles. Recipe for Chocolate Glaze is below.

Ingredients:

1/2 cup plus 1/4 cup semisweet chocolate chips
2 Tablespoons unsalted butter
2 Tablespoons light corn syrup

Directions:

1). In a microwave-safe bowl, combine the 1/2 cup of chocolate chips, butter and corn syrup. Microwave on 50 percent power for 50 seconds.

2). Carefully remove the bowl from the microwave (it will be hot--I used potholders) and add the extra 1/4 cup of chocolate chips, stirring while you add. The mixture should turn from thin drizzle to thick frosting consistency. And it tastes as good as it looks!

That's it! But don't forget these key details in the donut-making process:

1. Donuts taste best when fresh. They will get stale quickly when left out and attempted to eat two days later. All is not lost, however, if you want to eat donut leftovers! Place them in an airtight plastic baggie to stave off staleness as long as possible! If all else fails, dip rock-hard donuts in coffee to instantly soften them up!

2. These donuts can be made into cupcakes! Because they rise so much (and because I got lazy), I thought it made perfect sense to try filling a few cupcake liners with donut batter too! It worked! Just be careful peeling off the paper as they tend to stick.

3. The dipping in chocolate and sprinkles is the fun part! I try to get just the right amount of glaze on each one, turning the donuts so they leave a smooth design of chocolate and an evenly spread sprinkling of sprinkles. If you really want to be daring, you can try the chocolate glaze on top of the Bacon donuts mentioned earlier. Use bacon bits instead of sprinkles to top the chocolate and enhance the bacon flavor. Doesn't that sound good?

4. Despite bacon, chocolate, butter and sugar...these donuts are healthy! Somewhat healthy! They're baked (not fried!) and made with all-natural homemade ingredients. So that's a start!

All-in-all, I'd say donuts are a success in my book no matter how you make them. It was a fun experiment for me to try, having never ever made a donut before this month! But I will definitely be baking them again!

Thursday, March 15, 2012

"Donuts, I got Donuts"


If you're a Simpsons TV show fan, go ahead and say it with me: "Mmm...donuts." Or we can sing Chief Wiggum's donut song: "Donuts, I got donuts...."

Don't know what I'm talking about? D'oh! Oh well, just check out the awesome pictures and the recipe below for my first ever attempt at homemade donuts!  Finally, finally, another success!  I owe it all to shopping with my mom at Bed, Bath & Beyond where I swore I wasn't going to buy anything, until I saw it: a shiny, enticing, never-before-owned-by-me donut pan, complete with recipe ideas attached. I happen to absolutely without a doubt love donuts, and absolutely without a doubt never eat them because I don't eat fried foods anymore. Le sigh.

However, one of my favorite types of donuts used to be the glazed "cake" donut (pancakes, shortcakes, birthday cakes--do you see a pattern in my favorite treats?). And everyone knows cake is baked, not fried. (Yay, healthier already!). So I took the Wilton's recipe for standard Baked Cake Doughnuts that came with my new pan, and twisted it up with the one food item I'd been wanting to incorporate into my baked goods forever. The one item I knew could dress up a standard donut recipe and make it shine--or perhaps sizzle. Bacon.

Now these donuts did not turn out overwhelmingly bacon-y in taste (is that good or bad?) so I might have to experiment with adding just a little more bacon grease and bits next time. But the result was still fluffy, sweet, and so delicious.

Bacon Cake Donuts

Ingredients:


2 cups cake flour, sifted
2 teaspoons baking powder
1/4 teaspoon nutmeg
1 teaspoon salt
3/4 cup brown sugar
3/4 cup buttermilk
2 eggs
1 and 2/3 Tablespoons melted butter
1/3 Tablespoon (1 teaspoon) bacon grease
1 teaspoon bacon bits (cooked bacon, chopped)

Directions:


1). Preheat the oven to 425 degrees a spray a donut pan with nonstick cooking spray (or, if you don't have a donut pan, I suppose you could use a muffin tin and see what happens!). In a large bowl, sift together the flour, baking powder, nutmeg and salt.

2). In a separate bowl, combine the brown sugar, buttermilk, eggs, melted butter and bacon grease. (The grease is easy enough to collect from bacon heated on the stove--I used about nine small pieces of precooked Trader Joe's Fully Cooked Uncured Bacon to get a teaspoon of grease, though). It helps if the butter and grease has cooled a little before adding them to the mixture--otherwise they'll curdle the eggs.

3). Add the wet ingredients to the dry ingredients and beat gently until just combined. Bake approximately seven minutes, then remove from oven and let sit at least five minutes before removing from the pan carefully with a couple of toothpicks on the sides of the donuts to turn them out. Let cool slightly, then drizzle with icing or dip in frosting if so desired.

My intention was to create a "Maple-Bacon" breakfast kind of donut, actually, but I just couldn't get my frosting to taste or look quite right. So that's an experiment for another day. Rather than wait until I had a perfect maple syrup frosting recipe concocted before writing this post, I figured I'd best just get it up here and you can either use your favorite canned frosting, try out one of my previous recipes like eggnog frosting or just eat them plain (that's what I did!) with a side of coffee for dunkin'. Tasted perfect to me! You won't have to say "D'oh!" and "Nuts!" separately ever again. Mmm...donuts....