Showing posts with label strawberries. Show all posts

Thursday, March 17, 2016

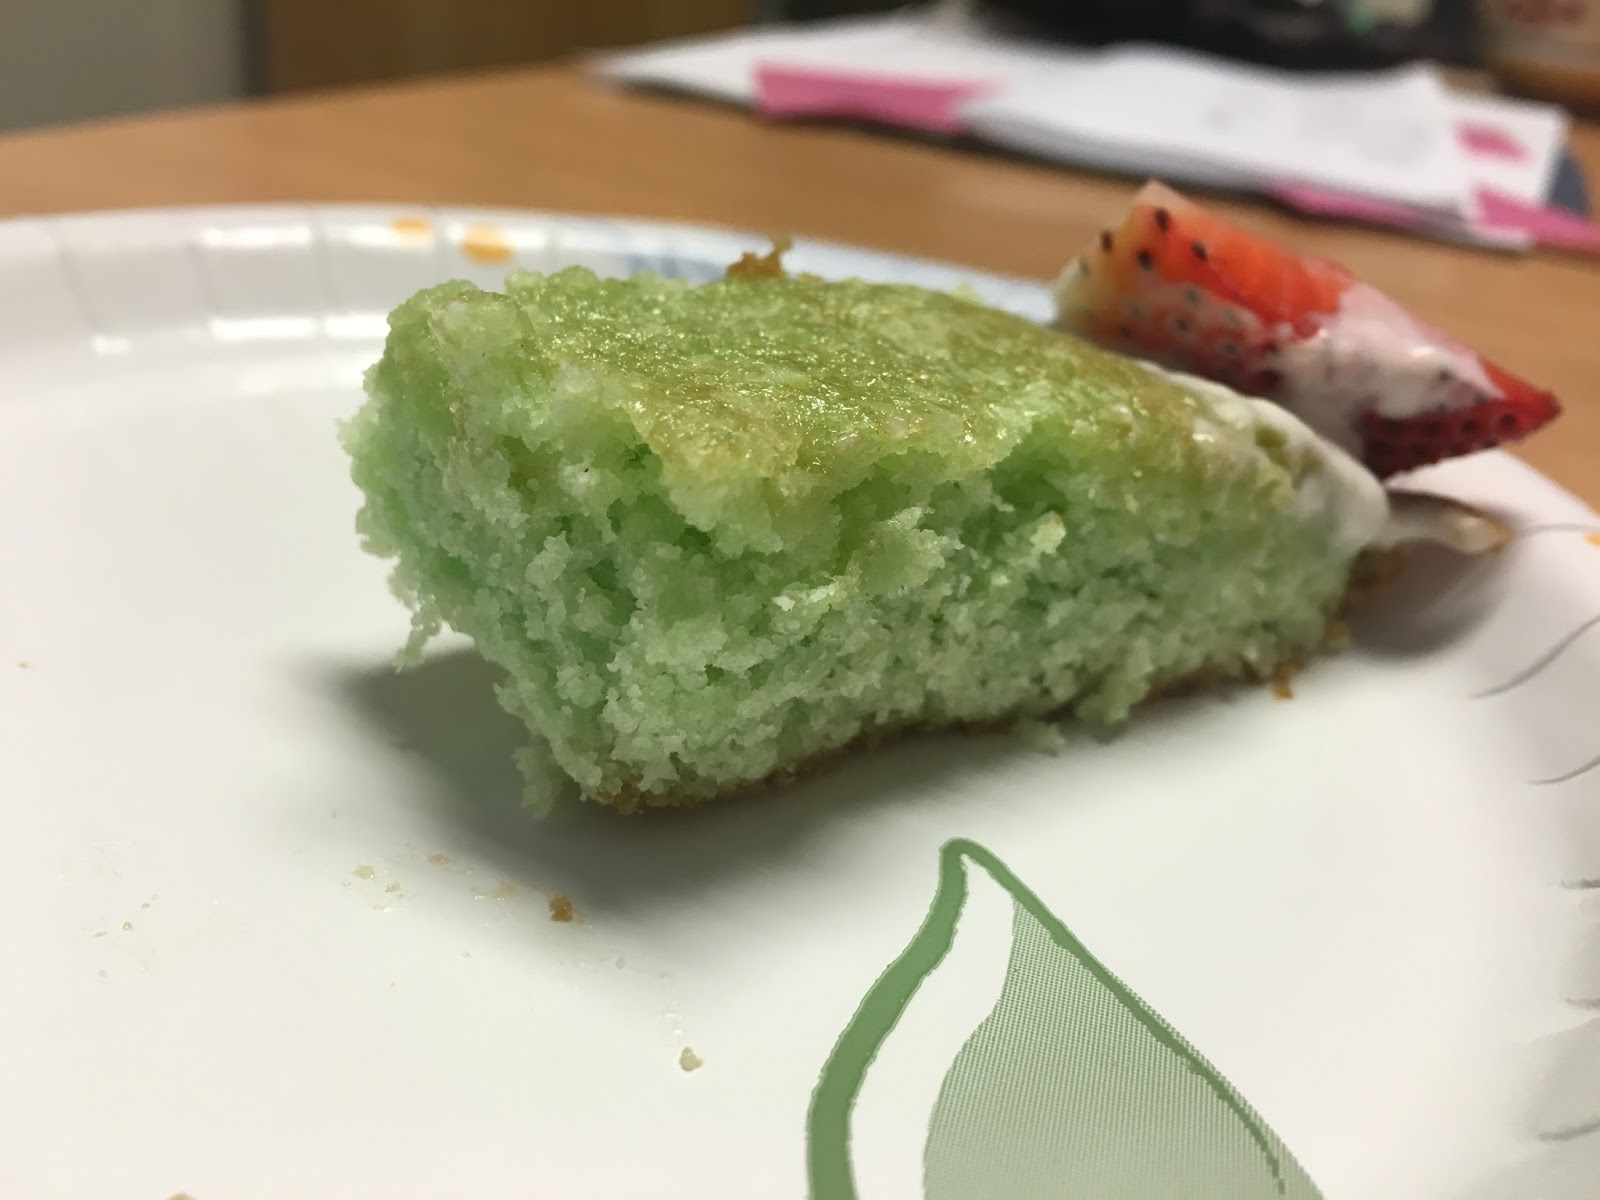
Green Sour Cream Pound Cake for St. Pat's!


Happy St. Patrick's Day! It's the one day out of the year where my baking can match my clothes. Green, after all, has always been my favorite color. This year St. Patrick's Day also fell within the week of Spring Break at the college where I work. It's fairly quiet on campus, which makes it the perfect time to bring in treats to colleagues who have been working so hard to make it to mid-semester.

So I knew I would be baking something green well before the day arrived. I just wasn't sure what. I wanted to make something from scratch and use the ingredients I had. I'm not sure how the idea of "pound cake" came into my head--it must have popped up in my Internet search for recipes using self-rising flour (I had a leftover container my mom gave me for pancakes). But most of the those self-rising baked goods also called for buttermilk--which I did not have. In my fridge, however, was a small tub of sour cream. I knew this could be a good substitution for some baked goods. In fact, a few donut recipes appeared when I modified my search for self-rising flour and sour cream. But I was most drawn to a post for Sour Cream Pound Cake from farmflavor.com. It might take a while to bake, but sounded super easy to put together. And the instructions on my green food coloring bottle said I only needed to add 1/2 teaspoon into any cake batter to get that green tint. Perfect! My St. Pat's Green Sour Cream Pound Cake was born.

Ingredients:

2 sticks of butter (16 Tablespoons), softened but not melted
3 cups sugar
5 eggs
1 teaspoon vanilla
3 cups self-rising flour (sifted)
8 oz. sour cream (I use Daisy Lite)
1/2 teaspoon liquid green food coloring (I used McCormick)
Optional strawberries, green, grapes, whipped cream, and green frosting to decorate

Directions:

1.) Preheat the oven to 325 degrees. In a very large bowl, cream the butter and sugar together with an electric or stand mixer. Add the eggs one at a time, mixing after each, then add the vanilla and mix again.

2.) Alternate adding flour and sour cream until all ingredients are combined. Add the green food coloring last, mixing until thoroughly combined.

3.) Pour the batter into your pan of choice (that's been heavily greased with butter/flour or nonstick cooking spray). The original recipe calls for an hour and a half bake time for a tube/bunt pan. For my shallow book-shaped pan (slightly larger than 9x13 inches) I had to cut that baking time down significantly, checking after 30 minutes (still too wobbly), and ultimately baking only about 40-45 minutes total, until the top and edges were slightly brown and a toothpick inserted into the center came out clean.

4.) Remove the cake from the oven and let cool to room temperature before refrigerating overnight. Serve the next morning with strawberries, GREEN grapes for St. Paddy's, and any whipped cream or icing you choose.

I was a little nervous bringing the finished product to work the next morning after baking. Would a green cake be appetizing? Would the center be too solid or not solid enough? Despite a clean toothpick test, I hadn't cut into the cake or baked any side cakes to try first since the batter was just barely enough to fill my pan. And I didn't want to ruin the look of the finished cake before my coworkers saw it.

Turns out I didn't need to worry! The cake received rave reviews by my supervisor, our administrative assistant, and all the librarians and staff that had a piece. Nearly half the cake was gone by lunch time! The center was moist, the flavor was sweet, and I now have a go-to pound cake recipe for any time of year!




Thursday, September 12, 2013

Toaster Pastries (Fake Pop-Tarts!)


Okay, so here's a quick dessert I put together with the exact criteria of: easy, fast, and possible with just the things I already have in my fridge and pantry (no time to grocery shop!). I was inviting a friend over after work (more like a request for computer tech support...) and wanted to make sure I not only had dinner to offer in thanks (teriyaki chicken rice bowls) but also some kind of dessert. My guest already sampled the previously posted Pumpkin Nut Bread, so I needed something new. However, I only had a few minutes to prep something before work and was already dealing with:

1. Computer breaking (of course)
2. Fridge leaking (after already being fixed once!)
3. Spilling hot water from the rice bowl vegetables on the floor
4. Spilling hot water from the rice bowl vegetables on my feet
5. Laundry buzzing
6. Dishes overflowing
7. Trash overflowing
8. The fact I still had to shower and change clothes for work

(Being an adult is such fun, isn't it?)

Luckily it was my evening shift at work, so I had a whole morning at least to handle these chores. But getting off work in the evening also meant no time to plan and bake an elaborate dessert or go grocery shopping before my guest arrived. It was time to look in the pantry. Time to look in the fridge. Time to get those creative juices flowing.

I had one leftover refrigerated pie crust and one unopened jar of jam ("Unopened" is a key word here because all my jars of peanut butter, for instance, were "open," which meant "eaten out of," which meant I'd double dipped in them at least once.... Otherwise I might have whipped up this quick peanut butter cookie recipe for dessert instead).

So, remembering that I saw a recipe involving jam-filled pastries online just the other day, I turned to my phone's Internet and quickly searched my go-to Allrecipes.com. I couldn't find the exact pastry I'd spotted before (it may have been some kind of kolacky?), but I did land on a page for the "Toaster Pastry" (fake Pop-Tart) kind. Called Top Tarts by recipe author "kellweeeeezy," this dessert uses only six ingredients if you follow it to the letter, and is easily customizable if you don't. Here's my take on Toaster Pastries:

Ingredients:

1 refrigerated pie crust (I used Pillsbury since that was what I'd found at the store previously)
8 teaspoons strawberry jam (I look for jars with reduced sugar and NO high-fructose corn syrup)
1 cup sugar (I didn't have confectioner's sugar)
5 Tablespoons (an estimate--this doesn't have to be exact) fat-free evaporated milk (I don't keep regular milk in my fridge but do have evaporated milk for pumpkin pies...)
1/2 teaspoon vanilla extract
Sprinkles (if you have them, it does make the pastries quite pretty. Unfortunately, the only ones I had were expired and somewhat anemic looking...).

Directions:

1.) Preheat the oven to 425 degrees. Let your pie crust sit out until it reaches room temperature, then roll the dough with a rolling pin until it forms close to a rectangle shape.

2.) With a pastry wheel (or a pizza wheel/knife/etc. will work), cut the dough into an even number of smaller rectangles of the same size (My pie crust allowed for 8 rectangles, which makes 4 pastries. The original recipe makes 8 pastries total). Place 2 teaspoons of strawberry jam in the center of half the rectangles and spread it with a spoon to reach about 1/4 an inch from the edge (It may be hard to get exactly 1/4 an inch, so just keep in mind that the closer the jam gets to the edge the more likely it will be to spill out during baking...).

3.) Top the jam-filled rectangles with the plain rectangles and crimp the pastries together with a fork. You can also prick them with the fork to form letters showing what kind of jam is inside or to claim which pastry will ultimately be yours! Then bake the pastries on a cookie sheet coated with nonstick cooking spray for about 7-9 minutes (I couldn't bake them on parchment paper since my parchment paper is only oven safe up to 420 degrees. And yes, I've had parchment paper burn in my oven before).

4.) In a bowl, combine the sugar, milk, and vanilla until a thin icing forms. After the pastries have been removed from the oven (mine started to get golden brown at about 9 minutes), let them cool at least 5 minutes before drizzling with icing. If you have non-expired sprinkles, you can sprinkle them on at this stage too.

5.) Refrigerate your pastries for later toasting or enjoy at any temperature. If you eat them while still warm (or if you reheat them) just keep in mind that the jam will get a lot hotter than the pastry. Tongue-burning hot. But oh so gooey good.

I taste-tested a pastry during my lunch at work and was pleased with the result as well as with the break in my day from crazy adulthood. Nothing like fake Pop-Tarts to take you back to a time before broken electronics, leaking fridges, vegetable cooking, laundry, dishes, trash, and work were your responsibility. Let's all take a moment to savor the sweetness of childhood and offer up thanks for quick and easy desserts.


Thursday, July 11, 2013

Berry Cheesecake


It's time for a potluck! To welcome our new boss, my coworkers arranged a fun vegetarian potluck lunch and I couldn't wait to sign up! For a non-meat dish, I decided on bringing in the family's traditional Artichoke Dip that my mom makes for Christmas almost every year (and sometimes Thanksgiving, and sometimes random parties in between). And of course, I couldn't show up without a baked dessert! Since our potluck was right before the Fourth of July, I decided to make something red, white, and blue. The idea of Berry Cheesecake came to me before I had a recipe, but I'm always up for experimentation. This one's based off of the Sour Cream Cheesecake I made with my friend last April, with a few slight changes to make the cake berry fun!

Ingredients:

For crust:
1 and 1/2 cups graham cracker crumbs
1/3 cup melted butter
1/4 cup sugar

For filling:
2 eggs
2/3 cup sugar
1 teaspoon vanilla extract
8 ounces light cream cheese (softened)
1/4 teaspoon salt

For topping:
2 cups light sour cream
1/4 cup sugar
1 teaspoon vanilla
3 Tablespoons strawberry jam
5-6 large strawberries
1/2 cup blueberries

Directions:

1.) Preheat the oven to 325 degrees. Crush a box of graham crackers to create crumbs (I crushed mine in a ziploc baggie, or you can buy graham cracker crumbs already crushed).  Mix the crumbs, butter and sugar together, then press the mixture into a round cake pan. Bake about 8 minutes, then remove from the oven to cool.

2.) In a bowl, beat the eggs, then add the sugar, vanilla, cream cheese and salt. Combine all with an electric mixer until the mixture is smooth.  Pour on top of the crust and bake another 15 minutes.

3.) Let the cheesecake cool while you make the topping. Mix together the sour cream, sugar and vanilla extract. Stir in the strawberry jelly, then pour on top of the filling and bake another 10 minutes.

4.) Cool the cheesecake completely before refrigerating overnight. In the morning, slice your strawberries very thin, and use the slices to decorate the top of the cheesecake in a pattern with blueberries around the edges. Sprinkle the fruit with just a dusting of sugar and serve cold to keep the cheesecake as solid as possible.

And, though I didn't make it myself, here's my mom's famous Artichoke Dip!

Ingredients:

3 cans whole artichoke hearts
1 cup mayonnaise
2 cups powdered Parmesan cheese
1 teaspoon garlic powder (not garlic salt)
Paprika for sprinkling

Directions:

1.) Preheat the oven to 325 degrees. Open the cans of artichokes, drain, and cut into small pieces with kitchen scissors. Place pieces in an empty ceramic crock pot.

2.) Add in the mayonnaise, Parmesan cheese, and garlic powder, stirring so that all ingredients evenly combine. If the mixture looks too moist, add a little more cheese. If it’s too dry, add more mayonnaise. When you’re done mixing, smooth the top flat with the back of a spoon.

3.) Sprinkle paprika over the top of the dip until it forms a nice and even red layer that’s not too thick but still covers the artichokes. Bake at 325 degrees for about 25-30 minutes, watching the dip for the last few minutes to make sure it doesn't brown too much on the top.

4.) Remove from the oven and serve warm or refrigerate overnight. The next day, place the ceramic pot into the electric crock and turn on to heat a few hours before the dip will be served. Tastes best warm.