Showing posts with label cream cheese. Show all posts

Sunday, December 4, 2016

Pumpkin Cheesecake!


I wanted to try something new this Thanksgiving. I usually make exactly two pies: pumpkin and pecan. Facebook also cheerfully reminded that five years ago for Thanksgiving I made two pumpkin pies, two pecan pies, cranberry sauce, and a sweet pumpkin dip. This year brought about a stressful week right before Thanksgiving, and I asked my mom if I could be free of pie duty this year. She was happy to take on our pumpkin and pecan pies so that tradition could continue and to help me out.

But I can't stay away from baking for long. I soon found myself wondering if maybe I should try that Pumpkin Cheesecake recipe I'd been saving for weeks from FoodNetwork.com. I'd purchased all the ingredients (twice) and still had yet to make it. I thought maybe Thanksgiving would be the perfect time.  Maybe baking would be the ultimate stress reliever as it had been for me in years past. And so I threw it together, following the Pumpkin Brulee Cheesecake recipe fairly closely but with my own style, and enjoying the whole process.

Ingredients:

8 sheets of graham crackers (honey, not cinnamon)
1 Tablespoon unsalted butter, melted
12 ounces low fat cream cheese
1/2 cup brown sugar (light)
1/3 cup plus 1 Tablespoon white sugar
1/2 teaspoon salt
2/3 cup low fat Greek yogurt
2 eggs
2 egg whites
15 ounces (one can) pumpkin puree
2 Tablespoons flour (I used whole wheat pastry flour again)
1 Tablespoon pumpkin pie spice
1 Tablespoon vanilla extract

Directions:

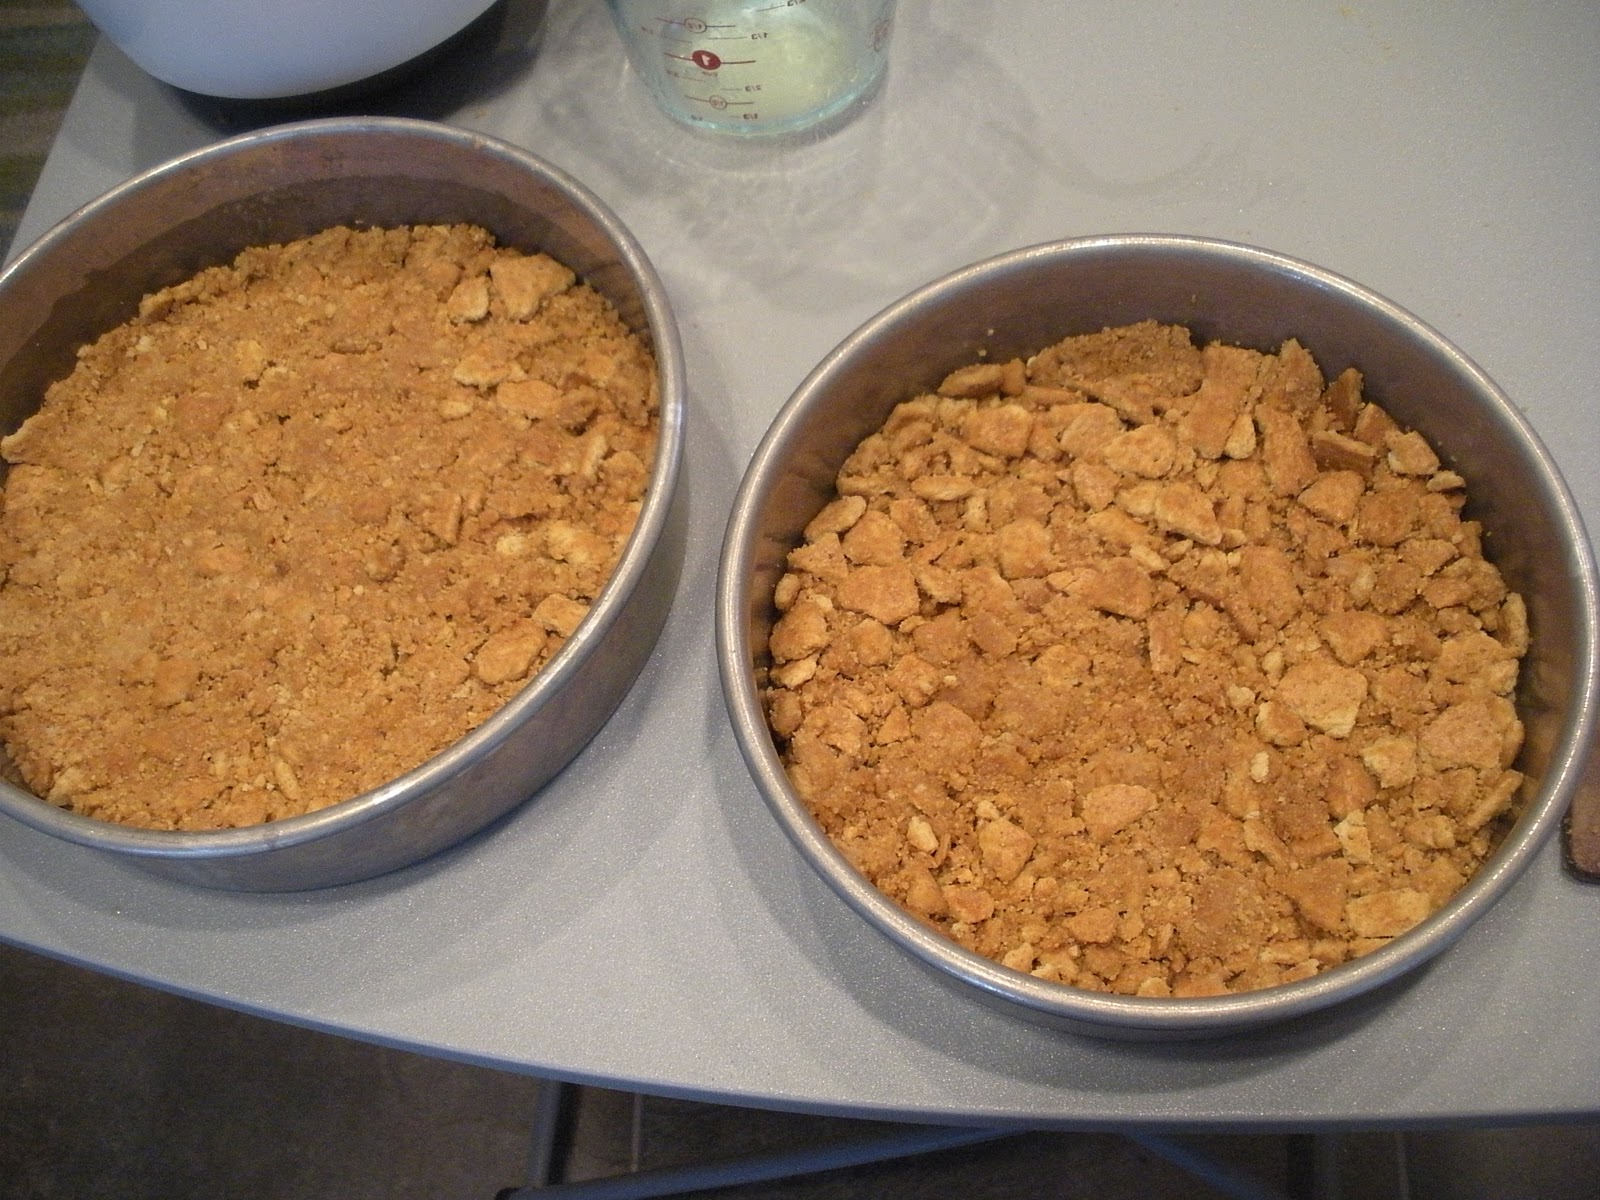
1.) Preheat the oven to 325 degrees. Mash your graham crackers into tiny pieces and crumbs (I placed the graham crackers in a plastic baggie and then mashed them with a meat mallet, carefully so as not to hurt the counter). Pour graham cracker crumbs into a bowl and mix in 1 Tablespoon of white sugar, 1 Tablespoon melted butter, and 2 Tablespoons water. Mix until the graham crackers are moistened and can be pressed into the bottom of a pie tin. I like to press mine in with a plastic baggie over my hand lightly sprayed with nonstick cooking spray.

2.) Bake the pie crusts 10 minutes and set aside to cool completely. Then in a large bowl, combine the cream cheese, brown sugar, 1/3 cup white sugar, and salt. Beat in the yogurt, egg, and egg whites. This can all be about medium speed. Lower the speed and add pumpkin, flour, vanilla, and pumpkin pie spice. Keep the speed low, then stir with a spatula to fully combine.

3.) Pour the batter over the cooled crusts and bake in the center rack for about an hour (check about five minutes before to make sure it's not burning too much). Place on a trivet to cool to room temperature. Refrigerate overnight.

4.) Top with whipped cream or other toppings of your choice. I skipped the actual "brulee" part of the original recipe (lacking a torch) and went for a whipped cream border instead!

Thanksgiving was a great success with the immense help of my mom, the help of my brother, and my small pie contribution. It held together, didn't taste overdone (despite the browning on top) and was a delicious dessert to enjoy with family!


Thursday, July 11, 2013

Berry Cheesecake


It's time for a potluck! To welcome our new boss, my coworkers arranged a fun vegetarian potluck lunch and I couldn't wait to sign up! For a non-meat dish, I decided on bringing in the family's traditional Artichoke Dip that my mom makes for Christmas almost every year (and sometimes Thanksgiving, and sometimes random parties in between). And of course, I couldn't show up without a baked dessert! Since our potluck was right before the Fourth of July, I decided to make something red, white, and blue. The idea of Berry Cheesecake came to me before I had a recipe, but I'm always up for experimentation. This one's based off of the Sour Cream Cheesecake I made with my friend last April, with a few slight changes to make the cake berry fun!

Ingredients:

For crust:
1 and 1/2 cups graham cracker crumbs
1/3 cup melted butter
1/4 cup sugar

For filling:
2 eggs
2/3 cup sugar
1 teaspoon vanilla extract
8 ounces light cream cheese (softened)
1/4 teaspoon salt

For topping:
2 cups light sour cream
1/4 cup sugar
1 teaspoon vanilla
3 Tablespoons strawberry jam
5-6 large strawberries
1/2 cup blueberries

Directions:

1.) Preheat the oven to 325 degrees. Crush a box of graham crackers to create crumbs (I crushed mine in a ziploc baggie, or you can buy graham cracker crumbs already crushed).  Mix the crumbs, butter and sugar together, then press the mixture into a round cake pan. Bake about 8 minutes, then remove from the oven to cool.

2.) In a bowl, beat the eggs, then add the sugar, vanilla, cream cheese and salt. Combine all with an electric mixer until the mixture is smooth.  Pour on top of the crust and bake another 15 minutes.

3.) Let the cheesecake cool while you make the topping. Mix together the sour cream, sugar and vanilla extract. Stir in the strawberry jelly, then pour on top of the filling and bake another 10 minutes.

4.) Cool the cheesecake completely before refrigerating overnight. In the morning, slice your strawberries very thin, and use the slices to decorate the top of the cheesecake in a pattern with blueberries around the edges. Sprinkle the fruit with just a dusting of sugar and serve cold to keep the cheesecake as solid as possible.

And, though I didn't make it myself, here's my mom's famous Artichoke Dip!

Ingredients:

3 cans whole artichoke hearts
1 cup mayonnaise
2 cups powdered Parmesan cheese
1 teaspoon garlic powder (not garlic salt)
Paprika for sprinkling

Directions:

1.) Preheat the oven to 325 degrees. Open the cans of artichokes, drain, and cut into small pieces with kitchen scissors. Place pieces in an empty ceramic crock pot.

2.) Add in the mayonnaise, Parmesan cheese, and garlic powder, stirring so that all ingredients evenly combine. If the mixture looks too moist, add a little more cheese. If it’s too dry, add more mayonnaise. When you’re done mixing, smooth the top flat with the back of a spoon.

3.) Sprinkle paprika over the top of the dip until it forms a nice and even red layer that’s not too thick but still covers the artichokes. Bake at 325 degrees for about 25-30 minutes, watching the dip for the last few minutes to make sure it doesn't brown too much on the top.

4.) Remove from the oven and serve warm or refrigerate overnight. The next day, place the ceramic pot into the electric crock and turn on to heat a few hours before the dip will be served. Tastes best warm.

Tuesday, February 5, 2013

Red Velvet Cuppy Cakes


Another coworker birthday meant another baking opportunity at the end of January! When I asked what kind of treat my coworker would like to celebrate her special day, she was less specific than her predecessor's request for savory scones. Instead, she simply wanted something chocolate. While the thought of brownies did cross my mind, I was hoping to try something a little more adventurous again, and I remembered her ordering a Red Velvet dessert at Claim Jumper for her birthday last year. Though deeply red, Red Velvet cakes are actually made with cocoa powder, and so I hoped a cupcake version would fulfill her craving.

After searching both cookbooks and websites for a tasty (and easy) Red Velvet cupcake recipe, I discovered that the ones calling for cake flour (which I didn't have) usually called for buttermilk (which I did) and the recipes that called for flour that I did have were lacking in buttermilk, and most of them seemed like they just didn't have quite enough cocoa powder to taste like chocolate anyway. Not to mention the fact that vinegar still sounded like an odd ingredient in a baked good to me.

Still, I was determined to produced Red Velvet Cuppy Cakes that morning to take to work that day. It was time to start adapting.

While I tend to stay away from a lot of Food Network recipes simply because they can be fairly complex, I had stumbled upon the famous Paula Deen's Red Velvet cupcake recipe that didn't require cake flour and didn't sound too complicated. Though my cooking tends to be a lot lighter than Paula Deen's (much less butter), I had a feeling I could adapt the recipe to my needs easily enough too. The public comments on the recipe recommended using more cocoa powder (what I had in mind) and less oil (huzzah!) so I didn't dive in completely unprepared. I also halved the recipe--more manageable to make and take in one morning before work. The results:

Ingredients:

For the cupcakes:

1 and 1/4 cups whole wheat pastry flour (my staple)
1/2 + 1/4 cup sugar
1/2 teaspoon baking soda
1/2 teaspoon salt
1/4 cup cocoa powder
1/2 + 1/4 cup vegetable oil
1/2 cup buttermilk
1 egg
1 Tablespoon red food coloring
1/2 teaspoon white distilled vinegar
1/2 teaspoon vanilla extract

For the frosting:

8 ounces Neufchatel (it's what i had in the fridge--cream cheese will work)
1 stick of butter
2 cups sugar (the original recipe called for powdered sugar but I only had granulated baking sugar)
1/2 teaspoon vanilla extract

Directions:

1.) Preheat the oven to 350 degrees. In a bowl, sift together the flour, sugar, baking soda, salt, and cocoa powder. In a separate bowl, beat together the oil, buttermilk, eggs, food coloring, vinegar and vanilla (be careful that the very red food coloring and resulting mixture doesn't get on your clothes).

2.) Combine the dry ingredients and the wet ingredients slowly. Stir until well mixed, and then pour into a cupcake tin lined with paper wrappers until each is about 2/3 full.

3.) Bake the cupcakes for about 20 minutes, using a toothpick to test for doneness (watch the time closely so they don't overbake and come out dry).

4.) Remove from oven and let cool completely before frosting. To create the frosting, beat the cheese and butter with an electric mixer until smooth, add the sugar and beat again on a low speed. Finish on a high speed until the mixture becomes light and fluffy.

That's all there is to it! If I were to make it again, I might try cake flour, a little less baking time, and with powdered sugar in the frosting. But all in all, I think this birthday treat turned out quite beautiful, and disappeared from my office break room quite rapidly. With the chocolate flavoring and rich red color, it's also something to keep in mind for Valentine's Day. Which is coming up. In nine days. Just saying. Be prepared....

Sunday, April 15, 2012

Sour Cream Cheesecake


Yes, I am lactose intolerant. So, yes, as a general rule, I cannot eat such delicious foods as cheesecake--or pretty much anything with the words "cheese" or "cream" somehow buried in them. This is not to say I don't occasionally tempt fate, in very small portions, especially for the sake of dear friends, and with the help of a Lactaid pill. But you don't want to know about my dietary deficiencies. You want to know how to make that delectable-looking slice of heaven that even this non-dairy eater here is raving about from the minimal sliver she used for taste testing.

I owe this one to my dear friend Janice (that's her in the picture under step 2) who wanted to try out a recipe that another friend gave her. We've often created baking experiments together, and it's always fun to teach and learn and just spend time together--especially when it results in delicious food. So dairy product or no, I was gung-ho to try out her friend's recipe labeled "Cream Cheese Pie."  Accidentally glossing over the word "pie" on the paper she handed me, I baked both our Sour Cream Cheesecakes in cake pans (we doubled the recipe to make one for each of our families). This essentially created an easy cheesecake recipe (because cheesecakes are actually rather complicated to make under normal circumstances--they require hot steam baths to prevent cracking and everything!). But whatever you call it, and however you vary the recipe, it's still going to taste great and be a fun project to put together with friends!

Ingredients:

For crust:
1 and 1/2 cups graham cracker crumbs
1/3 cup melted butter
1/4 cup sugar

For filling:
2/3 cup sugar
1 teaspoon vanilla
8 ounces light cream cheese (softened)
1/4 teaspoon salt
2 eggs

For topping:
2 cups light sour cream
1/4 cup sugar
1 teaspoon vanilla

Directions:

1.) Preheat the oven to 325 degrees. Crush a box of graham crackers to create crumbs (we crushed ours by hand in plastic baggies). Mix crumbs, butter and sugar together, saving a few crumbs for the topping. Press the mixture into the cake pan, bake 8 minutes, then remove from oven to cool.


2.) In a bowl, beat the eggs, then add the sugar, vanilla, cream cheese and salt. Combine everything with an electric mixer until the mixture is smooth. Pour the mixture on top of the crust and bake 20 minutes.


3.) Let the cheesecake cool while making the topping: mix together the sour cream, sugar and vanilla, along with remaining crumbs. Pour on top and bake another 10 minutes. (I also accidentally glossed over the fact that the crumbs in the original recipe are supposed to go on the very top of the cake, not inside the topping mixture. But, oh well, this does not affect flavor--only presentation. See below).

4.) Cool the cheesecake completely before refrigerating at least 30 minutes, though overnight is best.

Using the light cream cheese and sour cream makes this one just a touch healthier than most cheesecakes, and I believe made it slightly easier for my tummy to digest. Don't let the three different mixtures (crust, filling, topping) scare you away from a relatively easy recipe that's still under five steps to make! Thank you Janice, and thank you Janice's friend!

Next up, my Easter escapades!

Sunday, December 18, 2011

Holiday Feast!


Okay, this really should have been posted in November so that if I decide to look back on my blog for recipes come next Thanksgiving I'll be able to actually find them.... But it is true that same kinds of desserts and sides made for Thanksgiving can also be made at Christmastime (Plus that whole Bronchitis for a month thing really messed up my November plans). So before it gets too late into December, let me post the traditional (and soon to become traditional) Thanksgiving recipes I made this year.

In addition to my regular Pumpkin Pie (I made the recipe this year already in October for a bake sale before baking two more at Thanksgiving), I also had my annual Bourbon Pecan Pie that I've been making for at least five years now, adapted from Paula Deen's recipe. And if that wasn't enough pie, I decided to break tradition and make one of my favorites that I hadn't done in about five years: Sweet Potato Pie. To round out the menu (since Thanksgiving can't be just about dessert--I know, it's sad) I also created a Whole Berry Cranberry Sauce side (hmm, also a sweet dish) and a sweet Pumpkin Cream Cheese Dip (wow, maybe Thanksgiving at my house can be all about dessert?), leaving the turkey, potatoes, and stuffing to my mom.

The easy thing about these pie recipes is that they start with a pre-baked pie shell (I buy whole wheat crusts from Whole Foods) so you don't have to make the dough from scratch and can just focus on the delicious filling. While the cranberry sauce is slightly more labor intensive than the kind from a can (and yes, we had that at Thanksgiving too--don't mess with tradition), it comes together fairly easily with only four ingredients. The pumpkin dip was something new to our Thanksgiving table (a recipe I made for a fall scrapbook party last year), which I served with apple slices and graham cracker sticks. All in all, I think our holiday was quite festive and successful, and I might just have to repeat some of these recipes for Christmas dinner too!

Bourbon Pecan Pie


Ingredients:


1 cup sugar
3 Tablespoons melted butter
1/2 cup dark corn syrup
3 eggs, beaten
1 and 1/2 to 2 cups pecan halves
1/2 cup whole pecans (may need more depending on how many it takes to cover the top of the pie)
2 Tablespoons bourbon (I've been using the same bottle of Jim Beam Bourbon Whiskey for the past five years)
1 pie shell (8 or 9 inches in diameter)

Directions:


1.) Preheat the oven to 375 degrees. In a large mixing bowl, combine the sugar and butter. Add the corn syrup, eggs and bourbon, stirring after each addition. Then stir in the pecan halves.

2.) Pour almost all the filling into the pie shell. Leave some liquid at the bottom of the bowl. Add your whole pecans to this liquid and coat them thoroughly. Using your fingers (they will get sticky), carefully lay each coated pecan on the top of the pie's filling to form a pattern (I like to start around the outside edges and just make circles. This part takes a little patience, but the aesthetics of the end result is worth it).

3.) Bake for 10 minutes at 375 degrees, putting foil around the edges of the pie to prevent the edges of the crust from burning. Then lower then temperature to 350 degrees and bake for about 22 minutes longer until the top of the pecans become firm and a deeper brown. Let cool on a baking rack and serve at room temperature or refrigerate overnight and serve cold the next day. Basically, this pie tastes good at any temperature, and can be eaten for several days after Thanksgiving for dessert, in your lunch at work, for breakfast....


Sweet Potato Pie


Ingredients:


2 cans (16 oz. each) candied yams (I prefer the kind in light syrup, not heavy syrup, since I can't seem to find any without syrup)
1/8 teaspoon salt
1 teaspoon vanilla extract
1/2 cup milk of your choice (I used a can of fat free evaporated milk since I'd been using that for the pumpkin pies)
2 Tablespoons melted butter
2 eggs
1 teaspoon pumpkin pie spice
1 pie shell

Directions:


1.) Preheat the oven to 350 degrees. In a mixing bowl, combine all ingredients for the filling, stirring until the eggs are beaten and the yams have been mashed in (though I like a few remaining chunks in mine).

2.) Pour the filling into the pie shell and bake for approximately 35 minutes. You can again place foil around the edges of the pie to prevent the crust from burning, or just take your chances if you trust your oven!

At this point you can also top the pie with about 1/2 a bag of mini marshmallows and bake it for an additional 15 minutes to let the marshmallows melt and brown. But I decided to skip the marshmallows this year and just focus on the flavor of the sweet potato, which came out being not too sweet, but just right for me and my younger brother who, it turns out, likes sweet potato pie better than pecan or pumpkin. Looks like this recipe will be a keeper in our house!


Whole Berry Cranberry Sauce

Ingredients:

2/3 cup water 
1/3 cup orange juice
1 cup brown sugar
12 oz. cranberries (frozen or fresh--this is usually one package of Ocean Spray Cranberries)

Directions:

1.) In a large pot, bring the water, juice and sugar to a boil. Add the berries and return the mixture to a boil again.

2.) After it's started boiling again, reduce the heat and let the mixture simmer for approximately 30 minutes, stirring at regular intervals, until it becomes thick and begins to stay coated on the spoon you use to stir.

3.) Remove from heat and pour into a heat-resistant (glass or ceramic) bowl. Cover and cool in the fridge a few hours or overnight before serving--it tastes best cold rather than warm or room temperature.

I can't remember exactly where this recipe originated from, but I know that during some baking experiments a few years ago I tried to adapt the cranberry sauce recipe from the back of the Ocean Spray bag, combining it with a recipe I found on AllRecipes.com (the inspiration to use orange juice). For a more tart sauce you can experiment with more orange juice and less sugar, but this recipe has served me well for several years as a nice compliment to the canned cranberry sauce tradition as well.


Pumpkin Cream Cheese Dip

Ingredients:

2 packages (16 oz.) lite cream cheese
1 cup brown sugar
1 cup canned pumpkin
4 teaspoons maple syrup (this time I used a "pumpkin syrup" I found!)
1 teaspoon cinnamon

1.) In a large bowl, beat together the cream cheese, brown sugar and canned pumpkin with an electric mixer until most of the larger chunks are broken up and no longer visible.

2.) Add the syrup and cinnamon and continue to beat until smooth.

3.) Cover and refrigerate at least 30 minutes, though overnight works well too. Since this is a sweeter dip, serve with fruit, graham crackers, ginger thins, vanilla wafers (basically any kind of mild cookie) rather than chips. Though you could try it with chips. I've never done that before.

Again, I don't remember where this recipe originated from now, though I do remember experimenting with proportions and ingredients last year when I first created it for my scrapbooking party. It makes a nice appetizer for guests who can't wait for the official dinner to be ready, or a lighter dessert for people who choose fruit over pie. Due to the dairy in the cream cheese, I can't eat very much of this dip, but I did taste test in small amounts and absolutely love how the fall flavors shine through. You only get to use pumpkin for so long during the year--I take advantage of every opportunity!

So that was the basic Thanksgiving menu on my end (I still don't know how to cook a turkey and have a personal vendetta against mashed potatoes ever since I learned they are secretly made with milk or cream). But in another year (or maybe for Christmas dinner?) I might add a few new experiments to the list. One day I do plan to try recreating my mom's recipe-less cornbread stuffing, which I never wanted to eat as a kid (due to chunks of celery and onion) but I just can't get enough of now! Overall, my best advice for holiday dinners is just make what you like, try balancing tradition with something new, and (most importantly) don't stress over the food--take the time to enjoy just being with the people that mean the most to you.

Happy Holidays! Christmas cookies and chocolate will be up next!