Showing posts with label muffins. Show all posts

Wednesday, June 24, 2015

Go-To Banana Muffins!


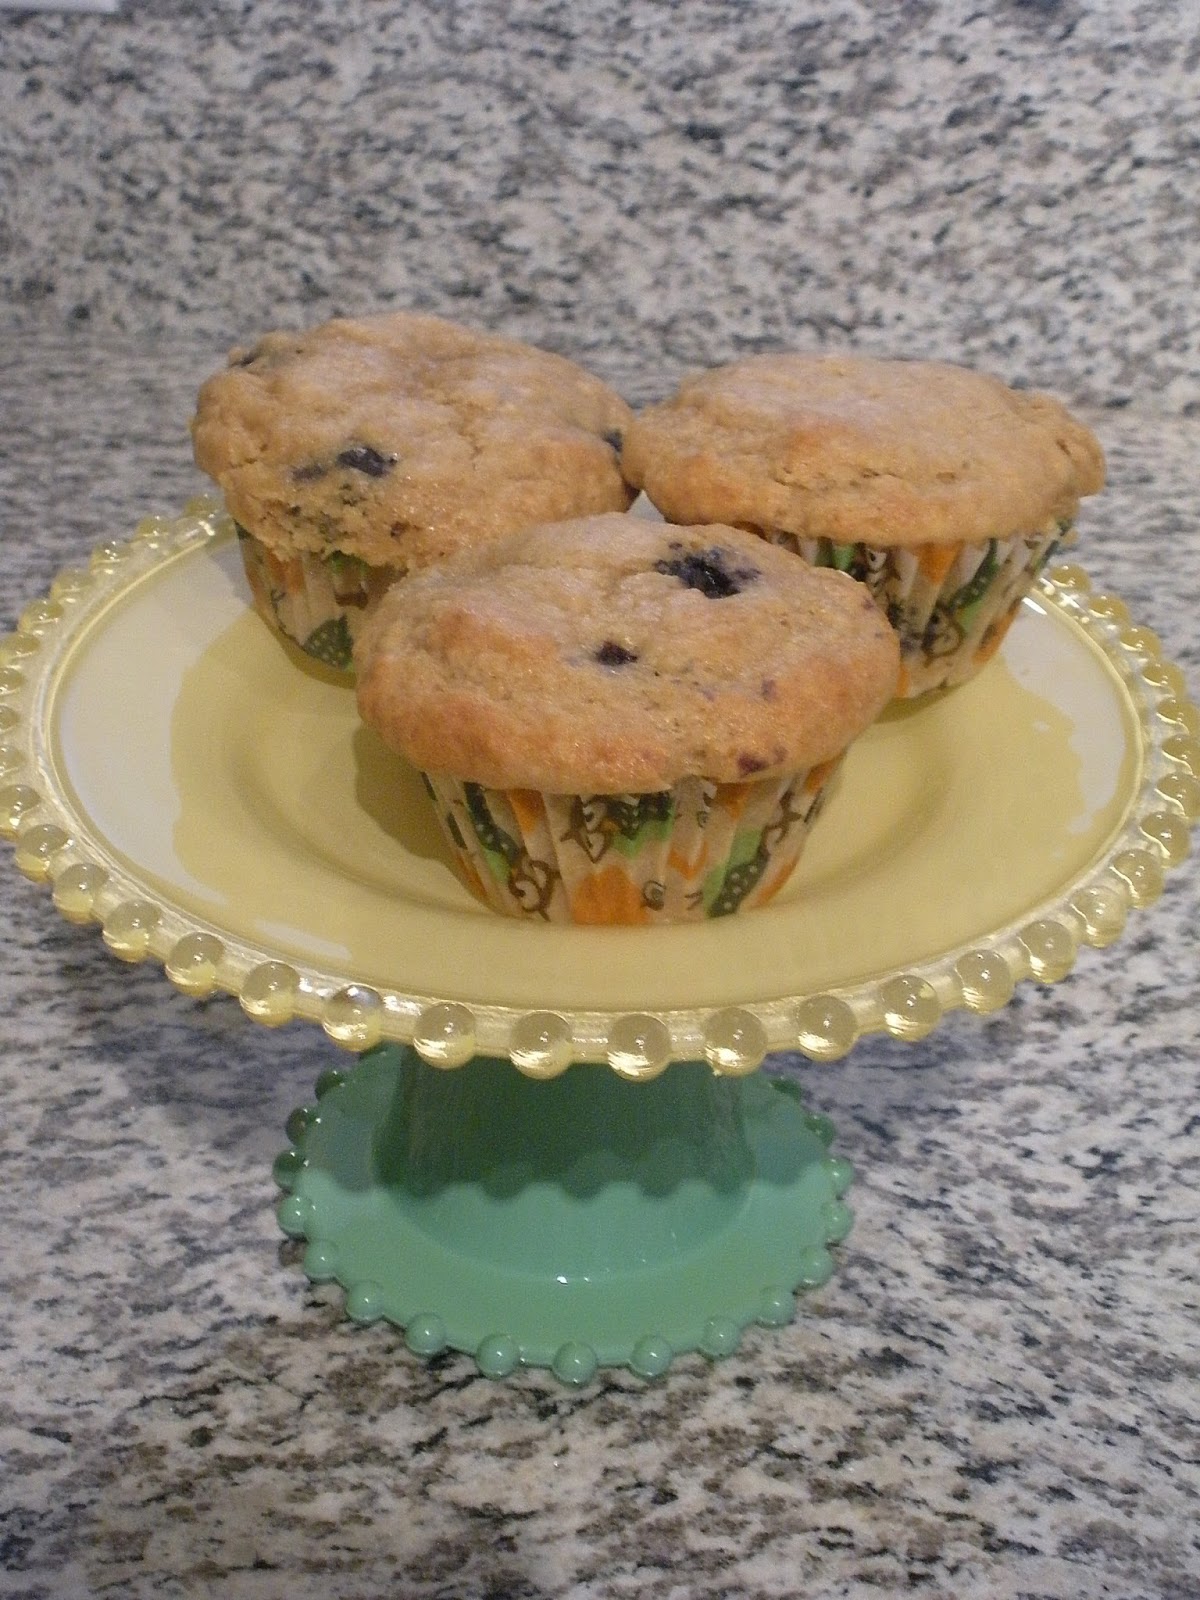
I officially have a go to banana muffin recipe!  After many attempts to find the perfect combination, I realized that I could adapt my Spring Banana Bread recipe into muffin form and have since made Go-To Banana Muffins several times for parties, work events, and even gave the recipe as a bridal shower present. All I had to do was change brown sugar to white sugar, cut the baking time back, and add in chocolate chips or nuts as needed.

Ingredients:

2-3 very ripe bananas
1/3 cup melted butter
1 cup white sugar
1 egg
1 teaspoon vanilla extract
1 teaspoon baking soda
Pinch of salt
1 and 1/2 cups of whole wheat pastry flour
1 cup chocolate chips (or combination of chocolate chips and pecans, etc.)

Directions:

1.) Preheat the oven to 350 degree and line a muffin tin with paper (cupcake) liners. Spray lightly with cooking spray if the paper is strong enough.

2.) In a single bowl, mash the bananas with a fork, then stir in the melted butter, baking soda, and salt. Add the sugar, egg, and vanilla. Sift in your flour last, folding it slowly so that the flour fully incorporates into the mixture. Do the same for the chocolate chips, folding slowly until fully incorporated.

3.) Pour the batter into the muffin cups and bake for about 18 minutes (25 at the most, but 18 worked for me). Use a toothpick inserted into the center of a central muffin to check for doneness (if it comes out moist with crumbs on it, the muffins might need a little more time. If it comes out dry, you're good). Cool slightly, but serve warm. (Note: They also taste great cold since they're moist enough to not harden in the refrigerator, or they can be reheated in the microwave to maintain the original flavor).

I've received so many positive reviews for these muffins, and I absolutely love bananas, so I'll definitely be returning to this recipe over and over again!

Sunday, July 6, 2014

Banana Pecan Muffins!


It seems like I only end up making banana dishes when I end up with uneaten overripe bananas.  Well, those really are the best kind to use in baking, so when my bananas went uneaten this week it was the perfect excuse to bake something new.

Usually I will revert to a classic banana bread, but last time I attempted my Buttermilk Banana Bread it baked a bit bitter (Ah, tongue twisters).  I'm still not sure if this was due to bad buttermilk, bad bananas, not refrigerating a fruit concoction, or something else entirely, but I didn't want to risk it. I wanted something quick and actually tasty--which meant muffins were in order.

Rather than looking at past failures (Banana Muffies anyone?), I just went straight to the Internet for a 5-star reviewed recipe. My quick Google search brought me first to Tyler Florence's simple Banana Nut Muffins. It had five stars out of 368 reviews.  That was all I needed.  And hey, I like Tyler Florence. He's a cutie.

Though I was a little skeptical that his recipe didn't call for any buttermilk, milk, sour cream, yogurt, or any other dairy (besides butter), I felt it best to experiment as always and see how his suggestions turned out. Since I had less time and fewer muffin tins, I opted to halve the recipe and only make them fill one muffin tin instead of two (though the recipe misleadingly says it yields 12 muffins--two cups of flour for 12 muffins? Those suckers are going to be huge!). My only other change was that I skipped the electric mixer step (I find electric mixers unnecessary for quickbreads, and why dirty an extra dish/machine when all you need is a little elbow grease?) and I also used a full 1/2 cup of chopped pecans instead of halving that amount (the more nuts the better in this case--I wanted full flavor!).

The result was not a failed experiment, but rather a delicious, moist, and crunchy muffin that I enjoyed for breakfast and eagerly shared with my friends.

Ingredients:

1 cup whole wheat pastry flour
1/2 + 1/4 teaspoons baking soda
1/4 teaspoon salt
2 overripe bananas
1/2 cup brown sugar
1/2 + 1/4 stick of butter (six Tablespoons), melted (I put mine in the microwave for just under a minute)
1 egg
1/2 teaspoon vanilla extract
1/2 cup of pecans, chopped
Sugar crystals/white sugar for sprinkling

Directions:

1.) Preheat the oven to 375 degrees. In a bowl, combine the flour, baking soda, and salt. In a separate bowl (glass makes it easier), mash the bananas with a fork. Add in the brown sugar, egg, and vanilla, then the melted butter (once it's had a couple of minutes to cool) until everything is well combined.

2.) Gently fold the banana mixture into the flour mixture, then fold in almost all the 1/2 cup of pecans, leaving a small handful for sprinkling.

3.) Spoon the batter into a 12-cup muffin tin sprayed with nonstick cooking spray OR lined with paper muffin/cupcake liners (I chose the paper liners this time for an easier cleanup). Fill each cup about 1/2 to 3/4 full. Top with the remaining pecan pieces and a sprinkling of sugar crystals (I ran out of sugar crystals so I just used regular white sugar this time).

4.) Bake approximately 17-18 minutes (probably not the full 20 minutes that Tyler suggests), but test with a toothpick for doneness when the muffins start to smell good and look risen (if the toothpick inserted into the center of one of the most central muffins comes out clean then they're ready!). I removed mine from the oven about 10 seconds before the 18-minute timer buzzed and they were perfect--cooked through but still moist.

Of course you can try this without the pecans, or with walnuts or chocolate chips instead, but I felt like the sweetness of a pecan would match perfectly with the banana, and it did. One friend was pleased that her muffin was still moist even after having been refrigerated (I didn't want to take any chances this time with bananas going bad) and another complimented the taste of his at breakfast. The rest I will be taking with me to a family brunch this afternoon, but the recipe I will keep with me for whenever I'm craving banana muffins again!

Bonus: One of my favorite tributes to the banana can be found here....

Thursday, August 29, 2013

Blueberry Coffee Cake Muffins!


Time for another baking project! I'm going for a new baked good just about every week now. While not all of them are blog worthy (a repeat recipe cinnamon roll batch and a last-minute pizza--see below), I did enjoy experimenting with a recipe my mom gave me for blueberry coffee cake. Since I didn't have the 9x13-inch pan or the yogurt she used in her original recipe, I opted to make muffins with half the batter, and a loaf cake with the other half. I think it turned out quite nicely for such an adaptation. Let's call them Blueberry Coffee Cake Muffins:

Ingredients:

2 and 1/2 cups whole wheat pastry flour plus extra for dusting
2 teaspoons baking powder
1/2 teaspoon baking soda
Dash of salt
1 and 1/3 cups brown sugar
1 egg
1/3 cup of oil
12 ounces buttermilk (instead of yogurt that my mom used)
1/3 cup unsweetened applesauce
2 teaspoons vanilla extract
2 cups frozen blueberries (Mom's original recipe called for fresh blueberries but this was all I had)

Directions:

1.) Preheat the oven to 375 degrees. In a large bowl, sift the flour, baking powder, baking soda, and salt together.

2.) In a separate bowl combine the brown sugar, egg, oil, buttermilk, and applesauce. Slowly and carefully add the wet ingredients to the dry ingredients, stirring until just combined, then pour the batter in 12 muffin cups lined with paper and a loaf pan sprayed with nonstick cooking spray.

3.) Rinse the blueberries and dust them in a little bit of flour so they won't sink in the muffins. Drop about 4-6 blueberries into each muffin, pushing them deeper into the batter with a spoon. Layer just a little bit of extra batter on top of the blueberries in the muffins so they can barely be seen. Fold the rest of the blueberries into the loaf pan batter.

4.) Bake the muffins and the loaf separately for approximately 22 minutes each (may be a little light on the muffins, but I like them that way. The loaf came out perfect with the toothpick test).

5.) Allow both to cool slightly before eating! You can spread butter on the loaf or eat the muffins with sugar dusted on top.

These turned out nice and fluffy with just the right amount of sweetness without being too sweet. I like how the muffins rose and spread to a nice size as well. And then there's the health factor--less guilt with whole wheat flour, applesauce, and blueberries to make this treat a little more wholesome. It really hit the spot when I taste tested the loaf for breakfast and the muffins for lunch!


Cinnamon rolls and pizza from this week:


It's good to be baking again.


Saturday, March 2, 2013

Wheat Free!


I miss coffee.

It's not so much the caffeine I need as the intense flavor, rich aroma and warm breakfast beverage that even the finest green tea just can't seem to replace in my heart. But for 40 days I'll go without, since this is the season of Lent for Catholics, which lasts right up until Easter (this year on March 31). Even if you're not Catholic or not particularly religious, giving up an (arguably) obsessive habit for a certain period of time can definitely make you appreciate things in life you might take for granted. Many give up technologies and ultimately spend more valuable time with family. Others avoid candy or soda to realize just how quickly their waistlines diminish. I'm giving up coffee on a dare, but I'm also giving up a part of my life that's a lot bigger. Or rather, smaller: I'm giving up wheat.

"Did I read that correctly?" you might ask. "Miss Muffin/Cookie/Pastry Baker is going to go without a quite major ingredient needed to make muffins, cookies and pastries?  Is she just not going to bake at all until Easter?"

Well, no, actually. Giving up wheat for 40 days has shown me the kinds of possibilities out there to those with gluten intolerance who must eat GF (Gluten Free) as well as to those who just want to avoid potentially over-processed foods (yes, I'm one of those people looking into the Wheat Belly book by William Davis to lose a little belly fat).

What have I discovered? Corn. Rice. Almonds. Coconuts. Potatoes. Oats. All with the potential to help create delicious baked goods without a single grain of wheat.

My research naturally prompted a new experimental recipe, since I love to experiment almost as much as I love to bake. Craving muffins and thinking about cornbread, I searched the Internet for a GF concoction that might just serve the purpose. I found a Food Forum blog post by writer Margaret Hartley and swiftly adapted her gluten-free cornbread to fit my preferences: muffin tins, brown rice flour, honey and buttermilk in place of skillets, GF flour mix, brown sugar and just milk. Though you could try her original recipe, I am just pleased my own Cornbread Cakes actually turned out edible. They fulfilled my cravings at least!

Cornbread Cakes (Wheat Free!)

Ingredients:

3/4 cups brown rice flour (white rice flour will also work)
1 and 1/3 cups cornmeal (I only had course ground available, so the cakes will be a bit crunchy unless you have fine ground meal)
1/2 teaspoon salt
2 Tablespoons honey
3 Tablespoons melted butter (slightly cooled)
2 eggs
3/4 cup buttermilk
1/4 cup skim milk
1 cup chopped or frozen blackberries (optional--I couldn't find the blackberries I wanted)

Directions:

1.) Preheat the oven to 400 degrees. In a bowl, combine the flour, cornmeal and salt.

2.) In a separate bowl, combine the honey, melted butter, eggs, and buttermilk, stirring quickly so the mixture doesn't curdle. Add the wet ingredients to the dry ingredients and stir just to combine (do not overmix).

3.) Pour the batter into a muffin tin greased with nonstick cooking spray and bake for approximately 10-12 minutes, until the edges start to brown (the tops might still be light). Then let them cool just slightly before removing them from the pan and serving warm, with or without butter.

Mine turned out just a little more dry than I'd hoped, and crunchy due to the course ground cornmeal, but that's okay for a corn cake side vs. a corn cake "dessert."  Next time I might up the butter and sweetener just a touch, and adjust the oven time accordingly. But these were still quite edible with positive reviews from my mom already (I just baked them this morning). I like the hint of rice flour flavoring and the fact that these are so easy to put together. Just keep in mind, they won't rise (no leavening agent like baking powder or baking soda) because they're meant to be skillet style. But you'll get a descent little cake out of them with a perfect corn taste and no wheat required!

Corn is just the tip of the iceberg, too. With so many great grains, nuts and more out there, I don't miss wheat nearly as much as you might think. My blog posts might be a little infrequent during the month of March because of a busy work schedule, but not because of a lack of resources. I'm happy to appreciate what's out there for baking and focus more on treats that do have more health benefits too. It is nice to know I can make a sacrifice and still enjoy the occasional breakfast pastry or evening dessert with a nice cup of tea.

But I still miss my coffee.

Thursday, November 22, 2012

Oatmeal Cranberry Breakfast Muffins


Whoops, looks like I went a little out of order here. I forgot I made these Oatmeal Cranberry Breakfast Muffins back some time in June (Another sign that my memory's going)? I also don't really remember how they tasted, but they are a healthier treat, with a recipe taken right off a bag of flour. This one I believe I followed almost to the letter, but if you can't read the directions in the photo, I'll still type it out below if you'd like to try recreating a healthy morning snack!


Ingredients:

2/3 cup whole milk (I'm pretty sure I used fat free)
1/4 cup vegetable oil (Canola)
1/4 cup molasses (I love me some molasses)
1/4 cup brown sugar
1 egg
1 cup white whole wheat flour
1 cup quick cooking oats
1 Tablespoon baking powder
3/4 teaspoon cinnamon
1/8 teaspoon nutmeg (my mom loves nutmeg)
1/4 teaspoon salt
1/2 cup dried cranberries (I usually go with Ocean Spray Craisins, since they're easiest to find)

Directions:

1.) Preheat the oven to 400 degrees or 375 degrees if using a convection oven. Then in a bowl, combine the milk, oil, molasses, sugar and egg.

2.) In a separate bowl, combine the flour, oats, baking powder, cinnamon, nutmeg, salt and dried cranberries. Stir in the milk mixture until everything is just combined. (According to the bag, it's supposed to be lumpy, so don't worry).

3.) Line a muffin tin with paper liners and fill each about 1/2 full (should be enough for at least 12 muffins). Bake about 15 minutes (12 minutes for a convection oven) and let cool slightly before removing from the tin.

With the nutmeg and the cranberries, this would probably make a perfect fall treat, so I'm almost caught up to the season!


Saturday, May 12, 2012

Easter Treats--2012!


For me, holidays are all about tradition. Family, of course, and tradition, and often times religious backgrounds. I know the true reason Easter exists, but I'm here today to talk about the foods it has inspired me to make from such secular traditions as honoring the iconic animals that have come to symbolize a holiday right smack in the beginning of spring. How could I not dye eggs and bake something for bunnies? Thus I present to you first my recipe for Colored Easter Eggs (my traditional go-to every year) and then a new attempt using a box mix (gasp--yes, I was in a hurry) to create Carrot Cake Muffins.

Colored Easter Eggs

Ingredients:

1 teaspoon white vinegar
Hot tap water
Food coloring

Directions:
1.) Fill paper cups about 2/3 of the way full with hot tap water. Add the vinegar and stir.

2.) Place 10-20 drops of food coloring into each cup, stir again, and carefully submerge your egg into the colored water. To get the exact shade of a color you'd like, follow the number of drops recommended on the back of the box. My favorite brand is McCormick, and their food coloring drop tips can be found here.

3.) Leave in 5-10 minutes depending on how dark you want your colors to be. Carefully remove each egg with a plastic spoon and store in the egg carton. Refrigerate overnight and enjoy on Easter morning!

Carrot Cake Muffins

Ingredients:

1 cup hot tap water
1 pouch of carrots and raisins (it comes in the box)
2 eggs
1 stick softened butter
1 cup oats

Directions:

1.) Follow the directions on the box for "Carrot Cake Cookies" but place in a muffin tin lined with paper cupcake liners instead (my cookie attempt did NOT end up tasting as delicious as when I put these into muffin form). First preheat the oven to 350 degrees and rehydrate the carrots and raisins by soaking them in the hot tap water for about 5 minutes. Drain and pat dry with paper towels. 

2.) In a large bowl, combine the cake mix, butter and eggs, stir in the oats, then stir in the carrots and raisins.

3.) Fill the muffin cups about 3/4 of the way full and bake approximately 12-15 minutes before removing from oven to cool.

Despite the "cookie" recipe, these really did taste best in muffin form. No frosting necessary--they were already quite sweet on their own. And, of course, presentation is everything. I used the Wilton brand Pink Petal baking cups as paper liners to make my muffins look like garden flowers. In the end, both my families (the one at home and the one at the library) were able to enjoy my favorite holiday tradition of all--sharing and eating delicious food together.

The back of the box--recipe at the bottom!


My cookie attempt--in the shape of carrots...kind of....

A beautiful garden!

Wednesday, March 14, 2012

Failed Experiments Part II: Banana Muffies


I did not set out to make Banana Muffin Tops (or "muffies" as the bakery/cafe/restaurant Panera likes to call them) on the morning of Sunday, March 11. But I was on a runner's high from having gotten a good jog in for the first time in weeks (56 days to be exact, but who's counting?) and I was energized to bake on my one full day off. I started with pancake batter because my dad always wants pancakes for breakfast on Sunday. Then I assessed what ingredients I had around the house and what I could throw together without even glancing at a recipe.

That's right, I attempted to make a baked good recipe-free.

This is a big deal for me. I love to experiment but I need to have some kind of foundation for my experimentation. I need order for things to make sense. Baking is a science and science needs to be exact so that other scientists can later repeat the process (that's what the scientific method--question, research, hypothesis, experiment, data, conclusion--is all about). But I figured, "What the hey? After all the baking I've done, I can probably throw something together with proper proportions from memory, right?"

You may think now is the time to shake your head sadly or just laugh in my face. You may be expecting a photo of exploded banana muffin batter to come next....  But unlike my truffle failure, this baking experiment turned out with the perfect shape and texture (see the picture above). It was in flavor, however, that I failed.

And I wouldn't even call it a failure--just not quite the success I was going for. Cutting perhaps a bit too far back on oil and sugar, the taste of these muffins was just "all right."  Though they smelled delicious both in the oven and when my mom sliced one in half and grilled it on the stove. So if you attempt to make this healthier version of a banana muffin tops (or regular banana muffins if you don't have "muffin top" pans or cups), you might want to remind your taste testers to butter them, jam them up, or even add a little frosting on top to give just a little extra moisture (as well as sugar or fat--because that is what makes things taste good) to an almost successful experiment.

Ingredients:


1 and 1/2 cups whole wheat pastry flour sifted
1 teaspoon baking soda
2 pinches of salt
3 small bananas, ripe and mashed
1/4 cup brown sugar
1/2 cup buttermilk
1/2 cup fat-free milk
2 Tablespoons canola oil
1 egg
1 egg white

Directions:


1). Preheat the oven to 375 degrees. Line a baking sheet with muffin top paper liners or grease a regular muffin pan with nonstick cooking spray.

2). In a large bowl, combine the flour, baking soda, and salt. In a separate bowl, combine the bananas, sugar, milks, oil, and eggs.

3). Add the wet ingredients to the dry ingredients and stir until everything is well combined but not overmixed. Lumps are definitely okay.

4). Pour the batter evenly into the muffin cups and bake for about 10 minutes (a little longer if you're making muffins instead of muffin tops) until a toothpick inserted in the center of the muffie comes out clean.

If I attempt this recipe again, I will likely add a little more oil, a little more brown sugar and perhaps experiment with the kind of dairy I use as well. In theory, these muffins can be made with just buttermilk, just milk (fat-free probably isn't the best option, though), or even yogurt or sour cream. Perhaps two eggs would be better than one egg white (that one was leftover from the pancake batter's egg yolk). And if the bananas I chose to use had been just a touch riper, the muffies probably would have been a little sweeter and more moist too.

So here's to hoping my next recipe is an absolute knockout! Want a preview of coming blog attractions? Well, I do have plans for a fun St. Patrick's Day cookie treat (hopefully I'll have time to post it during the actual month of St. Patrick's Day). And I also just bought myself a donut pan this very evening. I'm imagining a donut with bacon. You just can't fail with bacon. I can't wait to try it out and share!

Thursday, August 4, 2011

My Go-To Blueberry Muffins


Another coworker's going-away party this summer meant more bittersweet goodbyes as one more friend left my library district to start a new and exciting adventure in another state. It also meant another opportunity for baking. Well, I just couldn't show up to the party empty handed.

I brought baklava to the last party, but this latest event was specifically a breakfast affair. "What to bring, what to bring?" I wondered. Pancakes and French toast are my favorite breakfast foods to make, but don't exactly transport well. I didn't have time to bake the night before, so it had to be something I could bring together quickly the morning of--before the 8 a.m. party and after my 5 a.m. jog. That usually meant some sort of pastry. And my list of perfect breakfast pastries begins and ends with "muffins."

Now there are so many different types of muffins out there, it's almost ridiculous. You can make them sweet, savory, with any kind of fruit, nuts, chocolate chips, peanut butter, corn, carrots, spices, buttermilk, yogurt, sour cream--oh, the list goes on and on. You just can't whip them up with an electric mixer and frost them because then they become cupcakes. And while you might love yourself a nice cupcake, I personally prefer the more rustic texture of a good muffin over a fluffy, airy, saccharinly sweet, too-much-gobs-of-frosting...but that's another rant. The point is that the decision of "what muffin to make" can be a little overwhelming sometimes. So for this breakfast I decided to go traditional, and traditional for me meant "blueberry."

I first made these muffins for an old boyfriend of mine, and it has remained my Go-To Blueberry Muffin recipe ever since. It's easily adaptable to both my "jumbo" muffin pan and my "mini" muffin pan, and makes at least two batches of regular muffins if you just have the standard-sized tin. The secret ingredient is the almond extract, which pairs especially well with blueberries and buttermilk. I just love the smell!

Ingredients:

8 Tablespoons unsalted butter, softened
1 cup sugar, plus more for the topping
2 eggs
1 teaspoon almond extract
2 and 1/4 cups buttermilk
4 cups whole wheat pastry flour, sifted (any flour will work, but I always go with wwpf)
2 teaspoons baking powder
1/2 teaspoon salt
1 and 1/2 cups blueberries + 1/2 cup blueberries for the topping
1/2 cup sliced almonds (optional)

Directions:

1.) Preheat the oven to 400 degrees. In a medium-sized bowl, combine the butter and sugar with a fork, mixing thoroughly. Add the eggs one at a time, then add the almond extract and buttermilk. Stir just to combine.

2.) In a separate and larger bowl, combine the flour, baking powder, and salt (I like to sift all three ingredients in). Gently fold in the 1 and 1/2 cups of blueberries.

3.) Carefully add the buttermilk mixture to the flour mixture, stirring just to combine (Over stirring could result in denser muffins, and stirring too quickly or harshly could cause the blueberries to break and turn the mix purple...). Use an ice cream disher or large spoon to drop the batter into a muffin pan sprayed with nonstick cooking spray or lined with paper muffin cup wrappers.

4.) Add a couple of blueberries to the top of the batter in each filled muffin cup so they will be visible after baking. Sprinkle with extra sugar (I like to use white sugar crystals to stand out more) and almond slices if you desire.

5.) Bake for about 15-20 minutes (17 worked best for me). These muffins tend to come out "blonder" than most of my "golden brown" baked goods, so use a toothpick inserted into the center of one of the muffins to test for done-ness. If it comes out with batter still stuck to it, leave the muffins in a little longer. If the toothpick comes out clean, you're good to go!