Saturday, September 28, 2013

Crispy Rice Treats II: Strawberry!


Back in the fall of 2011 I posted about a Crispy Rice Treat experiment involving brown rice cereal and marshmallows that is definitely not trademarked (um, see original Kellogg's recipe here). I thought I had a solid go-to recipe any time I wanted a rice treat.

Then my Mom bought me some cereal.


It was on sale at Fresh & Easy, so she bought a little extra and let me try my own box. Now, I've certainly had rice cereal before and I can tell you they all pretty much taste the same. It's puffed rice. And that's it. But when you add strawberry to puffed rice you get something with the simple goodness of rice cereal and something even better: pink milk (edit: I should mention that this was almond milk for me, but I'm assuming the same thing would happen with dairy milk too). My first bowl tasted just like that Nestle childhood favorite: Strawberry Quik! Or, for those raised after 1997: Strawberry Nesquik!

That made me happy.

And then I had an idea.

Since I've seen crispy rice treat recipes with so many variations (mostly the amount of butter changes) and I didn't want to mess this experiment up, I went back to that classic Kellogg's recipe again and simply substituted the Goodness cereal in place of the Kellogg's brand. Unfortunately, my pan wasn't big enough to hold 40 large marshmallows plus 6 cups of cereal (I really should have halved the recipe). But once I transferred the mix to a pot it all turned out all right in the end.

Ingredients:

3 Tablespoon butter
40 regular marshmallows (the campfire kind rather than the mini)
6 cups Fresh & Easy brand Goodness Organic Cereal: Strawberry Crispy Rice (It's a mouthful to say, but it worked great! I haven't found another strawberry rice cereal but if you know a good brand feel free to share!)

Directions:

1.) In a very large nonstick frying pan (or just go with a nonstick pot if you have one), melt the butter on a low heat. Add in your marshmallows and let them sit a couple of minutes (while you monitor them) until they slowly start to melt too.

2.) With a wooden spoon (coated in nonstick cooking spray) stir the marshmallow mixture until marshmallow chunks are no longer visible and the mix is smooth. Then add in your rice cereal, stirring after every couple of cups so that the cereal is nice and evenly coated.

3.) Pour the treats into a 9-inch by 13-inch pan coated in nonstick cooking spray and press evenly into place with the spoon (or with your hands, which you can cover with plastic baggies coated with nonstick cooking spray). I didn't have the right size pan with me, so I used a cookie sheet pan with a lip to spread out the concoction and shape into a rectangle with my hands.

4.) Once the treats have cooled, cut them into rectangle pieces (the best you can with a large knife that won't scratch your pan) and separate the individual portions. Serve within a day or two so they don't get too hard from staleness.

I'm not gonna lie. These treats were messy. My rectangle-cutting skills leave a lot to be desired and the marshmallow in the treats kept sticking to everything (spoon, pan, fingers, each other)! But--also not a lie--they were so so good! Almost a little too rich (from the butter) but not quite. And very addicting (me and my taste tester nibbled on the little bits stuck to the spoon, measuring cup, pan, etc. and still went back for seconds...).

Easy to make, not too unhealthy for a "treat" (organic rice plus naturally nonfat marshmallows) and a unique flavor that's reminiscent of childhood. What more could you ask for? Maybe just a cup of coffee....

Not exactly a rectangle. Or a square. But not bad, right?

Wednesday, September 25, 2013

Cheddar Pear Pie!


Strange name. Serious pastry.

This recipe's been in the family for years. Or, at least, in my immediate family. My mom used to bake the delectable, surprising Cheddar Pear Pie ever since I was a kid. And unlike most picky eater children, I embraced the concept--strange as it might sound (I also happened to love zucchini bread, eggs with syrup, and pizza dipped in ranch dressing).

And yes, it does sound strange. When I found a jar of Trader Joe's Pear Halves in White Grape Juice, I was inspired to dig up the old familiar recipe and experiment a bit with pears that were already peeled (easy!) and wouldn't go bad as fast as fresh fruit (practical!). But every guy I mentioned this pie plan to was skeptical. "Cheese? In a pie? I'll...take your word for it."

Oh please. Guys eat cheesecake all the time and don't bat an eye at the fact that yes, you're actually eating cheese in your dessert. Probably because cheesecake is so gosh-darn delicious. Just like Cheddar Pear Pie. If you're willing to give it a chance.

Now you may remember that I'm lactose intolerant (I don't get to have gosh-darn delicious cheesecake all that often), but the amount of cheddar in this pie is actually pretty minimal--just enough to add a hint of sharpness to an otherwise sweet dish and give the topping a nice golden brown crumble crust on the top. I also use Whole Foods' whole wheat pie shells for the crust on the bottom so you get an extra little health benefit there.

With the jarred pears and pie shell shortcuts, this recipe is actually a piece of cake (er, easy as pie?) to put together for a quick and astounding dessert. After a little research I determined the original source of the family recipe was actually a 1998 Taste of Home Magazine (Mom, you didn't invent it yourself??), so that may also help lend some credibility to the CPP concept for any remaining cynics in your taste-testing audience (16 of 17 Taste of Home online reviewers gave it 5 stars, guys).

Thus, without further ado, I give you the recipe for one of my favorite fruit pies:

Ingredients:

3 pears, peeled (an entire 25-ounce jar. It won't fill the pie shell to the brim, but I only had one jar. The original recipe calls for at least 4 pears).
2 Tablespoons cornstarch
1/8 teaspoon salt
1 whole wheat pie shell

For topping:
1/4 cup (4 Tablespoons) butter, melted
1/2 cup flour (I use whole wheat pastry flour, as always)
1/4 cup sugar
1/4 teaspoon salt
1/2 cup shredded cheddar cheese

Directions:

1.) Preheat the oven to 400 degrees. Spoon the pears into a large bowl and slice them into even pieces (I cut each half into about four slices). If you're using jarred pears, make sure to drain out all water from the jar and dab the pears in the bowl with paper towels to remove excess moisture. Then add the cornstarch and salt, and mix until you can't see the white of the cornstarch anymore. Pour the pear mixture into the empty pie shell.

2). In a separate bowl, melt the butter and add in your flour, sugar, and salt in the same bowl. Stir the topping ingredients together, then fold in the cheddar cheese. Work into a dough with your fingers to blend everything thoroughly, then use your fingers to crumble the dough.

3.) Sprinkle the crumbled dough on top of the pears in the pie shell until they are completely covered. Then use foil to cover the pie and prevent burning of the cheese and crust edges. Bake approximately 40 minutes at 400 degrees (you might want to check the pie after 30 minutes to make sure your oven isn't browning it too much). Then lower the oven temperature to 325 degrees and bake an additional 5-10 minutes if it's not quite brown enough (I was going to go with 10 minutes but was so afraid of burning that I took it out after 5 and the pie still came out perfect).

4.) Remove the pie from the oven and allow it to cool at least 10 minutes. Serve while still warm (Personally, I don't mind cold pie, but this one tastes so good when heated up!). Store any leftovers (as if) in the fridge to prevent the pie from going bad. I mention this now because I forgot to store my Pumpkin Nut Bread in the fridge after a couple days (I left it sitting out on display in my kitchen under a nice glass dome) and the next two pieces I ate upset my stomach (a problem that I couldn't immediately identify the source of--I mean, it wasn't a dairy-based dessert so why was it making me sick? And then I realized, oh yeah, no preservatives).

The original recipe from Taste of Home actually calls for a temperature of 425 degrees and baking for 25-35 minutes. I would recommend scrapping that and going with my experimental version instead as I have tried making Cheddar Pear Pie in years past only to have burnt cheese and watery filling. This latest pie, however, came out solid (held up well to each pie server slicing) and can be seen as anything but burnt in the pictures above and below. As for the taste--that still lived up to my expectations from childhood. After carving out pieces for myself, my mom, and leaving a little behind for my dad and brothers, I took a slice to one of my guy taste testers who (unlike my family) had never heard of Cheddar Pear Pie.

I heated it up in the microwave, plated it, and waited. The piece was literally gone in seconds. Still, I needed a quote for all the skeptics out there.

"How was the pie?" I asked.

"Delicious!" was the response.

So now I have something to tell my disbelieving guy friends. They don't even have to take my word for it.


Thursday, September 12, 2013

Toaster Pastries (Fake Pop-Tarts!)


Okay, so here's a quick dessert I put together with the exact criteria of: easy, fast, and possible with just the things I already have in my fridge and pantry (no time to grocery shop!). I was inviting a friend over after work (more like a request for computer tech support...) and wanted to make sure I not only had dinner to offer in thanks (teriyaki chicken rice bowls) but also some kind of dessert. My guest already sampled the previously posted Pumpkin Nut Bread, so I needed something new. However, I only had a few minutes to prep something before work and was already dealing with:

1. Computer breaking (of course)
2. Fridge leaking (after already being fixed once!)
3. Spilling hot water from the rice bowl vegetables on the floor
4. Spilling hot water from the rice bowl vegetables on my feet
5. Laundry buzzing
6. Dishes overflowing
7. Trash overflowing
8. The fact I still had to shower and change clothes for work

(Being an adult is such fun, isn't it?)

Luckily it was my evening shift at work, so I had a whole morning at least to handle these chores. But getting off work in the evening also meant no time to plan and bake an elaborate dessert or go grocery shopping before my guest arrived. It was time to look in the pantry. Time to look in the fridge. Time to get those creative juices flowing.

I had one leftover refrigerated pie crust and one unopened jar of jam ("Unopened" is a key word here because all my jars of peanut butter, for instance, were "open," which meant "eaten out of," which meant I'd double dipped in them at least once.... Otherwise I might have whipped up this quick peanut butter cookie recipe for dessert instead).

So, remembering that I saw a recipe involving jam-filled pastries online just the other day, I turned to my phone's Internet and quickly searched my go-to Allrecipes.com. I couldn't find the exact pastry I'd spotted before (it may have been some kind of kolacky?), but I did land on a page for the "Toaster Pastry" (fake Pop-Tart) kind. Called Top Tarts by recipe author "kellweeeeezy," this dessert uses only six ingredients if you follow it to the letter, and is easily customizable if you don't. Here's my take on Toaster Pastries:

Ingredients:

1 refrigerated pie crust (I used Pillsbury since that was what I'd found at the store previously)
8 teaspoons strawberry jam (I look for jars with reduced sugar and NO high-fructose corn syrup)
1 cup sugar (I didn't have confectioner's sugar)
5 Tablespoons (an estimate--this doesn't have to be exact) fat-free evaporated milk (I don't keep regular milk in my fridge but do have evaporated milk for pumpkin pies...)
1/2 teaspoon vanilla extract
Sprinkles (if you have them, it does make the pastries quite pretty. Unfortunately, the only ones I had were expired and somewhat anemic looking...).

Directions:

1.) Preheat the oven to 425 degrees. Let your pie crust sit out until it reaches room temperature, then roll the dough with a rolling pin until it forms close to a rectangle shape.

2.) With a pastry wheel (or a pizza wheel/knife/etc. will work), cut the dough into an even number of smaller rectangles of the same size (My pie crust allowed for 8 rectangles, which makes 4 pastries. The original recipe makes 8 pastries total). Place 2 teaspoons of strawberry jam in the center of half the rectangles and spread it with a spoon to reach about 1/4 an inch from the edge (It may be hard to get exactly 1/4 an inch, so just keep in mind that the closer the jam gets to the edge the more likely it will be to spill out during baking...).

3.) Top the jam-filled rectangles with the plain rectangles and crimp the pastries together with a fork. You can also prick them with the fork to form letters showing what kind of jam is inside or to claim which pastry will ultimately be yours! Then bake the pastries on a cookie sheet coated with nonstick cooking spray for about 7-9 minutes (I couldn't bake them on parchment paper since my parchment paper is only oven safe up to 420 degrees. And yes, I've had parchment paper burn in my oven before).

4.) In a bowl, combine the sugar, milk, and vanilla until a thin icing forms. After the pastries have been removed from the oven (mine started to get golden brown at about 9 minutes), let them cool at least 5 minutes before drizzling with icing. If you have non-expired sprinkles, you can sprinkle them on at this stage too.

5.) Refrigerate your pastries for later toasting or enjoy at any temperature. If you eat them while still warm (or if you reheat them) just keep in mind that the jam will get a lot hotter than the pastry. Tongue-burning hot. But oh so gooey good.

I taste-tested a pastry during my lunch at work and was pleased with the result as well as with the break in my day from crazy adulthood. Nothing like fake Pop-Tarts to take you back to a time before broken electronics, leaking fridges, vegetable cooking, laundry, dishes, trash, and work were your responsibility. Let's all take a moment to savor the sweetness of childhood and offer up thanks for quick and easy desserts.


Tuesday, September 10, 2013

Pumpkin Nut Bread


It's dangerous this time of year.... Not because of upcoming ghosts, goblins, and T.P. house pranks that next month will ultimately bring, but because on August 29, before the last full month of summer was even over, my dad texted me seven precious words--and one smiley: "Pumpkin Spice Latte is back at Starbucks. =)"

Dangerous words.

I don't care if the high is 100 degrees (though this week's rain has brought the outside temperature down a few notches). I don't even actually order Starbucks lattes and frappuccinos all that often (quite a bit of sugar, sadly, because the coffee addict in me wants them bad). But if Pumpkin Spice is back at Starbucks, that means it's officially fall.

It's OFFICIALLY FALL. 

And my hands are rubbing together with pumpkin scheming already....

If you know me, you probably remember that fall and winter are my favorite times of year (baking for Halloween, baking for Thanksgiving, baking for Christmas, baking for Valentine's Day...). So naturally I am more than thrilled that stores are starting to pull out their Halloween decor (giving me ideas for upcoming costume parties) magazines are offering autumn themed recipes and Pumpkin, Pumpkin, Pumpkin is showing up on the shelves of grocery stores in a variety of forms. Canned, of course, (will need that for baking, thank you), in coffee (OMG, my favorite in K-cup form), as candy and even in granola (I miss this one, please let me know if you see it on the shelves of Trader Joe's).

And naturally, I must write an obligatory Pumpkin blog post to remind you just how Pumpkin crazy (you get the idea) I really am.

My first pumpkin dish of the year (don't worry, pies will come soon enough) was brought to me by my mom from her friend who offered up a recipe for Pumpkin Date Bread, promising that golden raisins could be substituted for the dates if I didn't have any (I don't).

While I'm typically not inclined to corrupt my pumpkin products with nuts, fruit, or even chocolate chips, I thought I'd try something different and keep the recipe's additions (though I did cut the original recipe in half to make one loaf instead of two). I call it Pumpkin Nut Bread so when friends try it they'll expect to bite into something more than just pumpkin. The original recipe comes from a Taste of Home magazine of unknown origin (though I can see the original page number was 42...spooky).

Ingredients:

1/2 cup applesauce (unsweetened)
1/2 cup canned pumpkin
1/3 cup canola oil
1 and 1/2 eggs (accomplished with one whole egg and one egg yolk)
1/4 cup fat free evaporated milk (original recipe just calls for milk but this was all I had on hand--ready for pies)
Half of 1/3 cup (I estimated) molasses
1/2 teaspoon vanilla extract
1 and 1/2 plus 1/3 cups whole wheat pastry flour
1 cup sugar
1 teaspoon baking soda
1 teaspoon cinnamon
1/2 teaspoon nutmeg
1/4 teaspoon baking powder
1/2 cup golden raisins
1/2 cup chopped pecans (I broke them into pieces with my hands)

For topping:
1/8 cup brown sugar
1/8 cup chopped pecans (also with hands)
1/4 teaspoon cinnamon

Directions:

1.) Preheat the oven to 350 degrees. In a large bowl (the largest mixing bowl you have), combine the applesauce, pumpkin, oil, eggs, milk, molasses, and vanilla. In a separate bowl, sift the flour, sugar, baking soda, cinnamon, nutmeg, and baking powder.

2.) Slowly (in batches) add the dry ingredients to the wet ingredients and stir after each addition to combine. Fold in the raisins and pecans. Then pour the batter into a loaf pan greased with nonstick cooking spray.

3.) In a new bowl (or you can wipe out the dry ingredient bowl), combine the brown sugar, extra chopped pecans, and cinnamon. Sprinkle the topping over the batter and bake for about 55 minutes (check with a toothpick after 45 minutes, just in case your oven is more powerful than mine). I also covered mine with foil for the first 35 minutes to prevent the pecans in the topping from burning.

4.) Let the bread cool about 15 minutes before serving.

My resulting loaf baked high, was fluffy soft with an occasional pecan crunch, and was rated highly by my taste-tester football-watching crowd (yes, I brought the bread to a Monday-night game. It's the most I have to contribute to the sport of football). Even a friend who claimed to dislike pumpkin bread took two (three?) slices and asked for the recipe to boot.

So this one's definitely a winner by itself, though if I were to recreate the recipe, I might adjust the topping--1/8 cup of pecans is just not very much. Or I may try a topping/nut/raisin-free version that's just for butter and jam spreaders.

While some Americans are hiding away this season in football hibernation "man caves," I'll be hiding away in my kitchen concocting fall recipes and planning crazy pumpkin spice purchases like an out-of-her-"gourd" mad scientist. Bwa ha ha--let's laugh in the face of danger.

Thursday, August 29, 2013

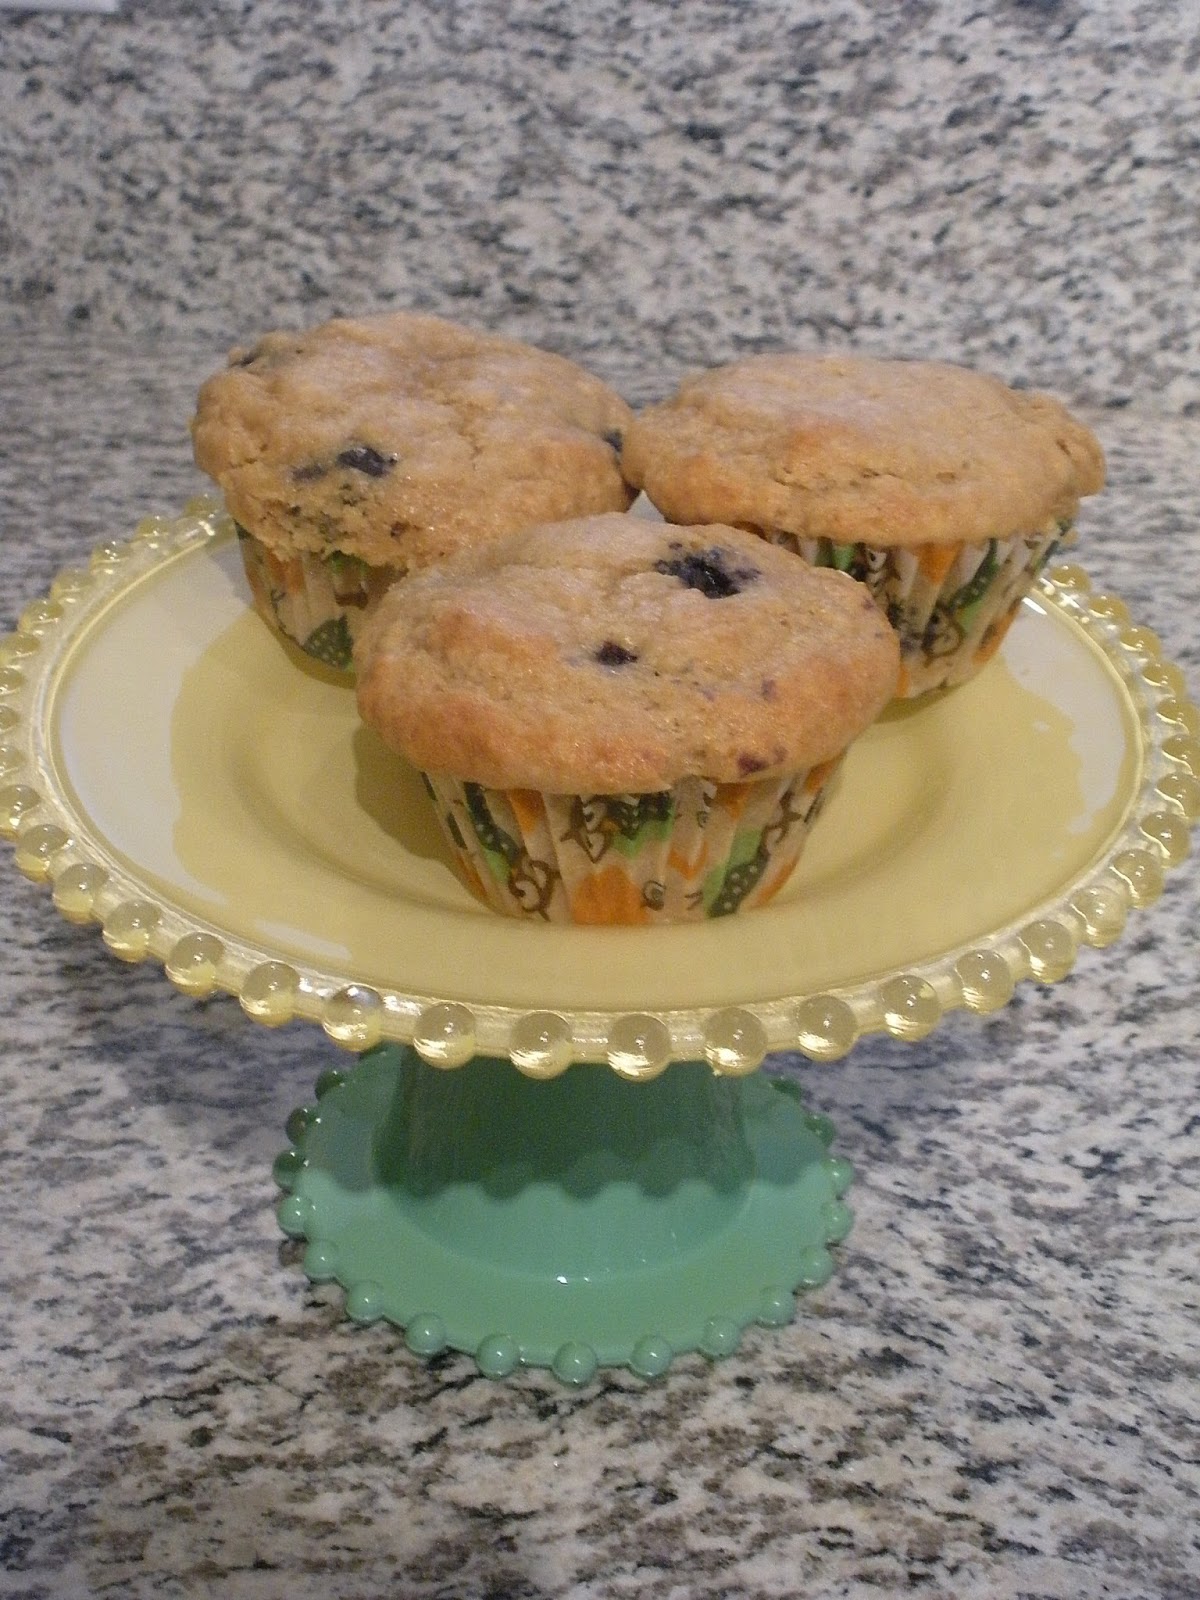
Blueberry Coffee Cake Muffins!


Time for another baking project! I'm going for a new baked good just about every week now. While not all of them are blog worthy (a repeat recipe cinnamon roll batch and a last-minute pizza--see below), I did enjoy experimenting with a recipe my mom gave me for blueberry coffee cake. Since I didn't have the 9x13-inch pan or the yogurt she used in her original recipe, I opted to make muffins with half the batter, and a loaf cake with the other half. I think it turned out quite nicely for such an adaptation. Let's call them Blueberry Coffee Cake Muffins:

Ingredients:

2 and 1/2 cups whole wheat pastry flour plus extra for dusting
2 teaspoons baking powder
1/2 teaspoon baking soda
Dash of salt
1 and 1/3 cups brown sugar
1 egg
1/3 cup of oil
12 ounces buttermilk (instead of yogurt that my mom used)
1/3 cup unsweetened applesauce
2 teaspoons vanilla extract
2 cups frozen blueberries (Mom's original recipe called for fresh blueberries but this was all I had)

Directions:

1.) Preheat the oven to 375 degrees. In a large bowl, sift the flour, baking powder, baking soda, and salt together.

2.) In a separate bowl combine the brown sugar, egg, oil, buttermilk, and applesauce. Slowly and carefully add the wet ingredients to the dry ingredients, stirring until just combined, then pour the batter in 12 muffin cups lined with paper and a loaf pan sprayed with nonstick cooking spray.

3.) Rinse the blueberries and dust them in a little bit of flour so they won't sink in the muffins. Drop about 4-6 blueberries into each muffin, pushing them deeper into the batter with a spoon. Layer just a little bit of extra batter on top of the blueberries in the muffins so they can barely be seen. Fold the rest of the blueberries into the loaf pan batter.

4.) Bake the muffins and the loaf separately for approximately 22 minutes each (may be a little light on the muffins, but I like them that way. The loaf came out perfect with the toothpick test).

5.) Allow both to cool slightly before eating! You can spread butter on the loaf or eat the muffins with sugar dusted on top.

These turned out nice and fluffy with just the right amount of sweetness without being too sweet. I like how the muffins rose and spread to a nice size as well. And then there's the health factor--less guilt with whole wheat flour, applesauce, and blueberries to make this treat a little more wholesome. It really hit the spot when I taste tested the loaf for breakfast and the muffins for lunch!


Cinnamon rolls and pizza from this week:


It's good to be baking again.


Monday, August 12, 2013

Buttermilk Banana Bread!


I'm trying to bake a lot more this summer. To help get me back into a groove, I started small. Peanut butter bananas dipped in dark chocolate (a slightly messy no-bake--see photo at end). Refrigerator cookie dough into chocolate chip cookies. Then a Pecan Pie from my holiday recipe collection to honor my grandmother. Finally, today, I just up and baked banana bread. Loosely based on the previously posted Banana Chocolate Bread, today I went chocolate free (no cocoa powder in the house...) and substituted buttermilk for milk (because we lactose intolerants don't tend to keep milk around the house either...). It was a bit of an experiment since I had to adapt the previous recipe's self-rising flour concept, and I didn't know if my bananas were ripe enough, and darned if I couldn't figure out what order to put the ingredients together in, but the timing was perfect and the results a delicious golden brown. This Buttermilk Banana Bread is taste test approved!

Ingredients:

1 and 1/2 cups whole wheat pastry flour (my go-to flour for healthy baking)
1/4 teaspoon plus 1/8 teaspoon baking powder
1/4 teaspoon plus 1/8 teaspoon salt
2 small-to-medium bananas
2/3 cup canola oil
2 eggs
1/2 cup white sugar
3 Tablespoons buttermilk (I had 2% on hand)

Directions: 

1.) Preheat the oven to 350 degrees. In a medium bowl, combine the oil, sugar and eggs and beat to thoroughly combine (I just used a fork).

2.) In a separate bowl, sift the flour, baking powder, and salt together. Add 2 Tablespoons of buttermilk and mix again.

3.) In a small bowl, mash your bananas. This is where I added my final 1 Tablespoon of buttermilk so that the bananas would be easier to whisk up. Add the egg mixture to the flour mixture, stirring slowly, then mix in the mashed bananas until the batter comes together (it's okay if it's still a little lumpy. Banana bread should be lumpy!).

4.) Pour batter into a loaf pan greased with nonstick cooking spray and bake approximately 40 minutes (Forty minutes gave it the perfect brown around the edges, crispy on the outside but still moist on the inside. Still, check your oven just to be sure as temperatures may vary). Remove from the oven and let cool at least 10 minutes before removing from pan and transferring to a wire rack to cool completely (though it tastes best warm).


Check out my other baking projects this month!


Thursday, July 11, 2013

Berry Cheesecake


It's time for a potluck! To welcome our new boss, my coworkers arranged a fun vegetarian potluck lunch and I couldn't wait to sign up! For a non-meat dish, I decided on bringing in the family's traditional Artichoke Dip that my mom makes for Christmas almost every year (and sometimes Thanksgiving, and sometimes random parties in between). And of course, I couldn't show up without a baked dessert! Since our potluck was right before the Fourth of July, I decided to make something red, white, and blue. The idea of Berry Cheesecake came to me before I had a recipe, but I'm always up for experimentation. This one's based off of the Sour Cream Cheesecake I made with my friend last April, with a few slight changes to make the cake berry fun!

Ingredients:

For crust:
1 and 1/2 cups graham cracker crumbs
1/3 cup melted butter
1/4 cup sugar

For filling:
2 eggs
2/3 cup sugar
1 teaspoon vanilla extract
8 ounces light cream cheese (softened)
1/4 teaspoon salt

For topping:
2 cups light sour cream
1/4 cup sugar
1 teaspoon vanilla
3 Tablespoons strawberry jam
5-6 large strawberries
1/2 cup blueberries

Directions:

1.) Preheat the oven to 325 degrees. Crush a box of graham crackers to create crumbs (I crushed mine in a ziploc baggie, or you can buy graham cracker crumbs already crushed).  Mix the crumbs, butter and sugar together, then press the mixture into a round cake pan. Bake about 8 minutes, then remove from the oven to cool.

2.) In a bowl, beat the eggs, then add the sugar, vanilla, cream cheese and salt. Combine all with an electric mixer until the mixture is smooth.  Pour on top of the crust and bake another 15 minutes.

3.) Let the cheesecake cool while you make the topping. Mix together the sour cream, sugar and vanilla extract. Stir in the strawberry jelly, then pour on top of the filling and bake another 10 minutes.

4.) Cool the cheesecake completely before refrigerating overnight. In the morning, slice your strawberries very thin, and use the slices to decorate the top of the cheesecake in a pattern with blueberries around the edges. Sprinkle the fruit with just a dusting of sugar and serve cold to keep the cheesecake as solid as possible.

And, though I didn't make it myself, here's my mom's famous Artichoke Dip!

Ingredients:

3 cans whole artichoke hearts
1 cup mayonnaise
2 cups powdered Parmesan cheese
1 teaspoon garlic powder (not garlic salt)
Paprika for sprinkling

Directions:

1.) Preheat the oven to 325 degrees. Open the cans of artichokes, drain, and cut into small pieces with kitchen scissors. Place pieces in an empty ceramic crock pot.

2.) Add in the mayonnaise, Parmesan cheese, and garlic powder, stirring so that all ingredients evenly combine. If the mixture looks too moist, add a little more cheese. If it’s too dry, add more mayonnaise. When you’re done mixing, smooth the top flat with the back of a spoon.

3.) Sprinkle paprika over the top of the dip until it forms a nice and even red layer that’s not too thick but still covers the artichokes. Bake at 325 degrees for about 25-30 minutes, watching the dip for the last few minutes to make sure it doesn't brown too much on the top.

4.) Remove from the oven and serve warm or refrigerate overnight. The next day, place the ceramic pot into the electric crock and turn on to heat a few hours before the dip will be served. Tastes best warm.