Wednesday, June 13, 2018
New Banana Bread!
Howdy y'all! It's been a while. Like, last published at the end of 2016 kind of while....
To be fair, 2017 was a bit of a busy year for me. Spring was a hectic time for work. Summer I traveled to three different states (California, Arizona, and Illinois). Oh yeah, and then I spent the last six months of the year planning a wedding...(to learn about fun bride-to-be exploits, check out my Engagement Entertainment blog).
But now I've settled in to married life, put away all those bridal shower gifts and registry items in the kitchen, and gotten back into baking...for fun!
I've had a few recipes that I've tried out in 2017 that I hope to post soon, such as a rice cooker birthday cake for my brother, and some breakfast egg dishes while married.
But today is all about going bananas.
I've made a lot of banana breads over the years--lots of banana items in general, and yet I couldn't help experimenting with a new recipe when I saw the video on Facebook from "I am Homesteader"'s Chocolate Chip Banana Bread. I needed something to occupy my mind while recovering from a small medical procedure, and I was desperate to eat real food again. My husband saw me watching the video and asked me if I was going to make banana bread.
"Why not?" I thought, and figured it might be a nice married couple bonding moment, if I could get him to help me out. We really needed to do something with the browning bananas on our counter, and I had recently cleaned our downstairs from top to bottom. I was ready to create something.
While experimenting with recipes can be hit or miss, when I discovered I was missing a few key ingredients for the recipe online I ended up having to substitute. I must admit these substitutions resulted in an extra tasty end result.
Ingredients:
2 cups whole wheat pastry flour (my usual, slightly healthier substitution for all purpose flour)
1 teaspoon baking powder
1 teaspoon baking soda
1 teaspoon salt
5 very ripe bananas
2 teaspoons vanilla
1/2 cup canola oil (I was out of unsalted butter and had already added salt to the recipe)
2 eggs
1 cup granulated sugar
1 Tablespoon molasses (to make up for the brown sugar I didn't have)
1 cup chocolate chips
Directions:
1.) Preheat the oven to 325 degrees and grease a light colored bread loaf pan to set aside. Then in a bowl, sift the flour, baking powder, baking soda, and salt.
2.) In a separate bowl, mash the bananas and then add the oil, sugar, molasses, vanilla, and eggs. Stir until combined but still a little lumpy (my husband begrudgingly did this part while watching anime videos on his iPad). Slowly add the wet ingredients to the dry ingredients, and then gently stir in the chocolate chips.
3). Pour the mixture into your prepared loaf pan and bake on the top rack approximately 40-60 minutes until a toothpick inserted into the center comes out mostly clean. This was the hardest part as the top kept browning (even while on the highest rack away from the fire), but the inside was still pretty moist. After about 40 minutes I turned off the oven and let it stay warm inside for about another 10 minutes, then removed from the oven to cool.
4). Cool completely (overnight works best) and carefully remove from pan with a knife run around the edges to loosen the bread. Refrigerate if you're not serving right away (it's also easier to cut when cold) and then serve re-heated with butter for best taste.
This bread came out especially moist, sweet but not too sweet, and tasted amazing heated on the stove with my favorite butter spread. While my husband did help make it (sort of), he was the best help at eating it (I can't finish an entire loaf on my own!). We delivered some slices to my parents and brothers as well, and still had a little left to enjoy days later.
I think I have a new go-to banana bread recipe! And a new motivation to start baking again! Hope to see you soon!
Sunday, December 4, 2016
Gingerbread!
It's beginning to look a lot like Christmas! Facebook posts galore. There's a tree on each profile page, photos of tablescapes. I'll get behind if I don't find decor!
At least, that's how I felt this weekend. I had already planned to hang ornaments on my little Christmas tree when the week finally came to an end, but after seeing how far along my Facebook friends and real-life neighbors were in getting their Christmas spirit on, I felt it was time to do some holiday decorating and spontaneous Christmas activities of my own. I decked out my front yard tree in lights, watched a Yule Log video on Netflix, and decided to bake gingerbread cookies!
Now I've made gingerbread cookies before, but I didn't know if my experimental take on a recipe from childhood was necessarily the best gingerbread cookie recipe out there. Also, I love finding tried and true, tested recipes online. So I did a web search and stumbled onto The Most Wonderful Gingerbread Cookies on Food.com (special thanks to gingerkitten D for the post). I chose this result because the recipe had five stars, and I had all the ingredients.
It's a good thing I gave it a try--these cookies were delicious! Not too hard, not too soft, and the perfect amount of sweetness whether you frost them or eat them straight out of the oven! It fulfilled my craving for gingerbread and for holiday cheer--I even made my first (terrible, tiny) gingerbread house! Now you can make one too!
Ingredients:
3 cups all-purpose flour (I used self-rising flour since I had it)
1/4 teaspoon salt (I put in just slightly less)
1 Tablespoon ground ginger
1 and 3/4 teaspoons ground cinnamon
1/4 teaspoon ground cloves
6 Tablespoons softened, unsalted butter
3/4 cup brown sugar
1 egg
1/2 cup molasses
2 teaspoons vanilla
Directions:
1.) In a medium-sized bowl, sift together the flour, salt, ginger, cinnamon, and cloves, stirring to combine. In a separate, larger bowl, beat the butter, brown sugar, and egg with an electric mixer on medium speed until the ingredients are thoroughly combined. Add in the molasses and vanilla, and continue to blend.
2.) Slowly add the dry ingredients to the wet ingredients in batches, beating with the electric mixer to combine until the flour disappears each time (be careful as the flour and the batter are likely to fly out of the bowl!). Once the flour is all incorporated and no longer visible, make sure the dough is just sticky enough to form into a small lump (I added a couple of Tablespoons of milk to help). Divide the dough in half and wrap each lump in plastic cling wrap to sit out at room temperature for about 2-3 hours.
3.) Place one lump of dough onto a sheet of parchment paper and begin to roll it out with a plastic rolling pin sprayed with nonstick cooking spray. Once the dough is flat and thin (about 1/4-inch thick), you can cut out your cookie shapes with your favorite gingerbread men or other cookie cutters. Place them on a sheet of parchment paper about an inch apart each and then freeze for approximately 15-20 minutes to help keep them from spreading in the oven.
4.) Preheat the oven to 375 degrees. Transfer the parchment paper with the cold cookie dough to a baking sheet and bake the cookies for approximately 7 minutes (watch them carefully so they don't burn!). If you want to make a gingerbread house, save the second lump of dough to roll out and cut into squares (dough should keep in the fridge for up to four days if you're too tired to make it all at once, like me). Remove the cookies from the oven and let cool on the baking sheet for 2-5 minutes before transferring to a wire rack to cool completely. Once the cookies are room temperature, you can frost them with your favorite colored icing.
I should warn you that making gingerbread cookies is pretty time consuming (you have to wait for the dough to sit at room temperature, wait for the cookies to chill, wait for the cookies to bake, and then wait for the cookies to cool to room temperature again so you can frost them without melting the icing). BUT, I will say they're totally worth it. I gave away non-iced but fresh-from-the-oven cookies to friends, went out to watch football, and came home to room temperature cookies I could frost and eat immediately.
Christmas cookies always feel festive, but gingerbread just has that extra special holiday feel. And despite the time it takes to make them, they're actually quite easy to put together. Now, making a gingerbread house--that's a LOT harder than it looks.
Pumpkin Cheesecake!
I wanted to try something new this Thanksgiving. I usually make exactly two pies: pumpkin and pecan. Facebook also cheerfully reminded that five years ago for Thanksgiving I made two pumpkin pies, two pecan pies, cranberry sauce, and a sweet pumpkin dip. This year brought about a stressful week right before Thanksgiving, and I asked my mom if I could be free of pie duty this year. She was happy to take on our pumpkin and pecan pies so that tradition could continue and to help me out.
But I can't stay away from baking for long. I soon found myself wondering if maybe I should try that Pumpkin Cheesecake recipe I'd been saving for weeks from FoodNetwork.com. I'd purchased all the ingredients (twice) and still had yet to make it. I thought maybe Thanksgiving would be the perfect time. Maybe baking would be the ultimate stress reliever as it had been for me in years past. And so I threw it together, following the Pumpkin Brulee Cheesecake recipe fairly closely but with my own style, and enjoying the whole process.
Ingredients:
8 sheets of graham crackers (honey, not cinnamon)
1 Tablespoon unsalted butter, melted
12 ounces low fat cream cheese
1/2 cup brown sugar (light)
1/3 cup plus 1 Tablespoon white sugar
1/2 teaspoon salt
2/3 cup low fat Greek yogurt
2 eggs
2 egg whites
15 ounces (one can) pumpkin puree
2 Tablespoons flour (I used whole wheat pastry flour again)
1 Tablespoon pumpkin pie spice
1 Tablespoon vanilla extract
Directions:
1.) Preheat the oven to 325 degrees. Mash your graham crackers into tiny pieces and crumbs (I placed the graham crackers in a plastic baggie and then mashed them with a meat mallet, carefully so as not to hurt the counter). Pour graham cracker crumbs into a bowl and mix in 1 Tablespoon of white sugar, 1 Tablespoon melted butter, and 2 Tablespoons water. Mix until the graham crackers are moistened and can be pressed into the bottom of a pie tin. I like to press mine in with a plastic baggie over my hand lightly sprayed with nonstick cooking spray.
2.) Bake the pie crusts 10 minutes and set aside to cool completely. Then in a large bowl, combine the cream cheese, brown sugar, 1/3 cup white sugar, and salt. Beat in the yogurt, egg, and egg whites. This can all be about medium speed. Lower the speed and add pumpkin, flour, vanilla, and pumpkin pie spice. Keep the speed low, then stir with a spatula to fully combine.
3.) Pour the batter over the cooled crusts and bake in the center rack for about an hour (check about five minutes before to make sure it's not burning too much). Place on a trivet to cool to room temperature. Refrigerate overnight.
4.) Top with whipped cream or other toppings of your choice. I skipped the actual "brulee" part of the original recipe (lacking a torch) and went for a whipped cream border instead!
Thanksgiving was a great success with the immense help of my mom, the help of my brother, and my small pie contribution. It held together, didn't taste overdone (despite the browning on top) and was a delicious dessert to enjoy with family!
Sunday, July 24, 2016
Biko Rice Cakes!
You may have seen some of my previous posts on various Filipino desserts (kutsinta, halo-halo, and bibingka)--they're so delicious. But I'd never attempted to make one of my other favorites that I've had at many a party before: Biko Kalamay
Basically a sweet rice cake, biko is a delightful mixture of coconut, rice, and syrup flavors, held together in a rectangular package.
All the recipes I've found online sounded a little intimidating, but this one for Biko with Latik syrup from Russian Filipino Kitchen was exactly what I needed.
Ingredients:
1 and 1/2 cups uncooked rice
1 and 1/4 cups water (for cooking the rice halfway)
1 and 1/2 cups brown sugar (1/2 cup for the latik syrup, the rest for the biko cake)
4 cups coconut milk (1 cup for the latik syrup, the rest for the biko cake)
Directions:
1.) After rinsing your uncooked rice in a pot (until the water turns clear), drain the sink water, place the pot on the stove, add the 1 and 1/4 cups cooking water, and bring the pot to a boil.
2.) Once the water has boiled, lower the heat to medium low and cook until the water mostly evaporates. Remove from heat and set aside. The rice should only be cooked halfway at this point.
3.) Make the latik syrup by mixing 1 cup coconut milk and 1/2 cup brown sugar in a separate pan. Bring the pan to a boil and then adjust the heat to medium low as well. Cook for 10 minutes, constantly stirring until the syrup thickens (mine didn't get super thick, but it still worked in the end and tasted great!). Remove from heat and set aside.
4.) Finish the biko cake by mixing 3 cups of coconut milk and 1 cup of brown sugar in a separate pot and bringing to a boil. Add the rice to the milk/sugar, and then mix again. Cook on medium heat for about 30 minutes, stirring constantly until thick.
5.) Remove from heat and transfer to a rectangular or square baking dish (glass or aluminum works well). Flatten the mixture and drizzle with the syrup as a topping. Cool to room temperature (the longer the better) before you cut the cake into squares and serve. Top with toasted coconut.
My first attempt at toasting coconut flakes was not the best (see below), so I'll leave you to find your own recipe for that one!
You'll fall in love with this unique treat--though my version is still not nearly as good as authentic biko made by Filipino chefs!
Rice Pudding
I can't remember the exact date of this attempt, but I do remember how delicious it was! Catching up with unposted recipes, I give you, Rice Pudding!
Ingredients:
1 and 1/2 cups cooked rice
2 cups milk (I used Lactose-free 1% and fat free--Lactaid brand)
1/4 teaspoon salt
1 egg (beaten)
1/3 cup white sugar
1 Tablespoon butter
1/2 teaspoon vanilla extract
Directions:
1.) Combine the rice, 1 and 1/2 cups milk, and salt in a saucepan over medium heat, stirring until thick, about 15-20 minutes.
2.) Add in the last 1/2 cup of milk, egg, and sugar into the mix, stirring constantly. Cook another 2-3 minutes. Remove from heat and stir in butter and vanilla.
3.) Top with cinnamon and garnish with a cinnamon stick. Refrigerate 6-8 hours to serve cold.
Found on Allrecipes.com under Old Fashioned Creamy Rice Pudding.
Cranberry Scones
Ingredients:
2 cups all-purpose flour (or self-rising flour)
1/3 cup sugar
1 teaspoon of baking powder (omit if using self-rising flour)
1/4 teaspoon baking soda (omit if using self-rising flour)
1/2 teaspoon of salt (cut back to about 1/4 teaspoon if using self-rising flour)
8 tablespoons (1 stick) unsalted butter (the original recipe recommends it being frozen, but just keeping it at the back of my fridge worked fine for me)
1/2 cup dried cranberries
1/2 cup sour cream (I used lowfat Tillamook brand)
1 egg
1/2 teaspoon almond extract
Directions:
1.) Preheat the oven to 400 degrees. In a bowl, combine the flour, sugar, baking powder and soda if using, and salt. Use a cheese grater to grate the butter into flakes, then slowly add it in with your hands. Stir in the cranberries.
2.) In a separate bowl, combine the sour cream and egg with a fork until smooth. At this point, you can also add in the almond extract for extra flavor. Then slowly add the sour cream mixture to the flour mixture until the dough starts to form. Use your hands to get the dough fully formed and shaped into a ball (if too sticky, add a little more flour).
3.) Shape the dough into hearts (I made two elongated lumps and squished them together in a "V" to make a heart shape) and place them on a baking sheet lined with parchment paper. Bake approximately 15-17 minutes or until golden but not too brown. Cool slightly (about 5 minutes), then remove from the sheet and serve warm.
The directions on Allrecipes.com give options for making Cranberry-Orange Scones, Lemon-Blueberry Scones, or even Cherry-Almond Scones, which gave me the inspiration to add almond extract--and I think that's what really makes these scones pop! The bride-to-be loved the treat and took the extras home to her groom, who ate about six in a row. I'd say that's a success!
Banana Donuts
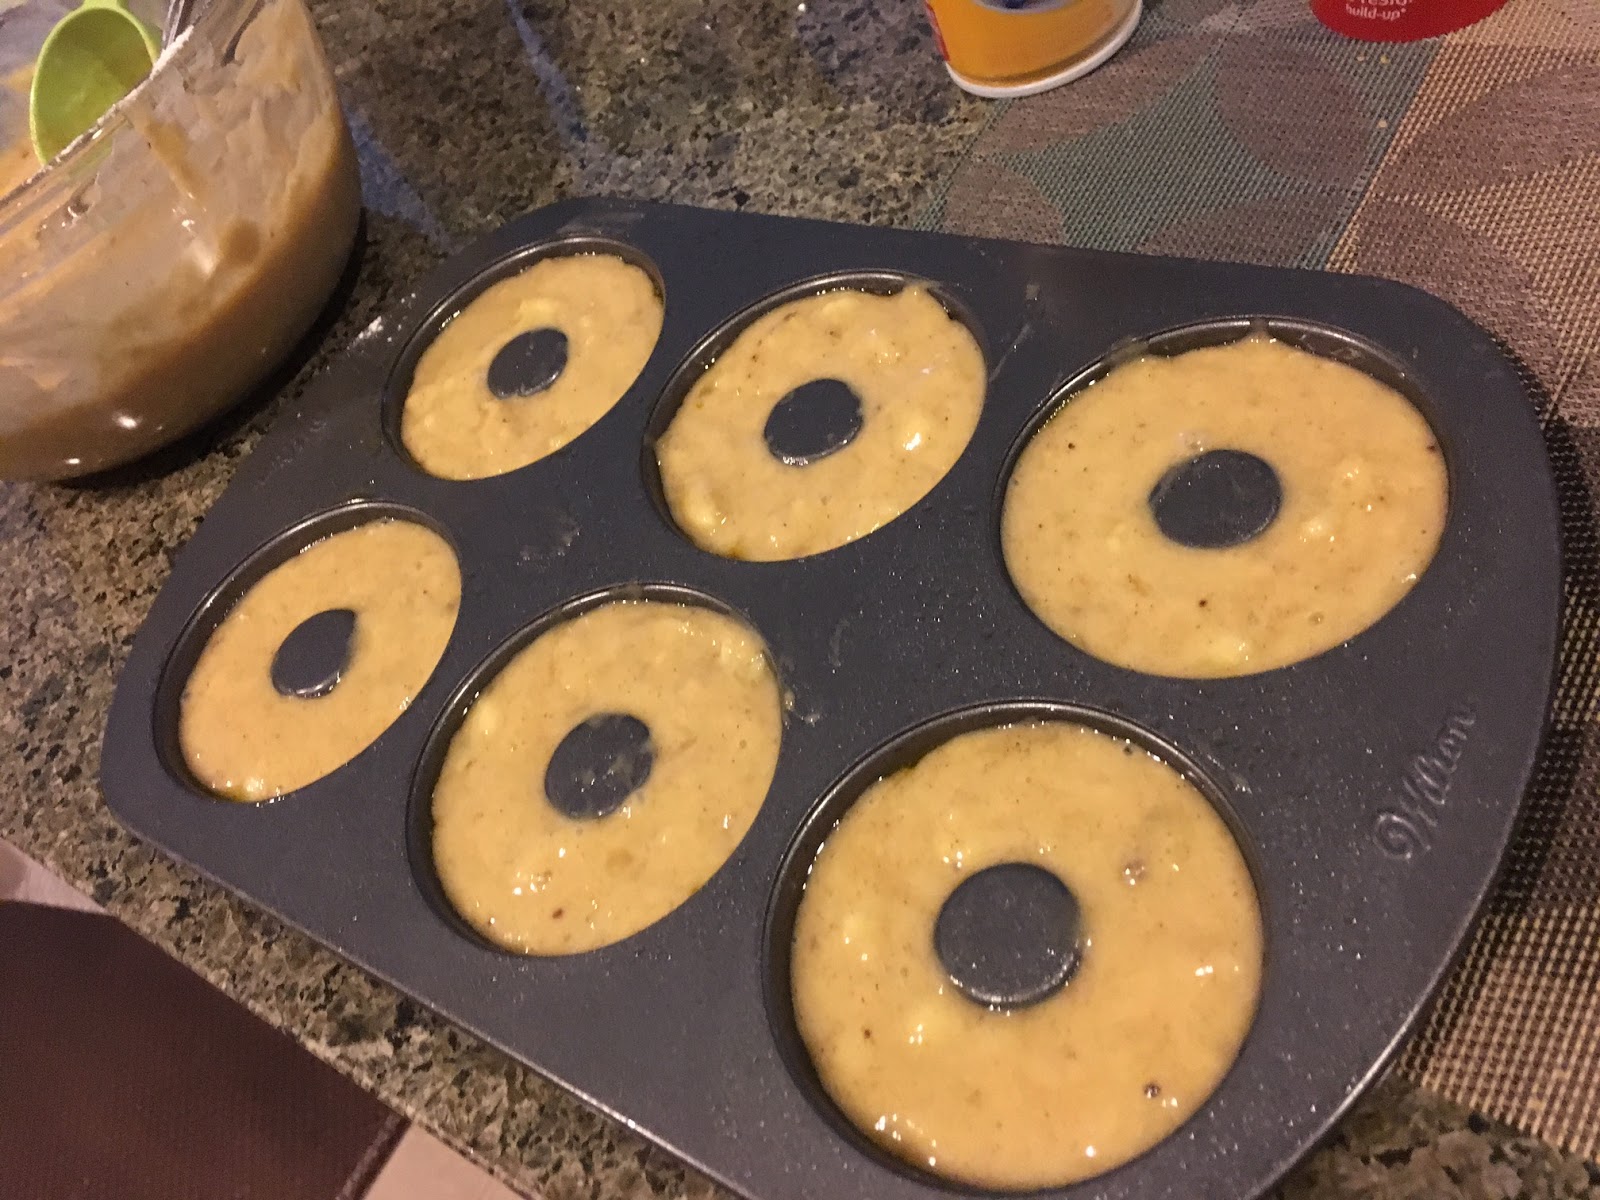
While I admit I'm a bit behind on my baking blog posts, I certainly haven't been behind on my baking. I made these delicious Banana Donuts on June 27, during my summer staycation off from work. I can't remember the exact motivation for donuts--perhaps I had browning bananas at the time, perhaps I just wanted to make something delicious to deliver to my mom. Either way it was a fun endeavor with a pleasing result.
In attempting to make my banana donuts, I knew I wanted to find a recipe where I could use self-rising flour. I still had some leftover that my mom had given me after making Jamie Oliver's deliciously easy pancakes for Valentine's Day, and I wanted to put it to good use. A quick search found me a great recipe from King Arthur Flour with directions on how to adapt it for self-rising flour. I cut the baking soda, lowered the amount of salt, and included the cinnamon since I was using bananas and they pair well together. I then borrowed a quick cinnamon-sugar recipe from the website Kitchn, and had the donuts ready in no time.
Ingredients:
1/2 cup vegetable oil
3 eggs
1 and 1/4 cups white sugar
1 and 1/2 teaspoons vanilla extract
1 teaspoon cinnamon
1/2 teaspoon salt
1 and 1/2 cups mashed bananas
2 cups self-rising flour
For the topping:
1/4 cup white sugar
1 Tablespoon cinnamon
Directions:
1.) Preheat the oven to 350 degrees. Beat together the oil, eggs, sugar, vanilla, cinnamon, and salt. Stir in the bananas.
2.) Slowly stir in the self-rising flour until the batter is smooth but still has some lumps of banana. Pour the batter into a donut pan (sprayed liberally with nonstick cooking spray) until nearly full.
3.) Bake approximately 18 minutes, until a toothpick inserted in the center of the donut comes out clean or with a tiny bit of crumbs attached. Remove from oven and loosen the edges with a plastic knife. Wait 5 minutes, and then transfer the donuts to a wire rack.
4.) While the donuts are warm, dip them into a bowl filled with the cinnamon-sugar mixture topping. Coat thoroughly, then turn over and coat the other side. Serve while warm, if possible, though the donuts taste good at room temperature as well.
Perfect Pancakes by Jamie Oliver
My mom sent me this Tweet from Jamie Oliver (celebrity chef extraordinaire) months ago, along with a care package of self-rising flour. Turns out it is the easiest way to make pancakes when you're craving them, and they always turn out fluffy and light! Try adding blueberries, chocolate chips, or other additions to customize to your tastes. Perfect!
Ingredients:
1 egg
1 cup self-rising flour
1 cup milk (I use fat-free or 1%, lactose free milk by Lactaid)
Pinch of salt
Directions:
1.) Whisk ingredients together. Pour onto a hot griddle that's been lightly coated with canola oil (you can tell it's ready when a drop of water placed on the pan starts to sizzle). Allow the edges of the pancake to harden and then flip it. Cook another minute or so, checking the underside for doneness.
That's it!
I saved this recipe for Valentine's Day (I had a lot planned and didn't want to lose time on an extensive, complicated endeavor), and poured the pancakes into a silicon heart-shaped mold for a breakfast filled with love. And chocolate chips. It worked great and gave me plenty of time to set up gifts, make bacon (another way to show your love), and get ready for a date at Gameworks. But really, you can use these pancakes for any occasion!
Thursday, March 17, 2016
Green Sour Cream Pound Cake for St. Pat's!
Happy St. Patrick's Day! It's the one day out of the year where my baking can match my clothes. Green, after all, has always been my favorite color. This year St. Patrick's Day also fell within the week of Spring Break at the college where I work. It's fairly quiet on campus, which makes it the perfect time to bring in treats to colleagues who have been working so hard to make it to mid-semester.
So I knew I would be baking something green well before the day arrived. I just wasn't sure what. I wanted to make something from scratch and use the ingredients I had. I'm not sure how the idea of "pound cake" came into my head--it must have popped up in my Internet search for recipes using self-rising flour (I had a leftover container my mom gave me for pancakes). But most of the those self-rising baked goods also called for buttermilk--which I did not have. In my fridge, however, was a small tub of sour cream. I knew this could be a good substitution for some baked goods. In fact, a few donut recipes appeared when I modified my search for self-rising flour and sour cream. But I was most drawn to a post for Sour Cream Pound Cake from farmflavor.com. It might take a while to bake, but sounded super easy to put together. And the instructions on my green food coloring bottle said I only needed to add 1/2 teaspoon into any cake batter to get that green tint. Perfect! My St. Pat's Green Sour Cream Pound Cake was born.
Ingredients:
2 sticks of butter (16 Tablespoons), softened but not melted
3 cups sugar
5 eggs
1 teaspoon vanilla
3 cups self-rising flour (sifted)
8 oz. sour cream (I use Daisy Lite)
1/2 teaspoon liquid green food coloring (I used McCormick)
Optional strawberries, green, grapes, whipped cream, and green frosting to decorate
Directions:
1.) Preheat the oven to 325 degrees. In a very large bowl, cream the butter and sugar together with an electric or stand mixer. Add the eggs one at a time, mixing after each, then add the vanilla and mix again.
2.) Alternate adding flour and sour cream until all ingredients are combined. Add the green food coloring last, mixing until thoroughly combined.
3.) Pour the batter into your pan of choice (that's been heavily greased with butter/flour or nonstick cooking spray). The original recipe calls for an hour and a half bake time for a tube/bunt pan. For my shallow book-shaped pan (slightly larger than 9x13 inches) I had to cut that baking time down significantly, checking after 30 minutes (still too wobbly), and ultimately baking only about 40-45 minutes total, until the top and edges were slightly brown and a toothpick inserted into the center came out clean.
4.) Remove the cake from the oven and let cool to room temperature before refrigerating overnight. Serve the next morning with strawberries, GREEN grapes for St. Paddy's, and any whipped cream or icing you choose.
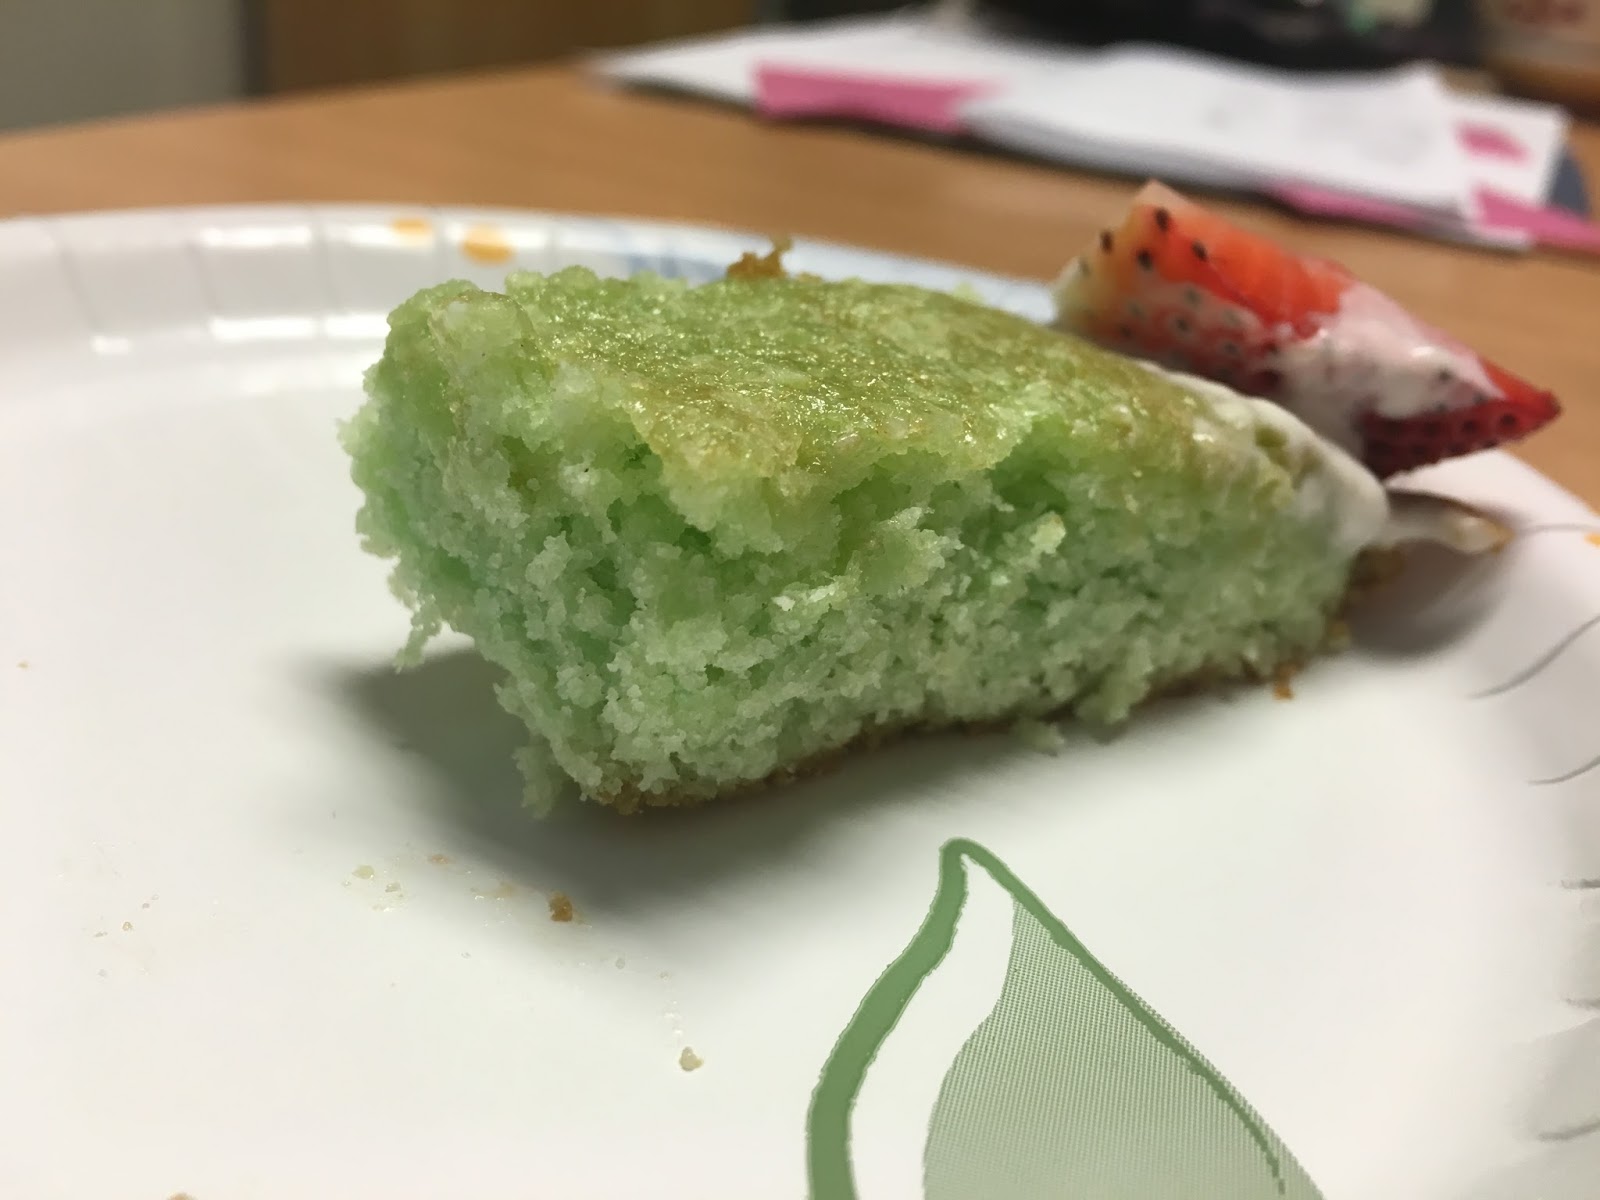
I was a little nervous bringing the finished product to work the next morning after baking. Would a green cake be appetizing? Would the center be too solid or not solid enough? Despite a clean toothpick test, I hadn't cut into the cake or baked any side cakes to try first since the batter was just barely enough to fill my pan. And I didn't want to ruin the look of the finished cake before my coworkers saw it.
Turns out I didn't need to worry! The cake received rave reviews by my supervisor, our administrative assistant, and all the librarians and staff that had a piece. Nearly half the cake was gone by lunch time! The center was moist, the flavor was sweet, and I now have a go-to pound cake recipe for any time of year!
Thursday, January 21, 2016
Classic Cinnamon Rolls
In my family, I started a holiday tradition upon which we have cinnamon rolls for breakfast Christmas morning. And I bake them. The smell and the taste is wonderful to wake up to on such a special occasion, and it gives me something to do in the early hours I'm up before the rest of my family now that I'm past the age of present peeking (mostly). The last few years I've utilized pizza dough to create Easy Breezy Morning Cinnamon Rolls for Christmas breakfast--which are always fun to make, delicious to eat, and don't require yeast (so they get done a lot faster since the dough doesn't need time to rise). But before I discovered this pizza dough hack, I made my yeast-less cinnamon rolls with biscuit dough. And while that recipe has remained a family favorite for years--my handwritten version safely tucked within a fat, orange binder with other old school, paper recipes--I've never actually posted it here. But when this year's Christmas rolled around and I just couldn't find whole wheat pizza dough at my local grocery stores (or any pizza dough, really), I went back to the classic and made cinnamon rolls that hearkened to my early years as an unofficial baker.
I'll call these my Classic Cinnamon Rolls. It turns out the original recipe (which I adapted slightly) comes from a Cooks Illustrated recipe by Raquel Pelzel, published May 2002 (That's where I got some of the language like "shaggy" dough and "wet sand"). My mom had copied the pages with diagrams to know how to shape the rolls correctly (which are probably safely tucked away within her own recipe binder). But since I don't have those original copies, special thanks to Ed Santiago for his recipe archive scans of the pages:
Ingredients:
For the dough:
Flour (for dusting)
2 and 1/2 cups whole wheat pastry flour
2 Tablespoons sugar
1 and 1/4 teaspoons baking powder
1/2 teaspoon baking soda
1/2 teaspoon salt
1 and 1/4 cups buttermilk
2 Tablespoons melted butter
For the filling:
3/4 cup brown sugar
1/4 cup white sugar
2 teaspoons cinnamon
1/8 teaspoon ground cloves
1/8 teaspoon salt
1 Tablespoon melted butter
Directions:
1.) Preheat the oven to 425 degrees. In a large bowl, whisk the flour, sugar, baking powder, baking soda, and salt for the dough. In a separate bowl or large measuring cup, whisk the buttermilk and melted butter for the dough.
2.) Add the wet ingredients to the dry ingredients and stir until a shaggy dough forms, about 30 seconds. Then knead the dough until it is smooth and not shaggy. Pat into a 12x9-inch rectangle and spray the top of the dough lightly with nonstick cooking spray.
3.) In another bowl, combine the brown sugar, white sugar, cinnamon, cloves, and salt for the filling. Add the melted butter and stir until the mixture resembles wet sand. Then take half the mixture and pat a thin layer onto the rectangle of dough, pressing down but not too deep.
4.) Roll the dough into a log, crimp the edges, and cut into your desired amount of cinnamon rolls. Lay them into a round cake pan sprayed with nonstick cooking spray and sprinkled with the other half of the filling mixture (save just a little to sprinkle on top of the rolls as well). Press the rolls flat and dust the tops with the cinnamon mixture.
5.) Bake the rolls for approximately 23 minutes, checking early for even browning. Remove from the oven, let cool at least 5 minutes and then ice with your favorite icing. If you don't have a recipe, it's easy to make!
From my previous cinnamon roll recipe, here's a simple Icing Recipe:
Combine 1 cup powdered sugar with 2 Tablespoons of your favorite milk-like product (soy creamer, buttermilk, half and half, or just plain milk). Be careful when you pour the sugar, then stir thoroughly. Drizzle over slightly cooled cinnamon rolls and you're done!
Now for some pictures of the process!
![]() |
| Yes, the outfit is a must! |
Wednesday, October 21, 2015
Fall Fun Including Pumpkin Donuts!
It's true, I've been a little behind in my blog postings, but that doesn't mean I haven't been ready (as always) for fall (and pumpkin).
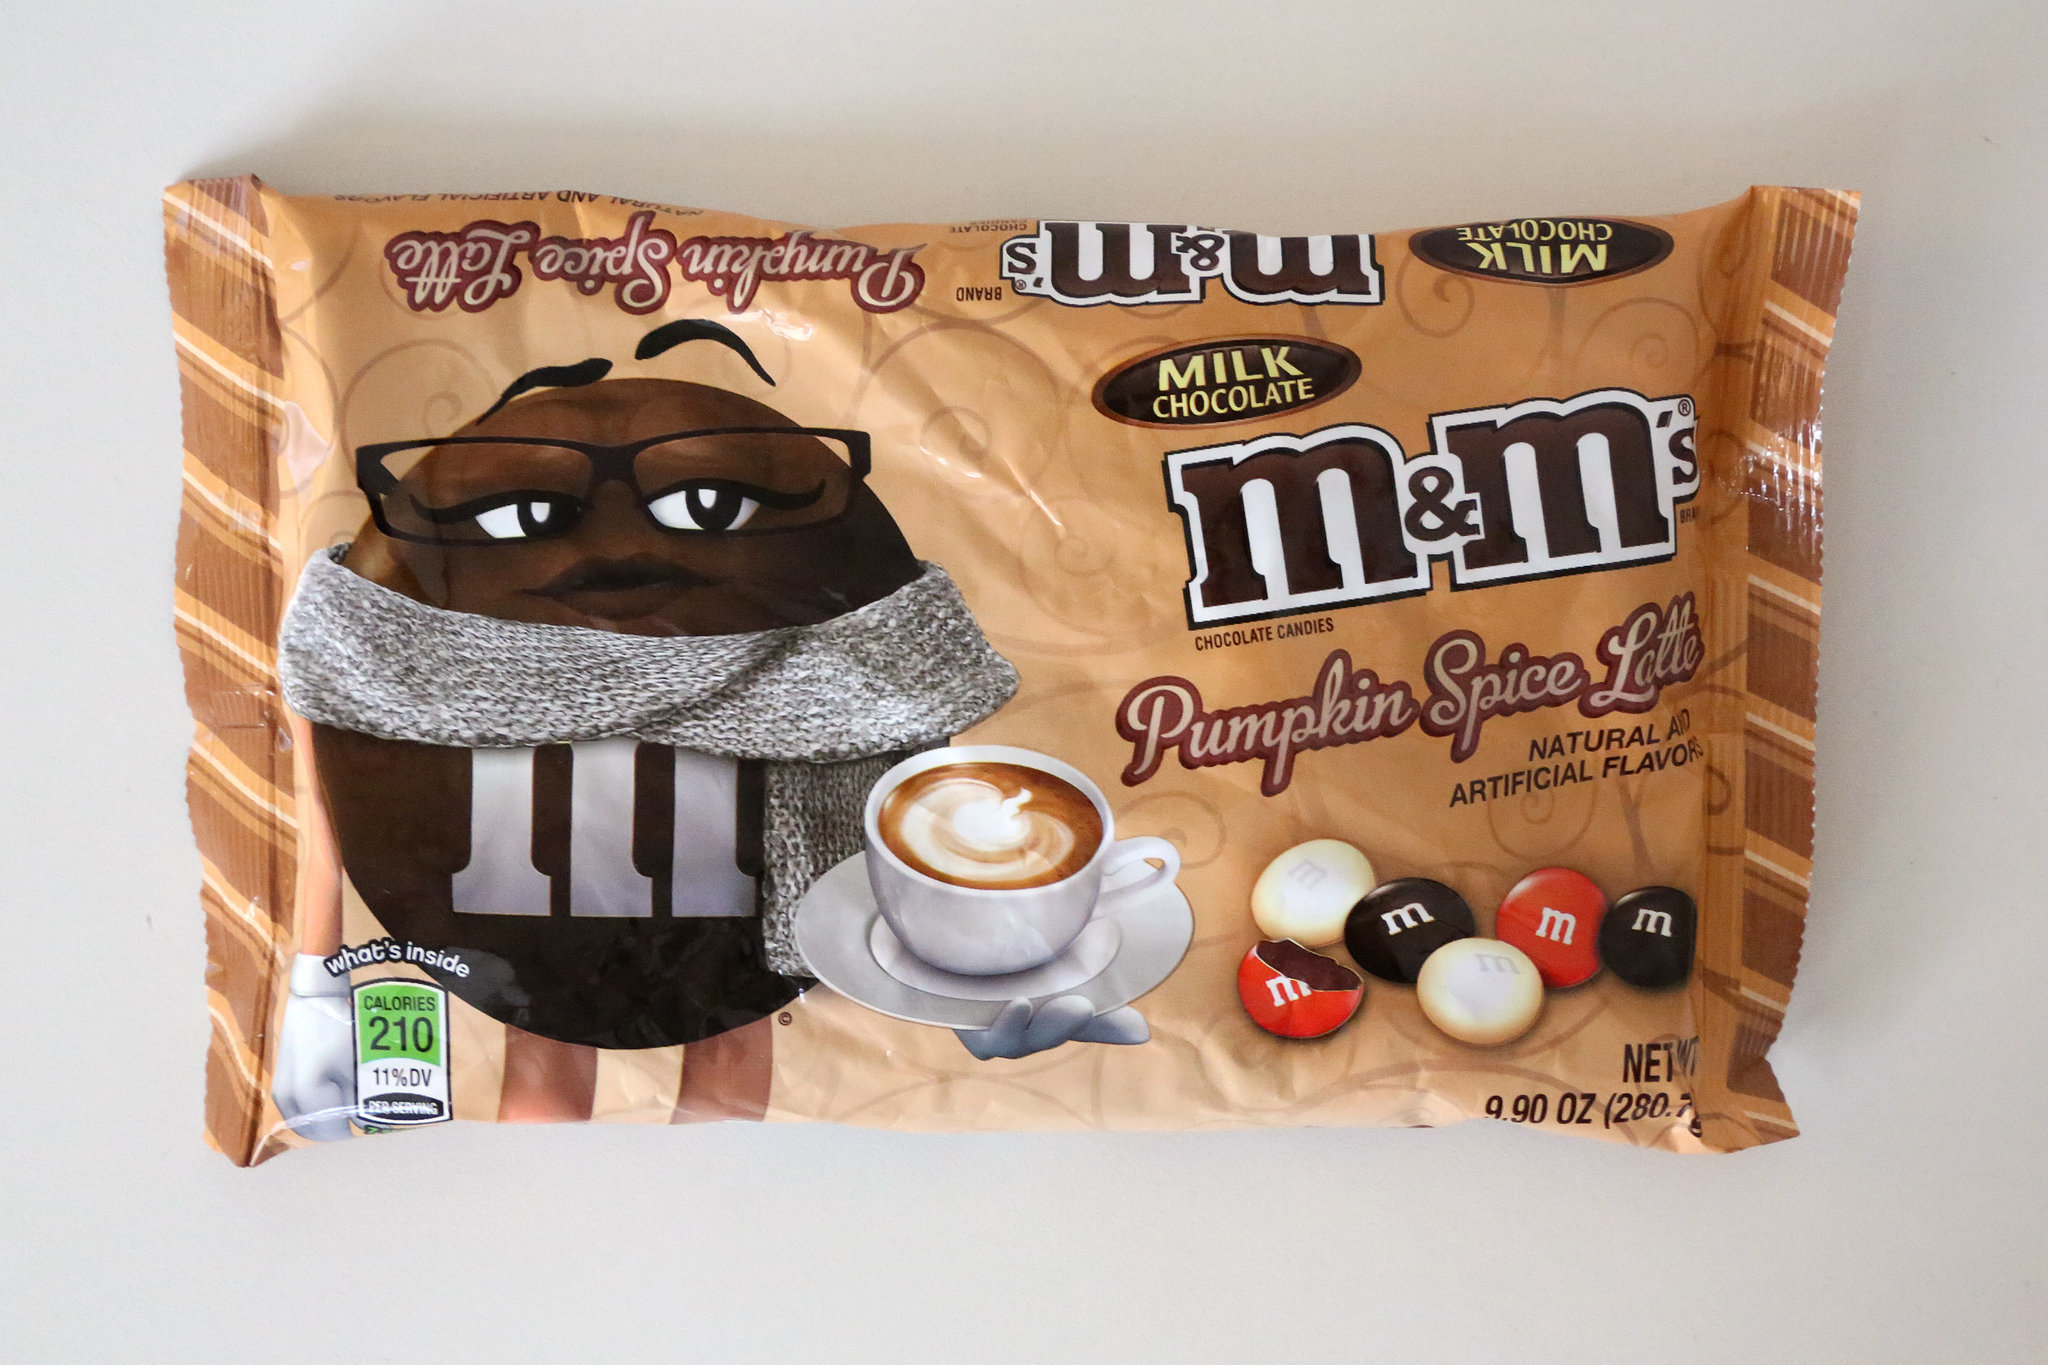
One need look no further than my recent grocery store purchases to confirm my commitment to all things pumpkin once late September rolls around. As I happily shared with a fellow pumpkin-loving Facebook friend, this season I've thus far sampled: pumpkin granola, yogurt, cream cheese, cake bars, black coffee (K-cup pods from Target), Starbucks lattes, waffles, pancakes, cereals, and M&Ms (pumpkin spice LATTE flavored).
| Fall-themed cereals alone! |
| Not all of these were spot on--I'm less impressed with the Nestle chips. |
But the biggest foodie plans for the season revolved around my sort of annual Halloween party get-together of former coworkers (we try to do this every year). I love putting together a menu of fall and spooky-themed items, many of which I've employed in the children's department of the library and many that I've just made up on the spot. Caramel apples were a must, seeing as how I hadn't yet made any caramel apples this fall (and it was October already), and spider cookies (made from Oreo cookies dotted with candy eyes) was a fun delight I'd tried before. Running short of time, I bought a prepackaged Duncan Hines chocolate cupcake mix (dark chocolate fudge if I remember correctly), but I couldn't skimp on something pumpkin flavored. Usually I make a nice Pumpkin Dip with cream cheese, but this time I'd had an idea to do some sort of pumpkin cake for a long time. Inspired by the MyRecipes.com Boo-tiful Pumpkin Cake, I thought I'd go a little smaller scale with Pumpkin Donuts (hey, I had a donut pan and not a bunt cake pan). With a quick Internet search, I found a four and a half-star recipe for Glazed Pumpkin Donuts on AllRecipes.com that I quickly modified for my purposes.
Ingredients:
2 cups whole wheat pastry flour (sifted)
1/2 cup packed brown sugar
1 and 1/2 teaspoons baking powder
1 and 1/2 teaspoons pumpkin pie spice
1/2 teaspoon salt
1/4 teaspoon baking soda
1 cup pumpkin puree (I used Libby's Canned Pumpkin)
2 eggs
1/4 cup of milk (I used Fat-Free Lactose Free Milk)
1/4 cup butter, softened
Directions:
1.) Preheat the oven to 325 degrees and spray your donut pan with nonstick cooking spray (you could try with a muffin pan, but it really helps to have a donut pan to make donuts).
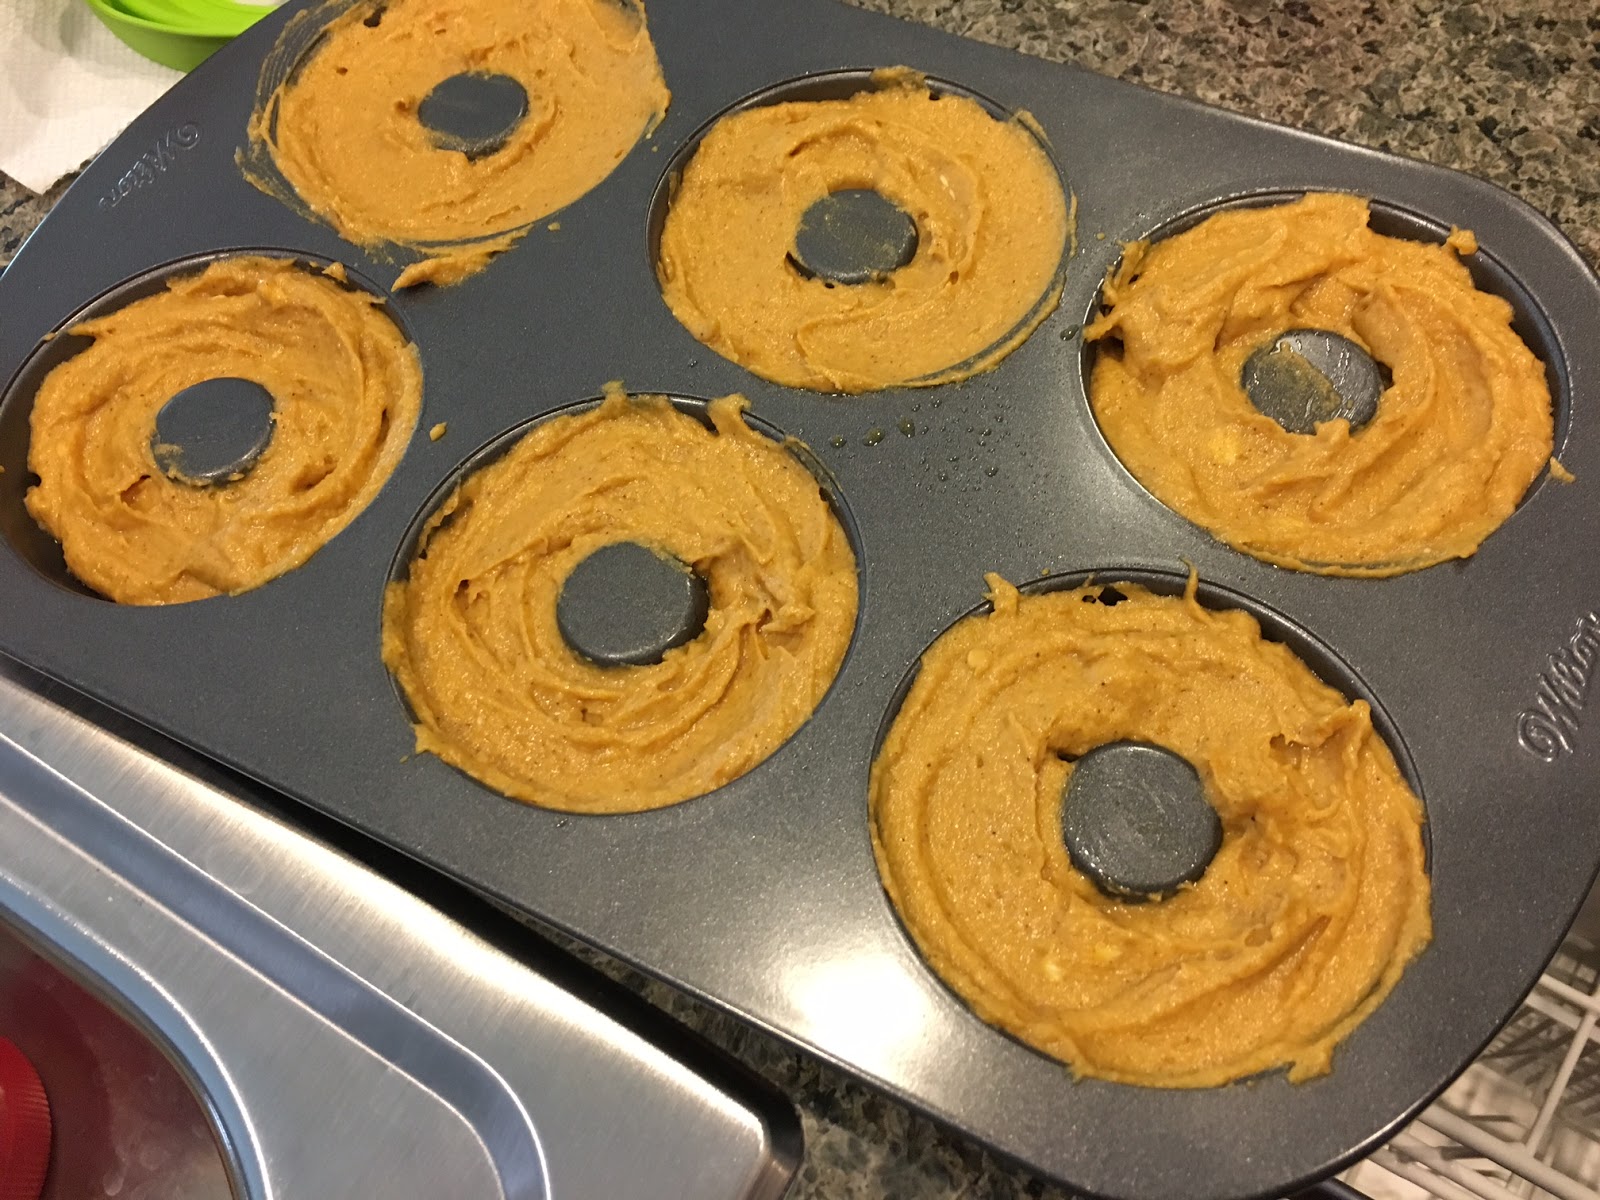
2.) Sift the flour, brown sugar, baking powder, pumpkin pie spice, salt, and baking soda into a large mixing bowl. Add the canned pumpkin, eggs, milk, and softened butter. Stir to combine ingredients (an electric hand mixer on low speed was especially helpful) until the batter is thoroughly combined but not overmixed (just make sure there are no large lumps of butter left. Those were the hardest parts to break down).
3.) Pour the batter into the donut pan, filling almost to the top. Wipe away any excess batter around the edges with a paper towel (this will help the donuts look more uniform later).
4.) Bake approximately 8-10 minutes (I started with 8 minutes but the donuts were not yet firm when I took them out--they should sort of spring back when touched rather than leave an impression. I baked for an additional 2 minutes until they started to brown around the edges just a tad).
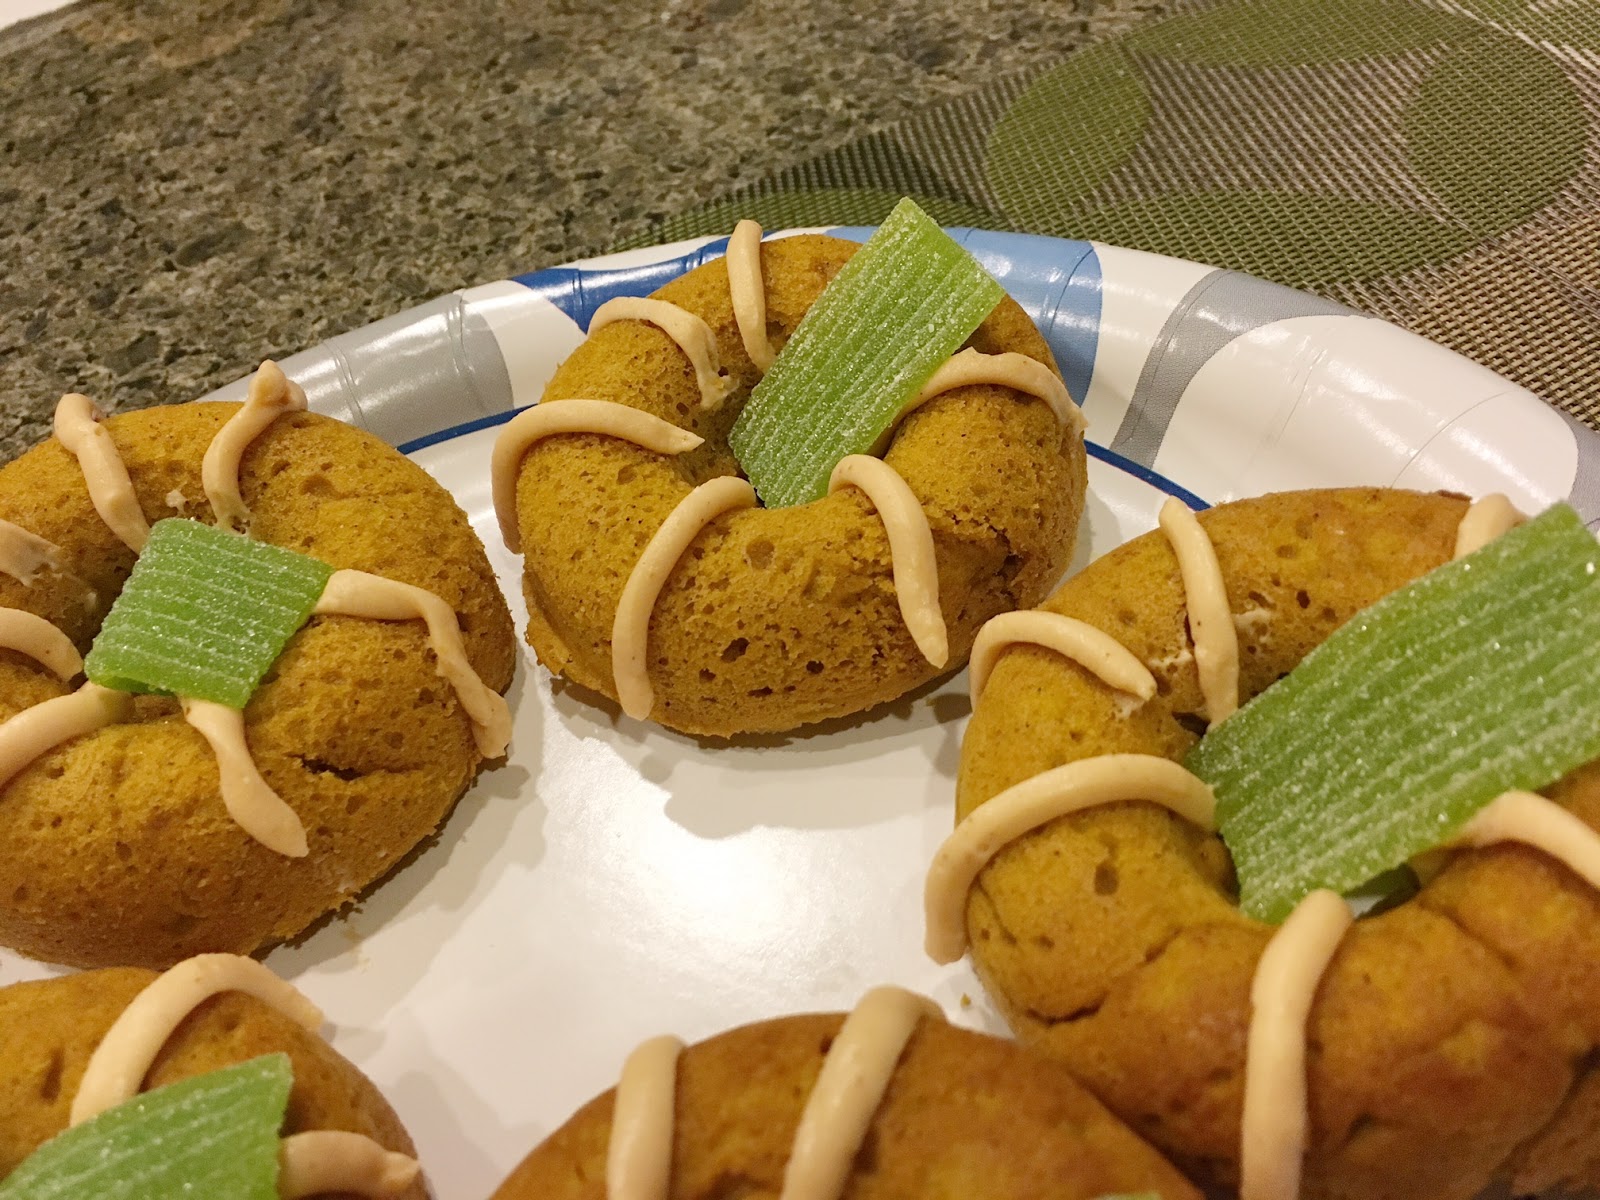
5.) Remove the donuts from the oven and allow to cool to room temperature before removing from the pan (otherwise they will stick to the pan and fall apart). Once the donuts are completely cooled, flip them over and frost them any way you like. I used Philadelphia Pumpkin Spice Cream Cheese spooned into a plastic baggie with the tip cut off so I could draw little gourd-shaped lines on the donuts.
Optionally, you can also add a piece of green licorice (I used green apple Rips) to make a stem, though the licorice will make the rest of the donuts smell like green apple when you store them in the fridge. Yes, I learned all these the hard way.
I have to admit, despite my obvious bias to all things pumpkin, these were my favorite treats of the Halloween evening. They came out moist--even after being refrigerated overnight--paired well with the cream cheese, had a lovely flavor, and offered a nice contrast to all the chocolate on my table.
What other fall things have I baked lately and not blogged about? I admit, the list is limited to JELLO Jigglers attempted in a pan meant for cakes (miraculously, it worked!). But for me, Halloween is the big event of the season...until Thanksgiving and pumpkin pie comes along....
Thursday, June 25, 2015
Nutella Brownies
Oh yes. You read that right. Nutella. And brownies. In the same sentence. In the same recipe. I must admit that I'd never really tried Nutella, though I've heard great things about it, especially from Italian chefs who cook with hazelnuts. Then one day I was scrolling through my Facebook newsfeed and saw one of those short recipe videos start to play: Three-Ingredient Nutella Brownies. I do like to keep things short and sweet, though I tend to get a bit skeptical of recipes with very few ingredients. Is it really possible to turn just three things into brownies? And awesomely delicious brownies at that? I had to experiment to find out.
When the time came to host a girls' movie night with my friends, I knew I had to make some kind of delicious dessert. I knew it had to be easy--I wouldn't have much time after work to prepare--and it had to be chocolate (Hey, what else would you pair with popcorn and wine?). What a perfect time to test out Nutella Brownies! I bought a jar of Nutella two days before the event and decided to bake the brownies the night before just in case it turned out that Nutella plus eggs plus flour did not equal delicious.
I didn't need to be worried.
Ingredients:
1 and 1/4 cups Nutella (chocolate-hazelnut spread. I used a whole 13 oz jar)
2 eggs
1/2 cup flour (as per usual, I used whole wheat pastry flour)
Directions:
1.) Preheat the oven to 350 degrees. Pour the entire jar of Nutella into a mixing bowl. Add the eggs and flour (sifted in if possible) and stir until all ingredients are combined. Caution: it will be thick.
2.) Pour the brownie batter into a square brownie pan that's been sprayed with nonstick cooking spray (the recipe from the video used a 9x13-inch cake pan, but I prefer squares for brownies and didn't think I had enough batter to fill a rectangle anyway).
3.) Bake for about 15 minutes. Remove the brownies from the oven to cool before cutting (you can also refrigerate them overnight and cut the next day).
These brownies may be a little low (no baking powder or soda to help them rise). They may be a little gooey (but that's personally my favorite kind). They will definitely be delicious.
So the main question that remains is, why wasn't I introduced to this delicious flavor of chocolate and hazelnut before?? I'm not a big chocolate person, but I am a big nut-butter person. Nutella seems to be the best of both worlds (I definitely licked my spoon after emptying the jar, and pretty much scraped the jar clean...). The brownies were a hit at movie night and I plan to repeat any recipes that are this easy to put together (so long as I keep my pantry stocked with Nutella. Shouldn't be hard).
Experiment success!
Wednesday, June 24, 2015
Go-To Banana Muffins!
I officially have a go to banana muffin recipe! After many attempts to find the perfect combination, I realized that I could adapt my Spring Banana Bread recipe into muffin form and have since made Go-To Banana Muffins several times for parties, work events, and even gave the recipe as a bridal shower present. All I had to do was change brown sugar to white sugar, cut the baking time back, and add in chocolate chips or nuts as needed.
Ingredients:
2-3 very ripe bananas
1/3 cup melted butter
1 cup white sugar
1 egg
1 teaspoon vanilla extract
1 teaspoon baking soda
Pinch of salt
1 and 1/2 cups of whole wheat pastry flour
1 cup chocolate chips (or combination of chocolate chips and pecans, etc.)
Directions:
1.) Preheat the oven to 350 degree and line a muffin tin with paper (cupcake) liners. Spray lightly with cooking spray if the paper is strong enough.
2.) In a single bowl, mash the bananas with a fork, then stir in the melted butter, baking soda, and salt. Add the sugar, egg, and vanilla. Sift in your flour last, folding it slowly so that the flour fully incorporates into the mixture. Do the same for the chocolate chips, folding slowly until fully incorporated.
3.) Pour the batter into the muffin cups and bake for about 18 minutes (25 at the most, but 18 worked for me). Use a toothpick inserted into the center of a central muffin to check for doneness (if it comes out moist with crumbs on it, the muffins might need a little more time. If it comes out dry, you're good). Cool slightly, but serve warm. (Note: They also taste great cold since they're moist enough to not harden in the refrigerator, or they can be reheated in the microwave to maintain the original flavor).
I've received so many positive reviews for these muffins, and I absolutely love bananas, so I'll definitely be returning to this recipe over and over again!
Sunday, March 22, 2015
Spring Banana Bread
It's the first weekend of Spring, and I've finally gotten caught up on this blog for the months I've missed. Though I didn't plan any specific baking for the new season, I felt like whipping up something in my kitchen again, and overripe bananas were just the inspiration I needed to make banana bread.
I've made many a banana bread in the past: Banana Pecan Muffins, Buttermilk Banana Bread, Banana Chocolate Bread, and even a failed attempt at Banana Muffies. All of them ended up tasting fine, but none were quite strong enough to be my "go-to" recipe every time (at least, not as memorable as I would have liked them to be). Thus, I turned to the Internet for help--especially since I had no buttermilk on hand and needed a recipe without it. One of the first results was a banana bread recipe from Simply Recipes that had no dairy other than butter and was advertised as "the most popular recipe on Simply Recipes, first posted 2005." Sounded like good reviews to me.
The execution of the banana bread was easy--I had all the ingredients on hand and could gather them quickly. I felt like making a loaf of bread rather than muffins, so I followed the original recipe, but decided to add brown sugar instead of white sugar for a little molasses flavor sweetness (And of course, I used my traditional whole wheat pastry flour in place of all-purpose).
Ingredients:
2-3 very ripe bananas, peeled (I had two small ones on hand)
1/3 cup melted butter
1 cup of sugar (I used brown sugar)
1 egg
1 teaspoon vanilla extract
1 teaspoon baking soda
Pinch of salt
1 and 1/2 cups of whole wheat pastry flour
Directions:
1.) Preheat the oven to 350 degrees and spray a metal or ceramic loaf pan with nonstick cooking spray.
2.) In a single bowl, mash the bananas with a fork, then stir in the melted butter, baking soda, and salt. Add the sugar, egg, and vanilla. Sift your flour last, folding it in slowly so that the flour fully incorporates into the mixture.
3.) Pour the batter into the loaf pan and bake for about 45-55 minutes (The original recipe calls for an hour to an hour and 10 minutes, but my bread browned up just a little too much after 53 minutes. I forgot to check it earlier as the Simply Recipes method suggested). Use a toothpick inserted into the center of the bread to check for doneness (if it comes out moist with crumbs on it, the bread might need a little more time. If it comes out dry, you're good). Cool completely, remove from pan, and slice to serve.
Sadly, this banana bread came out a little more done than I had planned, dark brown across the top, but with a nice crunchy crust that was still appealing. And even though I waited until the bread had cooled before cutting it, the slices came out more than a little crumbly, making it harder to serve. I decided against bringing it to brunch, for fear of the slices falling apart. However, here at home my family and I have been perfectly satisfied munching on the pieces. Flavor wise, this recipe delivers. A warm slice with butter on top made for the perfect tasty snack, and even the crumbling slices were a nice combination of crunchy on the top but soft in the center. So I'll definitely give this recipe another go, perhaps with a few tweaks and a little less bake time, to see if it's the banana bread keeper I've been looking for.
Subscribe to:
Posts (Atom)