Sunday, March 22, 2015

Catch Up Time

Wow, it's been a long time since I've blogged a new recipe, mostly because my baking lately has been recipes I've posted before. That, and a busy work schedule and a few trips out of town kept me from baking as much as I used to. But that's no excuse not to share delicious food and get back on schedule with seasonal recipes! As my latest banana bread is baking in the oven, I'm going to take a moment to catch up on the various recipes I've made throughout the winter season, concluding with Spring Banana Bread on my next post! So stay tuned....

Catch Up:

October
After making Pumpkin Spice Lattes multiple times this fall, I proceeded to decorate my house for Halloween, enjoy a boisterous football season, attend the local Aki Matsuri festival (autumn Japanese festival), and make Halloween treats for my friends in a gathering much smaller than the famous party of 2012, but just as fun! I also carved a pumpkin and made toasted pumpkin seeds on Halloween Day.


November
The month of November brought about a wonderful vacation to visit my grandfather, his new wife, and my aunt and uncles in south Texas. While there was obviously no time for baking away from home, I enjoyed authentic Mexican food close to the border, as well a BBQ, burgers, and free hotel breakfasts. Later that month I went on a second trip, this time with my boyfriend's family to whale watch at Newport Beach. Though it was just a weekend trip, I was able to enjoy a couple of nice meals and see live dolphins to boot! Oh, and what about Thanksgiving? I made my traditional pies (pecan, pumpkin, and sweet potato!), as always, and spent Thanksgiving evening with my boyfriend's family--a second feast of authentic Filipino cuisine!


December
I can't have Christmas without baking. This month I made savory scones and artichoke dip for my holiday party at work, then Christmas cookies (from store-bought dough), pies, and other snacks for another gathering with friends, celebrated the 90th birthday of my boyfriend's grandmother with lots of food and fun, made Mickey waffles for breakfast, had one final Christmas gift exchange party, and baked my traditional cinnamon rolls for breakfast on Christmas morning. I also tried a scorpion chili pepper for the first time--spicy but not unbearable!


January
New Year's parties brought more food, while the month of January was also my older brother's birthday, and a sushi outing! I tried a new breakfast diner in town, ramen, buffets, and made both pizza and French Toast without a recipe. You probably think all I do is eat out and...eat.


February
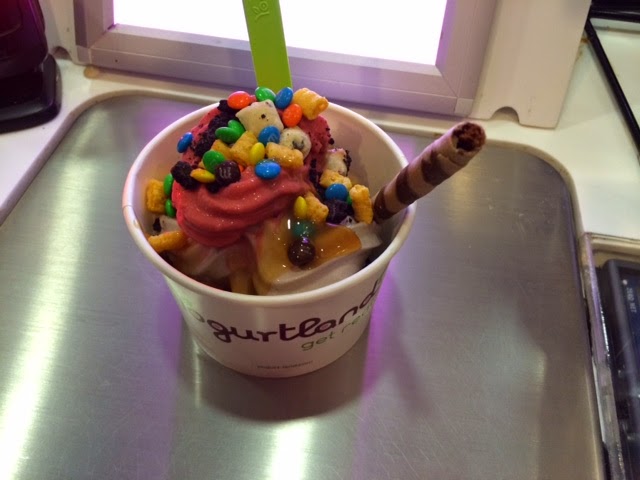
In the beginning of February I enjoyed the Super Bowl by eating a Super Bowl of ice cream and cookies. Then there was an early Valentine's Day lobster dinner with frozen yogurt. Next, my mom's birthday, followed by my boyfriend's birthday. February is also the month of my friend's birthday and my late grandmother's birthday, so we had celebrations for each. On Valentine's morning I made heart-shaped pancakes with a chocolate chip border using my traditional pancake recipe.


March
March brought about going away parties for my friend, my first 5K, and a St. Patrick's Day where I wore green but sadly didn't bake anything green! I did, however, make bibingka and halo-halo for the going away party. I spent the rest of the month celebrating Pi Day (3/14/15) with my mom's coconut banana cream pie, and Macaron Day with macarons. I also baked chocolate chip cookies for two different occasions using my favorite Pillsbury dough from Sam's Club. Yes, despite the delays in posts, I have actually done some baking! Oh, and there were some ice cream adventures in between (like dark chocolate ghost pepper gelato shown in the last picture--eaten just last night!).


So you're finally all caught up with my food adventures (if you were wondering where I've been all this time). And now, back to my not-so-regularly-scheduled blog programming. Thanks for staying with it!

Monday, October 13, 2014

Homemade PSL!


Continuing my pumpkin theme (because there's only so many months you can bake and post pumpkin), I attempted another easy recipe that fit perfectly with this year's transition into fall--and wasn't even any baking involved.

For those coffee addicts among us (I am one of them), the season of PSL (pumpkin spice latte) is a reason in itself to rejoice. However, not everyone spends this time of year celebrating. Recent reports of unhealthy ingredients in the Starbucks PSL and a comparison by John Oliver equating the taste to a candle can make even the most die-hard PSL fans a little disheartened. I won't go into a rant defending the taste of pumpkin (my bias is clear) or breakdown the unhealthy ingredients and excessive sweetening pumped into most Starbucks beverages (like the 79 grams of sugar for a non-seasonal Venti Mocha Frappuccino...). Instead I'll just point out that if you're a coffee addict and a pumpkin addict you probably enjoy the PSL. If you're also a bit health conscious/lactose intolerant like me, you might try ordering the PSL in a size small (tall) with soymilk, no whip, and maybe one pump of syrup. Or, to save money, confusion, and a potential waxy aftertaste, you might try making your own.

Recipes for PSL knockoffs can be found all over the Internet, but my mom recently presented me with one from Averie Cooks, who offers a vegan, gluten-free option that is also as easy as pumpkin pie. I tested it with my mom after inviting her over for afternoon tea and have since had three more cups and then made a second batch to last me through the weekend. It does, admittedly, taste a bit different from the Starbucks version, but it also tastes more natural, more fall-like, with the flexibility to doctor it up as sweet or less sweet as you like and the added health benefits of actual superfood: pumpkin.

Ingredients:

1 cup of your favorite brewed coffee
1/4 cup (heaping) canned pumpkin (I used Libby's, as usual)
1 cup unsweetened vanilla almond milk (Averie's recipe recommended this kind of milk, and it also happens to be what I use every day for cereal!)
2 teaspoons pumpkin pie spice
1 teaspoon ground cinnamon
1 teaspoon vanilla extract
2 Tablespoons brown sugar or sweetener of choice
a pinch of your favorite fall spices to taste (I did a sprinkling of cloves and a sprinkling of nutmeg)

Directions:

1.) In a microwave-safe bowl, combine the canned pumpkin and almond milk, whisking or stirring well to blend (I just used a fork). Add in the spices, vanilla, and sugar, continuing to stir.


2.) Heat the concoction in the microwave for about 1 minute or until warm (you can also heat the ingredients together in a small pot of the stove). Brew your coffee as normal and pour into a mug about one half to two thirds full.

3.) Add 1-2 ladles of the pumpkin milk to your cup of coffee and stir well (the pumpkin may separate out by the time you finish drinking and get a little thick, but it still tastes delicious).

You can top with whipped cream and sprinkles of spices if you desire, and experiment with the amount of sweetener to get it just right for your taste.

So easy! And such a nice treat to really make you feel like fall is finally here. It certainly jump started my season as I continued on that week to make pumpkin pancakes (to go with my second batch of pumpkin spice lattes), and enjoy pumpkin pie flavored Italian ice (which my boyfriend surprised me with this weekend before taking me to the local Pumpkin Patch). Trust me, I'm getting in all the pumpkin, and all the autumn, while I can.


Sunday, October 5, 2014

2 Ingredient Pumpkin Brownies!


It's time.

You know me.  You know I love fall.  You know I love pumpkin.  So I won't go into as much detail as I usually do on this blog when October rolls around (Just click on the "pumpkin" tag from the blog home page if you want to see a collection of all my pumpkin posts, or check out the photos I've collected of pumpkin treats found this year so far...).


Instead I'll keep things short and sweet. Very short, in fact.

My first pumpkin treat I baked this season wasn't actually meant to even taste like pumpkin. My mom was in the process of trying different recipes for our weekly family dinners and she came across the concept of very short (2 or 3 ingredient) recipes, such as making berry cobbler out of a box of cake mix, a bag of frozen berries, and a 2-liter bottle of Sprite (It's actually quite good!).  One such recipe she found was for 2-ingredient brownies, using just a box of brownie mix and a can of pumpkin.

Mom's brownie.

I was skeptical at first. Would these brownies have any taste without eggs or (gasp!) butter? Even a health conscious baker as myself knows that you need at least a little butter, oil, shortening, or other fat substitute in a batch of baked goods, right?  But then I tried one of her brownies for dessert. And it was divine. I couldn't believe I was eating a delicious treat that was half vegetable.

So the next time I went grocery shopping I decided to buy a box of Ghiradelli's Dark Chocolate brownie mix (I always keep a can of pumpkin on hand at home.  Because, you know, pumpkin). My mom and I are fans of dark chocolate (what with us both being lactose intolerant), and it sounded like a slightly healthier (antioxidants) and decadent choice.


Next, I tracked down the recipe that my mom used. It comes from a fun baking blog called Cookies and Cups (http://cookiesandcups.com/) and was clearly labeled as 2-Ingredient Pumpkin Brownies. I took a screenshot of the post with my phone, threw the two ingredients together, and made brownies, hoping the experiment would work and turn out as tasty as my mom's had been.

The original (OG) recipe.

Ingredients:

1 box Ghiradelli's Dark Chocolate brownie mix
1 can (15 oz) Libby's pumpkin

Directions:

1). Preheat the oven to 350 degrees. Spray a 9x9-inch square pan with nonstick cooking spray (I had no such pan--I really need to buy one--so I used a 9-inch circular cake pan instead. Still worked).

2). In a large bowl, combine the brownie mix with the pumpkin, stirring until no more mix flour is visible. Pour into the pan and bake for 25-30 minutes (mine needed 30 to really set) or until a toothpick inserted into the center of the brownies comes out almost clean.


3). Let cool at least 5-10 minutes before cutting. Serve and enjoy.


It doesn't get much more short and sweet than that.

I was a little hesitant about the results. The brownies had a tinge of bitterness from the dark chocolate and I felt I could taste the pumpkin just a little bit.. I still liked them, but would the lack of eggs and butter be noticeable? Was the gourd of a pumpkin too strong?  Would others who tasted my treat be turned off?

I cut a wedge for my boyfriend since he saw me baking brownies and couldn't wait for a piece. I knew he would tell me if he didn't like it.  He loves anything sweet, but is more than willing to let you know when something tastes a little off.

"Dee-licious!" was his response after the first bite. His plate was quickly cleaned.

So, there's probably no need to mention that I didn't follow the directions on the box, right?  That I secretly fed him a vegetable in his dessert?  If we're both pleased with the result, I see no reason to stir the pot.  Unless that pot has caramel for Halloween apples--but that's another recipe for another time. For now, I'd just like to say, thank you pumpkin. When it's your time to shine, you never disappoint.

Sunday, July 6, 2014

Banana Pecan Muffins!


It seems like I only end up making banana dishes when I end up with uneaten overripe bananas.  Well, those really are the best kind to use in baking, so when my bananas went uneaten this week it was the perfect excuse to bake something new.

Usually I will revert to a classic banana bread, but last time I attempted my Buttermilk Banana Bread it baked a bit bitter (Ah, tongue twisters).  I'm still not sure if this was due to bad buttermilk, bad bananas, not refrigerating a fruit concoction, or something else entirely, but I didn't want to risk it. I wanted something quick and actually tasty--which meant muffins were in order.

Rather than looking at past failures (Banana Muffies anyone?), I just went straight to the Internet for a 5-star reviewed recipe. My quick Google search brought me first to Tyler Florence's simple Banana Nut Muffins. It had five stars out of 368 reviews.  That was all I needed.  And hey, I like Tyler Florence. He's a cutie.

Though I was a little skeptical that his recipe didn't call for any buttermilk, milk, sour cream, yogurt, or any other dairy (besides butter), I felt it best to experiment as always and see how his suggestions turned out. Since I had less time and fewer muffin tins, I opted to halve the recipe and only make them fill one muffin tin instead of two (though the recipe misleadingly says it yields 12 muffins--two cups of flour for 12 muffins? Those suckers are going to be huge!). My only other change was that I skipped the electric mixer step (I find electric mixers unnecessary for quickbreads, and why dirty an extra dish/machine when all you need is a little elbow grease?) and I also used a full 1/2 cup of chopped pecans instead of halving that amount (the more nuts the better in this case--I wanted full flavor!).

The result was not a failed experiment, but rather a delicious, moist, and crunchy muffin that I enjoyed for breakfast and eagerly shared with my friends.

Ingredients:

1 cup whole wheat pastry flour
1/2 + 1/4 teaspoons baking soda
1/4 teaspoon salt
2 overripe bananas
1/2 cup brown sugar
1/2 + 1/4 stick of butter (six Tablespoons), melted (I put mine in the microwave for just under a minute)
1 egg
1/2 teaspoon vanilla extract
1/2 cup of pecans, chopped
Sugar crystals/white sugar for sprinkling

Directions:

1.) Preheat the oven to 375 degrees. In a bowl, combine the flour, baking soda, and salt. In a separate bowl (glass makes it easier), mash the bananas with a fork. Add in the brown sugar, egg, and vanilla, then the melted butter (once it's had a couple of minutes to cool) until everything is well combined.

2.) Gently fold the banana mixture into the flour mixture, then fold in almost all the 1/2 cup of pecans, leaving a small handful for sprinkling.

3.) Spoon the batter into a 12-cup muffin tin sprayed with nonstick cooking spray OR lined with paper muffin/cupcake liners (I chose the paper liners this time for an easier cleanup). Fill each cup about 1/2 to 3/4 full. Top with the remaining pecan pieces and a sprinkling of sugar crystals (I ran out of sugar crystals so I just used regular white sugar this time).

4.) Bake approximately 17-18 minutes (probably not the full 20 minutes that Tyler suggests), but test with a toothpick for doneness when the muffins start to smell good and look risen (if the toothpick inserted into the center of one of the most central muffins comes out clean then they're ready!). I removed mine from the oven about 10 seconds before the 18-minute timer buzzed and they were perfect--cooked through but still moist.

Of course you can try this without the pecans, or with walnuts or chocolate chips instead, but I felt like the sweetness of a pecan would match perfectly with the banana, and it did. One friend was pleased that her muffin was still moist even after having been refrigerated (I didn't want to take any chances this time with bananas going bad) and another complimented the taste of his at breakfast. The rest I will be taking with me to a family brunch this afternoon, but the recipe I will keep with me for whenever I'm craving banana muffins again!

Bonus: One of my favorite tributes to the banana can be found here....